14 Backyard Outdoor Kitchen Ideas Perfect for Entertaining
14 Backyard Outdoor Kitchen Ideas Perfect for Entertaining
There is a version of outdoor cooking that happens on a portable barbecue beside the back door, with the host shuttling between the kitchen inside and the garden outside, managing two cooking environments simultaneously, missing most of the conversation, and arriving at the table slightly stressed and significantly later than intended.
This is the version that most households default to, and it works — the food gets cooked, the guests get fed, and the occasion is a reasonable success despite the friction involved in producing it.

The outdoor kitchen removes the friction entirely. The host cooks in the same space as the guests, with everything required for the full meal within arm’s reach, without a single trip indoors. The conversation is continuous rather than interrupted.
The cooking is part of the occasion rather than a logistical problem running alongside it. The outdoor kitchen is not a luxury for the household that entertains seriously — it is the specific infrastructure that makes entertaining outdoors as relaxed and as enjoyable as the occasions themselves are meant to be.
Each idea below is a specific approach to one element or one complete configuration of the backyard outdoor kitchen. Each includes what you will need, what it will cost, and a practical tip to make it work as well as the entertaining space it is designed to become.
1. The L-Shaped Built-In Kitchen Counter
Budget: $800 – $5,000
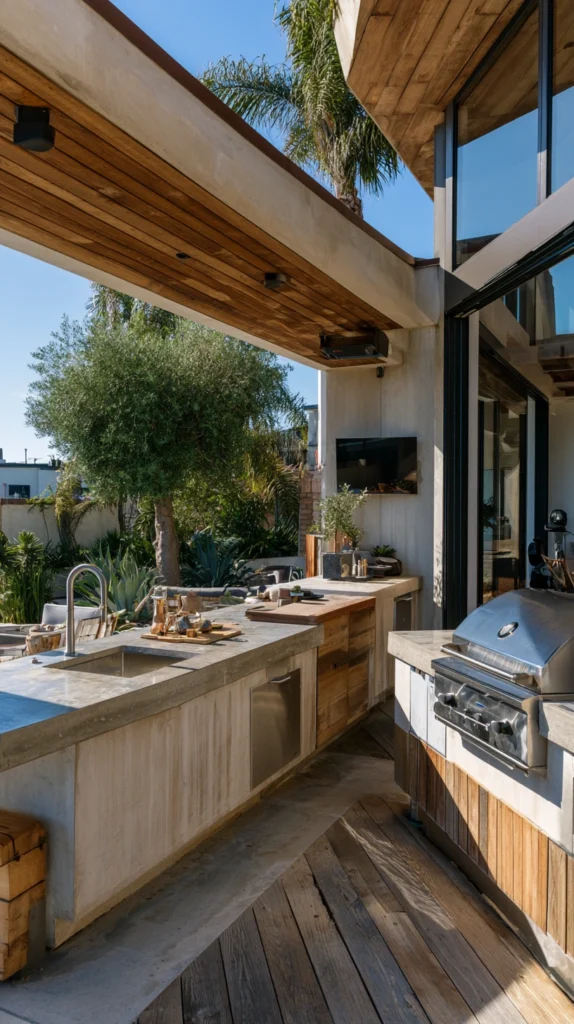
An L-shaped kitchen counter — one run parallel to the house, one run perpendicular to it, creating a corner workspace that provides the maximum counter area in the minimum footprint — is the most functional outdoor kitchen configuration for serious outdoor cooking. The L-shape provides separate zones for preparation, cooking, and plating without the one-dimensional constraint of a single straight run, and the corner position naturally faces the cook toward the primary seating area.
A cinder block frame with a concrete or tile counter top costs $300–$800 in materials for a standard L-shape. A built-in grill module for the cooking zone costs $200–$600. A stone or porcelain tile counter surface runs $30–$80 per square metre. The L-shaped kitchen requires a concrete or paved base to support the block frame — the base must be level and structurally capable of bearing the weight of the counter and the grill without settling.
Style tip: Design the counter height at 90 centimetres — the standard kitchen worktop height — rather than the 85 centimetres that most built-in outdoor kitchen plans default to. The 90-centimetre height suits standing food preparation and avoids the back discomfort of working at a surface that is slightly too low for sustained use. The correct ergonomic height is the specification that determines whether the outdoor kitchen is comfortable to cook in for three hours or for thirty minutes.
2. The Pizza Oven Feature Kitchen
Budget: $500 – $4,000
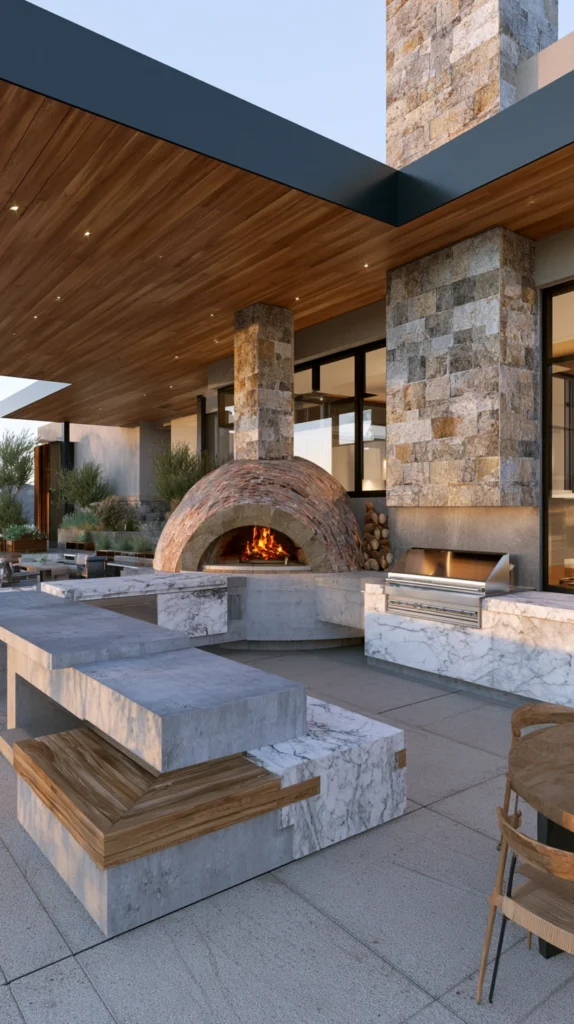
A wood-fired pizza oven as the centrepiece of the outdoor kitchen — surrounded by a preparation counter, a wood storage area, and a serving surface — creates the most socially engaged and most specifically occasion-generating of all the outdoor kitchen configurations. The pizza oven is not merely a cooking appliance; it is the reason people gather in the garden on a Friday evening when no other occasion has been planned, and the occasion it generates — the gathering around the oven, the taking turns to stretch dough, the specific pleasure of a pizza from a wood-fired oven — is one that the gas grill and the standard barbecue cannot produce.
A clay pizza oven kit costs $150–$400. A prefabricated refractory dome oven costs $400–$1,200. A custom-built stone or brick oven runs $1,500–$5,000. The pizza oven requires a preparation counter of at least 60 centimetres in depth beside the oven opening for dough stretching and topping, and a marble or granite section of the counter for the specific temperature management that pizza dough requires.
Style tip: Build the pizza oven on a raised base of 80–90 centimetres in height rather than at the low base height that many pizza oven kits specify. The correct working height for a pizza oven — the height at which the baker can comfortably reach into the oven dome without bending — is 80–90 centimetres from the oven floor, not from the ground. A pizza oven at the correct height is used more frequently and managed more safely than one that requires the baker to kneel or bend significantly.
3. The Modular Outdoor Kitchen System
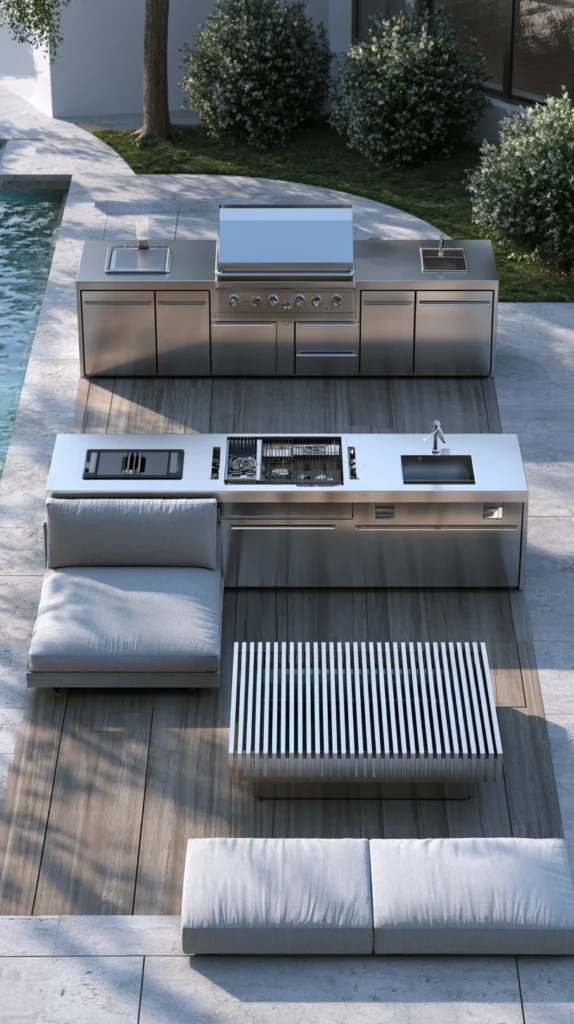
Budget: $400 – $3,000
A modular outdoor kitchen system — individual stainless steel or powder-coated aluminium modules (grill unit, sink unit, refrigerator unit, storage unit) that connect to form a complete kitchen in a configuration determined by the specific garden space — provides the flexibility of a fully designed outdoor kitchen at the accessibility of a manufactured product. The modular system can be reconfigured if the garden changes, can be extended when the budget allows, and requires no construction expertise to install.
A standard grill module costs $200–$600. A sink module runs $150–$400. A refrigerator module costs $200–$500. A storage module with doors and drawers runs $150–$350. A complete four-module system costs $700–$1,850 in modules alone. The modular system requires a level base — paving or concrete — at the correct position and an outdoor power point within reach of the refrigerator module.
Style tip: Fix the modular kitchen units together with the connecting hardware the manufacturer provides rather than simply positioning them adjacent to each other. Unfixed modules shift relative to each other with use and with thermal expansion, producing gaps and misalignments at the joints between units that read as neglect rather than use. The connected modular kitchen reads as a designed unit; the same modules simply placed together reads as equipment arranged in a line.
4. The Covered Outdoor Kitchen Pergola
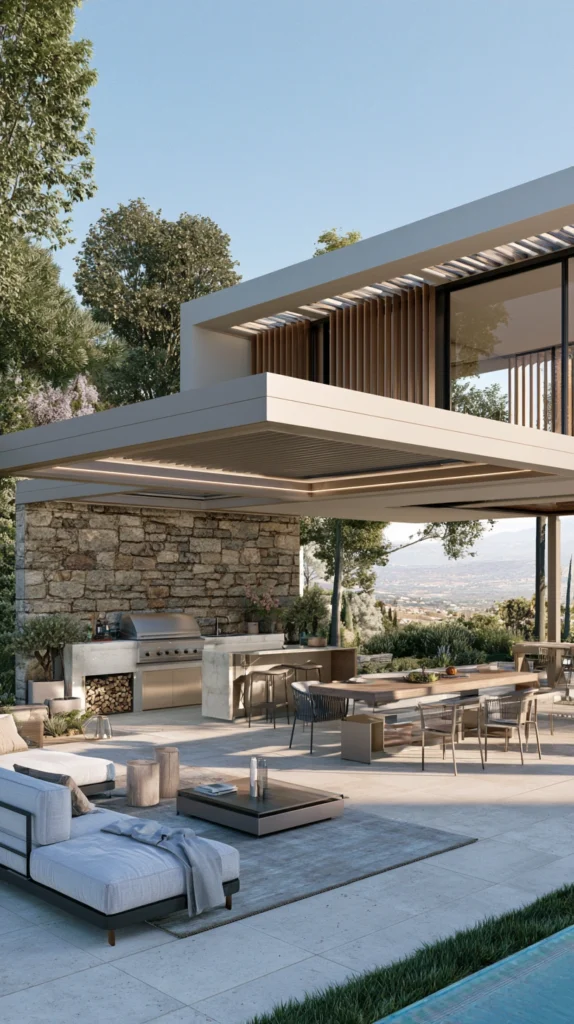
Budget: $800 – $5,000
An outdoor kitchen positioned beneath a dedicated pergola — with a roof structure of timber, polycarbonate, or aluminium louvres that provides weather protection for the cooking zone — creates the most year-round-capable and most specifically committed of all the outdoor kitchen configurations. A covered outdoor kitchen can be used in light rain, in direct summer sun, and in the transitional weather of spring and autumn that leaves an uncovered outdoor kitchen unusable for much of the year. The cover is the infrastructure that converts the summer outdoor kitchen into a year-round outdoor cooking facility.
A timber pergola specifically designed for an outdoor kitchen — with ventilation provisions for the grill smoke and electrical provisions for lighting and appliances — costs $500–$2,000 in materials and basic installation. An aluminium louvred roof system costs $1,500–$4,000. A polycarbonate roof panel over a timber pergola frame costs $200–$600 in roofing material. All covered outdoor kitchens with gas appliances require adequate ventilation — the cooking zone must be open on at least two sides even when covered.
Style tip: Install a ceiling fan within the covered outdoor kitchen pergola — an outdoor-rated ceiling fan costs $80–$200 and provides the air movement that makes cooking under a covered structure comfortable in warm weather, while also improving the ventilation of cooking fumes and steam. The fan is the comfort specification that most determines whether the covered kitchen is used for a full summer evening or only for the cooking portion of it.
5. The Outdoor Bar and Prep Station
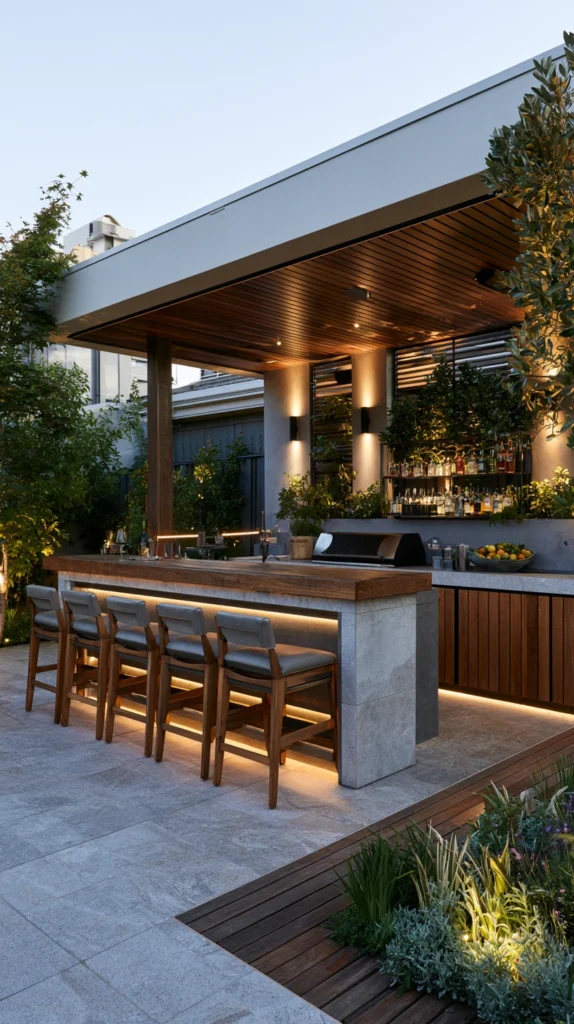
Budget: $200 – $1,500
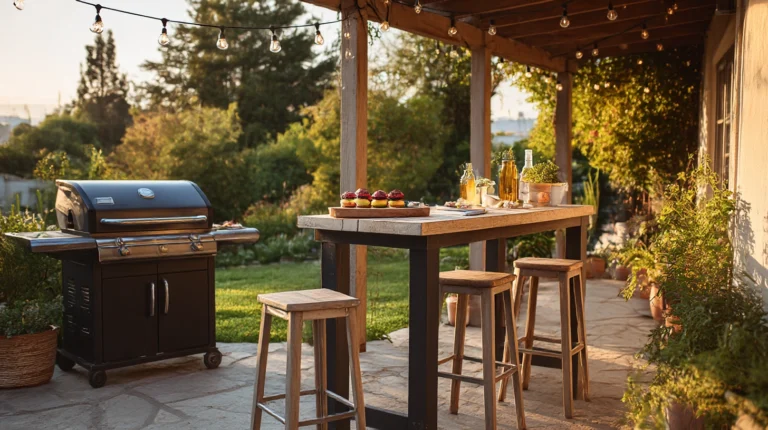
An outdoor bar counter — a raised surface of 100–110 centimetres in height, with bar stools on the guest side and preparation space on the cook’s side — creates the outdoor entertaining configuration that most naturally integrates the cooking process with the social occasion. Guests seated at the bar are at face level with the cook, able to participate in the conversation and in the drink preparation while the cook works, and the bar counter is the outdoor kitchen element that most specifically produces the quality of a restaurant kitchen’s pass in the domestic garden context.
A built-in concrete or stone bar counter costs $200–$600 in materials. A timber bar counter on a steel frame runs $200–$500. Bar stools suitable for outdoor use cost $40–$100 each. An ice bucket or a small undercounter refrigerator in the bar counter costs $30–$200. Position the bar counter so the cook faces the seating area behind it — the cook-facing-guests orientation is the social logic that makes the bar counter the most engaged element of the outdoor kitchen.
Style tip: Install lighting beneath the bar counter overhang — a strip of warm white LED lights along the underside of the counter nose — so the counter glows from below at the guest side in the evening. The undercounter lighting creates the quality of a professionally installed bar and provides gentle ambient light at the seating level without the overhead brightness of the kitchen’s primary lighting.
6. The Kamado Grill Station
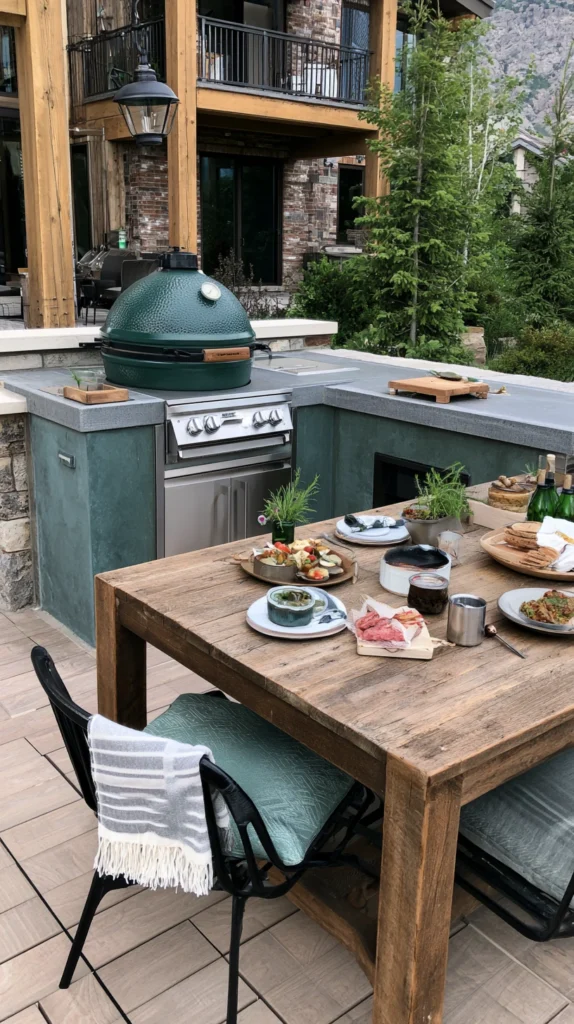
Budget: $300 – $2,000
A kamado grill — the egg-shaped ceramic cooking vessel that functions as a grill, a smoker, a pizza oven, and a low-temperature slow cooker simultaneously — at the centre of a dedicated cooking station creates the most versatile and most specifically serious outdoor kitchen focal point. The kamado communicates a commitment to outdoor cooking as a craft rather than as a convenience, and the cooking quality it produces — the specific quality of ceramic-retained heat and the specific smoke absorption of the ceramic dome — is categorically different from the cooking quality of a gas grill.
A mid-range kamado grill costs $500–$1,200. A premium version runs $1,200–$2,500. A built-in kamado table to support and frame the grill costs $200–$600. A weatherproof cover for the kamado costs $30–$80. Lump hardwood charcoal for the kamado costs $15–$30 per bag and produces significantly better cooking results than standard briquettes in the ceramic vessel.
Style tip: Position the kamado table so the grill lid opens away from the primary seating area — the kamado lid releases a concentrated blast of heat and smoke when opened, and a lid that opens toward the guests produces a quality of guest involvement in the cooking process that is different from the quality intended. The lid opening away from guests is the positioning decision that makes the kamado management a private cooking action rather than a shared heat event.
7. The Outdoor Sink and Prep Station
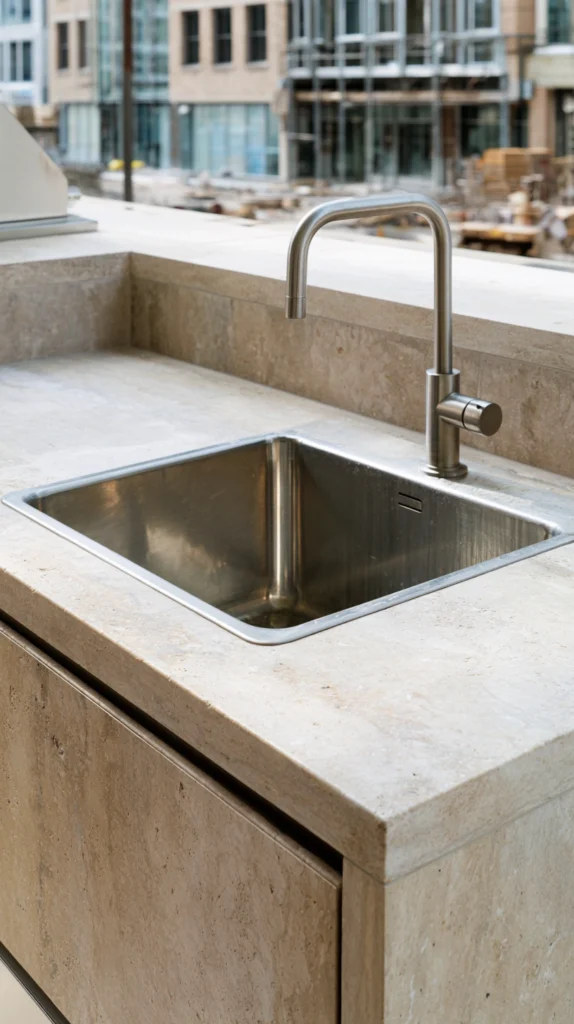
Budget: $200 – $800
An outdoor sink — connected to the mains cold water supply, draining to a soakaway or the main drain, with a prep counter on one or both sides — is the single outdoor kitchen addition that most transforms the outdoor cooking experience. The absence of an outdoor water source is the logistical friction that most consistently sends the outdoor cook indoors — for rinsing vegetables, for washing hands, for filling pots, for cleaning the grill. The outdoor sink eliminates every one of these trips simultaneously.
A stainless steel outdoor sink costs $60–$200. The cold water supply connection costs $100–$300 in materials and plumber labour. A drainage connection to the nearest outlet runs $80–$200. A prep counter on each side of the sink costs $30–$100 per side in tiled or stone surface material. The outdoor sink should be protected from freezing — either by installing a frost-proof tap and draining the supply pipe in winter, or by positioning the connection where the pipe is accessible for isolation.
Style tip: Install the outdoor sink at the food preparation end of the outdoor kitchen rather than at the cooking end. A sink beside the preparation surface allows rinsing and washing of ingredients at the point of preparation; a sink beside the grill serves the cleaning function but not the preparation function. The preparation-end sink position serves both functions.
8. The Outdoor Kitchen With Smoker
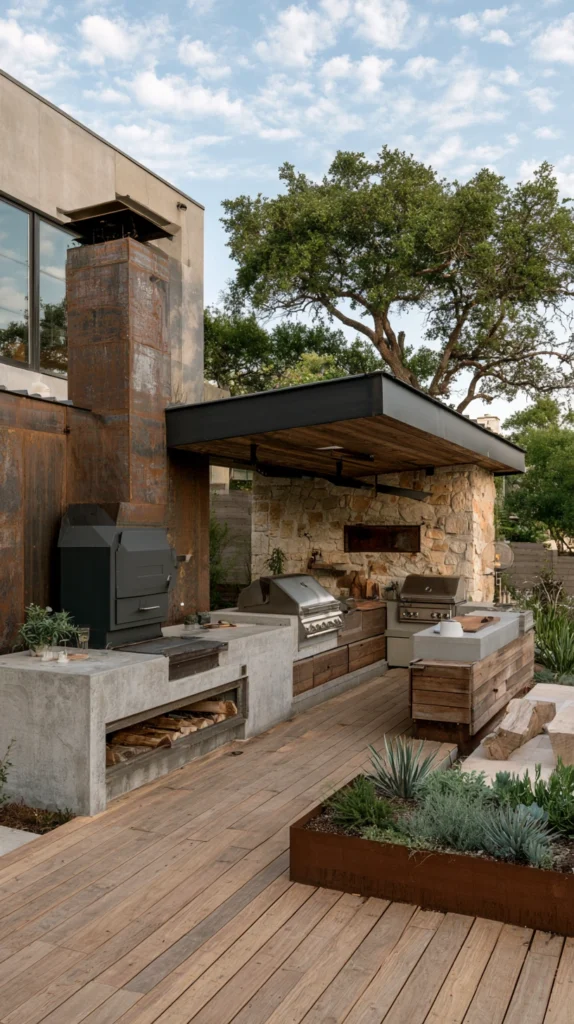
Budget: $400 – $2,500
An outdoor kitchen with a dedicated smoker — a drum smoker, an offset smoker, or a cabinet smoker positioned at the end of the kitchen counter or in a dedicated smoking station — creates the outdoor cooking setup for the household that takes smoked food seriously. The smoker communicates a commitment to a specific and specifically long-time-scale cooking method, and the smoked food it produces — the brisket that cooked for twelve hours, the ribs that spent six hours in the smoke — is the outdoor cooking achievement that no other cooking method can replicate.
A drum smoker costs $100–$300. An offset smoker runs $200–$600. A cabinet smoker with temperature control costs $300–$800. Position the smoker at the downwind end of the outdoor kitchen so the smoke travels away from the cooking station and the seating area rather than across them. The smoke direction is determined by the prevailing wind at the specific garden position, and the smoker should be tested in the prevailing wind direction before the kitchen is permanently constructed around it.
Style tip: Build a dedicated wood storage and seasoning rack adjacent to the smoker position — the wood used in the smoker requires seasoning to a specific moisture content for optimal smoke quality, and wood stored in an accessible, covered rack beside the smoker is both practically convenient and visually communicative of the serious relationship with the smoking process that the dedicated smoker station represents.
9. The Compact Courtyard Kitchen
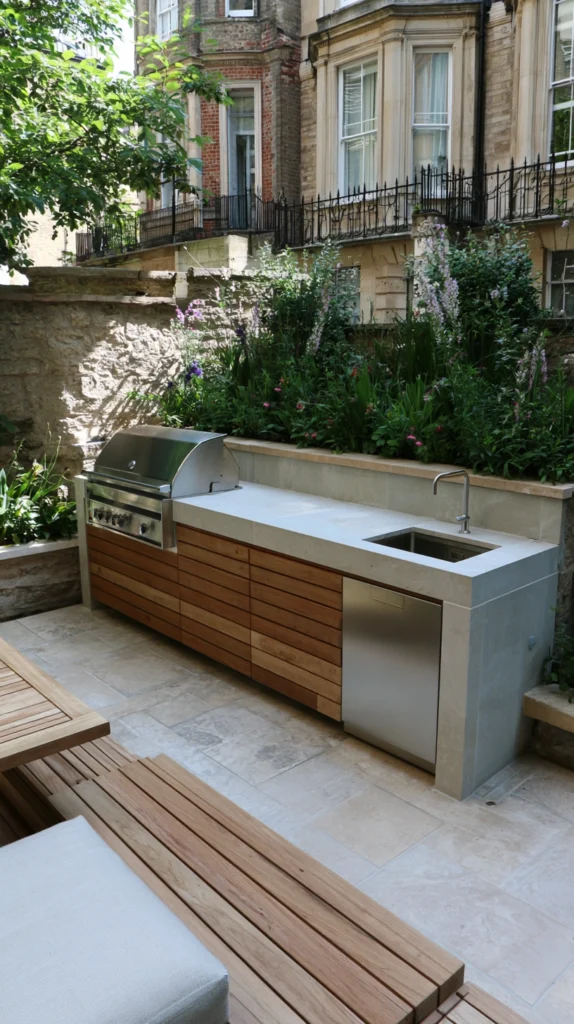
Budget: $200 – $1,200
A compact outdoor kitchen designed for a small courtyard or a narrow terrace — a single straight run of 150–180 centimetres with a grill at one end, a prep surface in the middle, and a storage section at the other end — provides the full outdoor kitchen function in the minimum space. The compact courtyard kitchen is not a reduced version of the full outdoor kitchen; it is the outdoor kitchen calibrated to the specific space available, and in a small garden where every square metre is performing multiple functions, a compact, well-specified single run earns its position more completely than a larger installation would.
A single-run outdoor kitchen counter in concrete block and tile costs $200–$500 in materials. A compact 2-burner outdoor grill for the cooking zone costs $100–$300. Storage beneath the counter — doors and shelves in a waterproof format — runs $80–$200. The compact kitchen should be built against the house wall or a garden wall rather than freestanding — the wall provides the structural backing that the single-run configuration lacks on the open side.
Style tip: Use the wall behind the compact kitchen counter as a functional surface — install wall-mounted hooks for utensils, a magnetic knife strip rated for outdoor use, a wall-mounted spice rack in a weatherproof container, and a wall-mounted paper towel holder. The wall as a functional surface doubles the storage and preparation capability of the compact kitchen without consuming any additional counter or floor area.
10. The Outdoor Kitchen With Refrigeration
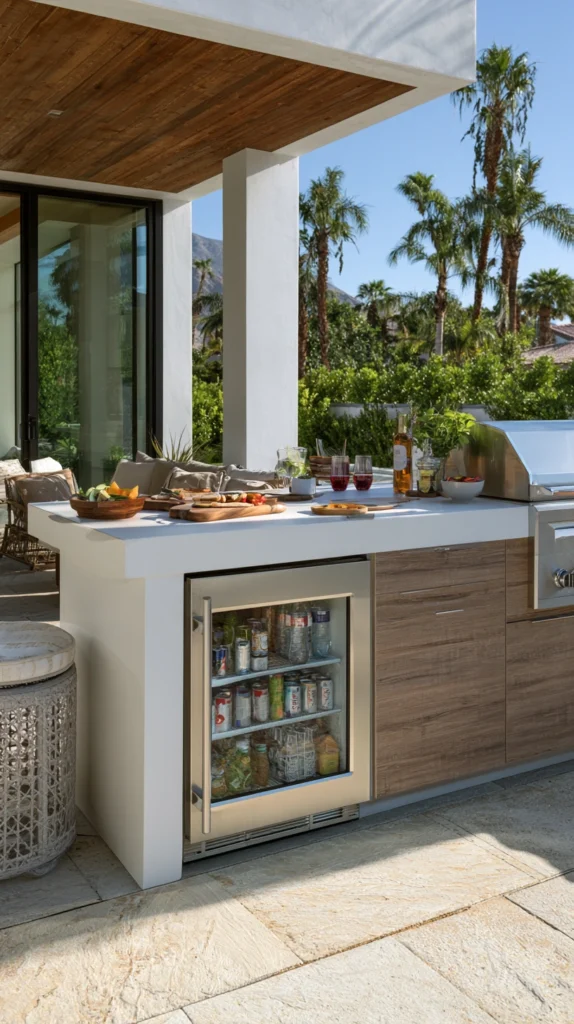
Budget: $400 – $2,500
An outdoor kitchen with a dedicated undercounter refrigerator — specifically rated for outdoor use, with a stainless steel finish that withstands UV, rain, and temperature variation — eliminates the most persistent interruption in the outdoor entertaining sequence: the trip indoors to retrieve drinks, ingredients, and condiments that the outdoor cooking process requires. The outdoor refrigerator is the infrastructure that most directly converts the outdoor kitchen from a cooking station into a complete outdoor entertainment facility.
An outdoor-rated undercounter refrigerator of 60 centimetres in width costs $300–$800. A compact drinks refrigerator for the bar area runs $200–$500. An outdoor-rated wine cooler costs $250–$600. Outdoor-rated refrigeration requires a dedicated outdoor power circuit — the outdoor circuit should be installed by a qualified electrician and fitted with a residual current device as a safety requirement.
Style tip: Set the outdoor refrigerator to 3–4 degrees Celsius for food storage rather than the warmer temperature that many outdoor kitchens default to in warm weather. An outdoor refrigerator that warms above 5 degrees in summer sun — which a non-outdoor-rated unit will do regardless of the temperature setting — is a food safety problem rather than a convenience. The outdoor-rated specification is the safety requirement, not the luxury one.
11. The Garden Wall Kitchen Integration
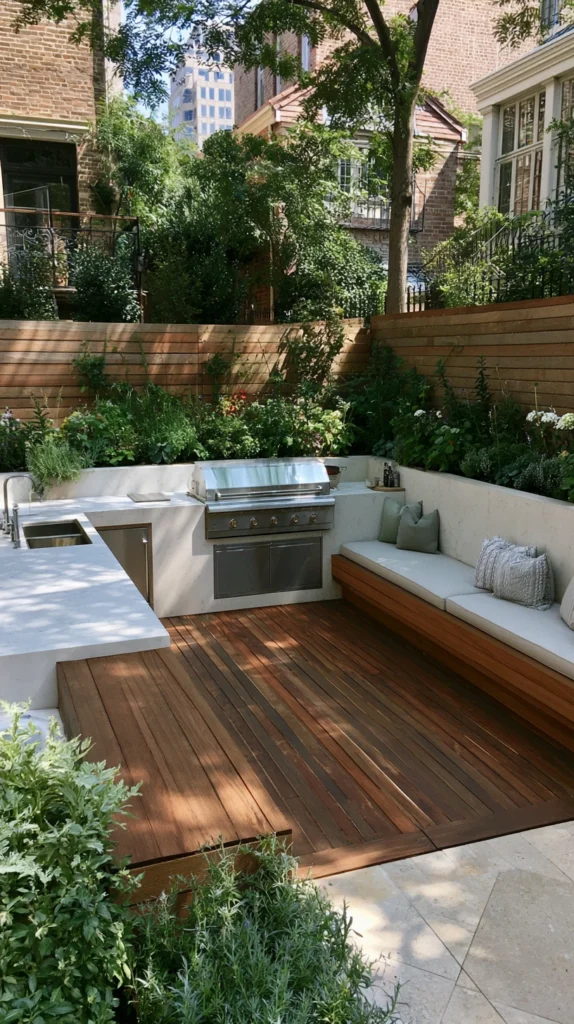
Budget: $600 – $3,000
An outdoor kitchen built into an existing garden wall — recessing the grill into the wall face, incorporating counters that extend from the wall on each side, and using the wall structure as the primary support for the kitchen — creates the most architecturally integrated of all the outdoor kitchen configurations. The wall-integrated kitchen reads as something that was always part of the garden structure rather than something that was added to it, and the permanence of the wall integration communicates the commitment to outdoor cooking that a freestanding installation does not.
Recessing a grill module into an existing garden wall costs $200–$600 in construction work plus the grill module cost of $200–$600. Counter extensions from the wall cost $100–$300 per run in concrete and tile materials. The wall must be assessed for its structural suitability for recessing — a hollow wall or a single-skin brick wall may require reinforcement before a grill module can be safely built into it.
Style tip: Extend the wall kitchen counter beyond the grill position on both sides — at least 60 centimetres of clear counter on each side of the grill provides the preparation and plating space that a grill positioned at the end of a single counter cannot offer. The counter extension on both sides of the grill is the spatial decision that converts a grill in a wall into an outdoor kitchen built around a grill.
12. The Outdoor Kitchen With Dining Table Integration
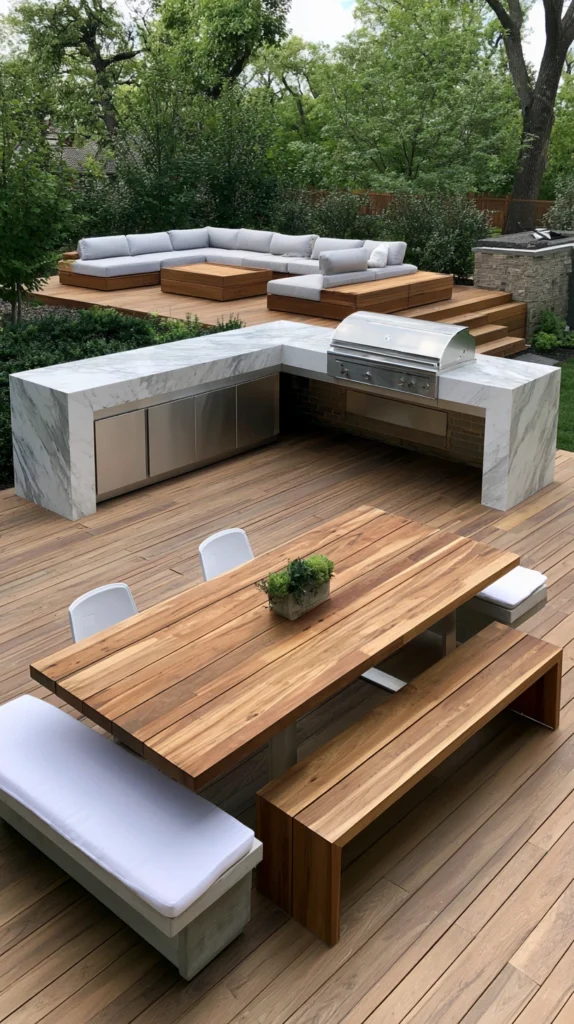
Budget: $500 – $3,000
An outdoor kitchen designed in direct spatial integration with the dining table — the counter at the correct height for serving directly onto the table, the seating arrangement positioned so diners can observe the cooking, the kitchen and the dining zone as a single composed space rather than two adjacent areas — creates the outdoor entertaining setup that most specifically produces the communal, collaborative quality of the best outdoor meals. The kitchen that serves the table directly, without transit, is the kitchen that communicates generosity at the moment of serving.
A built-in kitchen counter with a serving pass at 75 centimetres height costs $300–$800 in materials. A dining table positioned beside the kitchen at the serving pass height costs $200–$600. The kitchen-to-table serving distance should be no more than 60 centimetres — the arm’s-reach distance that allows direct serving without a step or a transit. The spatial integration requires planning both the kitchen and the dining table position simultaneously rather than specifying them independently.
Style tip: Orient the kitchen counter so the cook faces the dining table rather than facing the garden or the house wall. The cook who faces the guests serves at the moment of eye contact — the specific quality of a serving moment that is also a social moment. The cook who faces away from the table serves at the moment of turning around, which is a different and less generous quality of the same action.
13. The Outdoor Kitchen With Water Feature
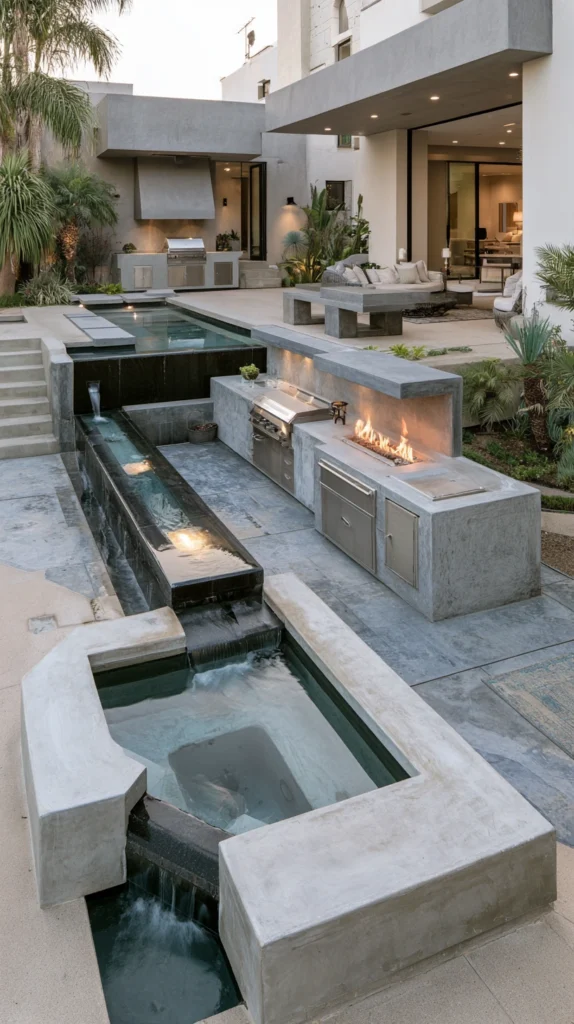
Budget: $500 – $3,000
An outdoor kitchen with an integrated water feature — a small rill running alongside the counter, a wall-mounted water blade adjacent to the kitchen zone, or a raised pool at the perimeter of the kitchen space — creates the sensory environment of cooking and eating beside water. The sound of water in the outdoor kitchen communicates a quality of resort and occasion that the same kitchen without water cannot produce, and the acoustic contribution of the water feature is experienced most completely in the outdoor kitchen because it is the place where the quietest moments of the outdoor occasion happen between the activity of cooking.
A self-contained wall water blade beside the kitchen costs $150–$600. A rill running alongside the kitchen counter costs $200–$800. A raised pool at the kitchen perimeter costs $300–$1,000. Position the water feature at the end of the kitchen run rather than immediately beside the cooking zone — water spray and condensation from a water feature adjacent to an open grill creates management problems that the feature’s contribution does not justify at that proximity.
Style tip: Use the water feature as the acoustic reference for the outdoor kitchen space — the specific sound of the water feature should be audible from the primary seating position adjacent to the kitchen, producing the background quality of water that transforms an outdoor kitchen area into an outdoor kitchen environment. A water feature that cannot be heard from the seating is a water feature that is providing its visual contribution only.
14. The Four-Season Outdoor Kitchen Room
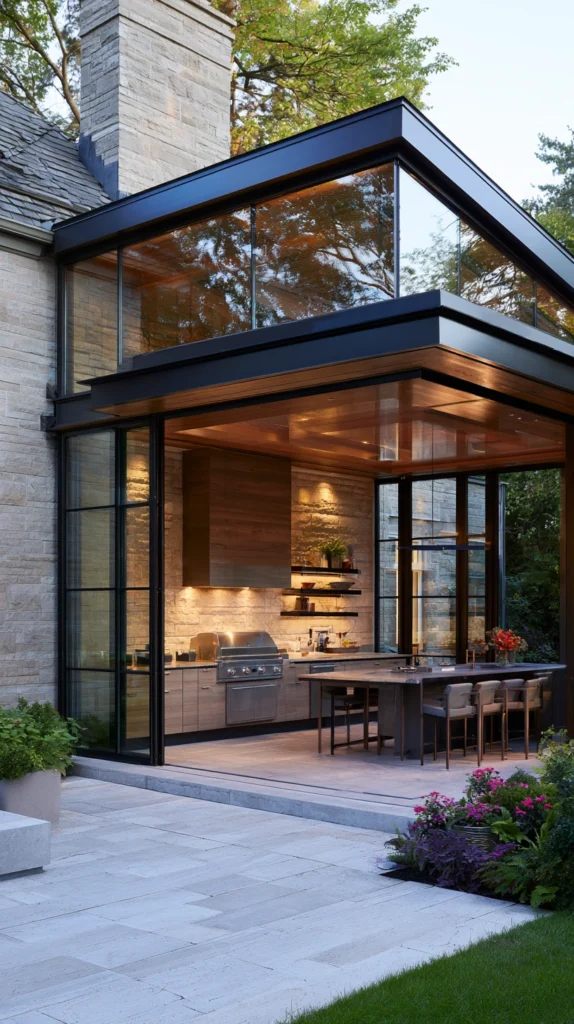
Budget: $2,000 – $15,000
A fully enclosed or semi-enclosed outdoor kitchen room — with insulated roof panels, retractable or fixed glazing on the weather-exposed sides, integrated heating, full kitchen appliances, and a dining table within the structure — creates the outdoor kitchen that is genuinely usable in every month of the year and in every weather condition. The four-season outdoor kitchen room is the outdoor entertaining investment with the longest annual return and the one that most completely achieves the goal of extending the living space of the house into the garden on a year-round rather than a seasonal basis.
A timber-framed garden room with kitchen appliances costs $5,000–$15,000 fully installed. A pergola with retractable glazing and a kitchen counter costs $3,000–$8,000. A covered outdoor kitchen with a wood-burning stove and integrated heating costs $2,000–$6,000. The four-season outdoor kitchen room requires building regulations approval in most jurisdictions above a certain size — the planning process should be completed before any construction begins.
Style tip: Design the four-season outdoor kitchen room with a connection to the house that is as short and as weather-protected as possible — the transition between the house and the outdoor kitchen room through a covered and sheltered walkway is the infrastructure that makes the room genuinely year-round rather than year-round in theory and fair-weather in practice. A kitchen room accessible only through an uncovered outdoor route is a kitchen room that is avoided in bad weather.
The outdoor kitchen that works for entertaining is the one that keeps the host in the garden rather than sending them indoors, that keeps the cooking in the conversation rather than behind a closed kitchen door, and that makes the outdoor meal as relaxed and as unhurried as the occasions themselves are meant to be.
Build it for the specific garden and the specific household — the compact single run for the small courtyard, the L-shape for the generous patio, the pizza oven station for the household that gathers regularly and values the occasion it generates, the four-season room for the household that uses the outdoor space as a genuine extension of the house rather than as a seasonal supplement to it.
The outdoor kitchen that suits the life it serves is the outdoor kitchen that earns its investment most completely — not in the quality of the food it produces but in the quality of the evenings it makes possible.