14 Backyard Walkway Ideas for Inviting Paths That Make Every Step Worth Taking
14 Backyard Walkway Ideas for Inviting Paths That Make Every Step Worth Taking
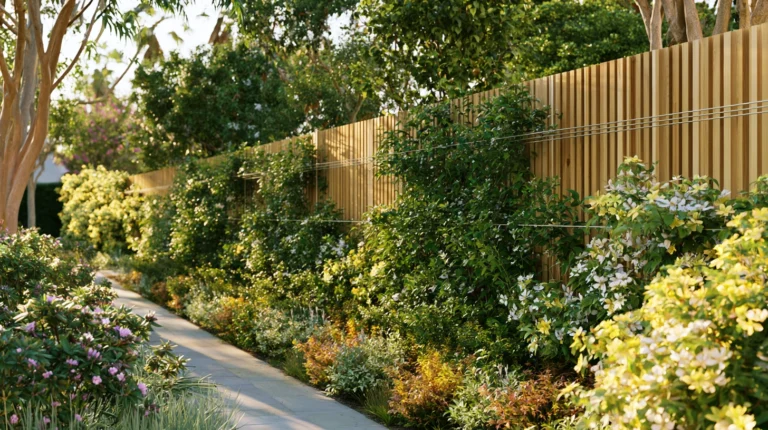
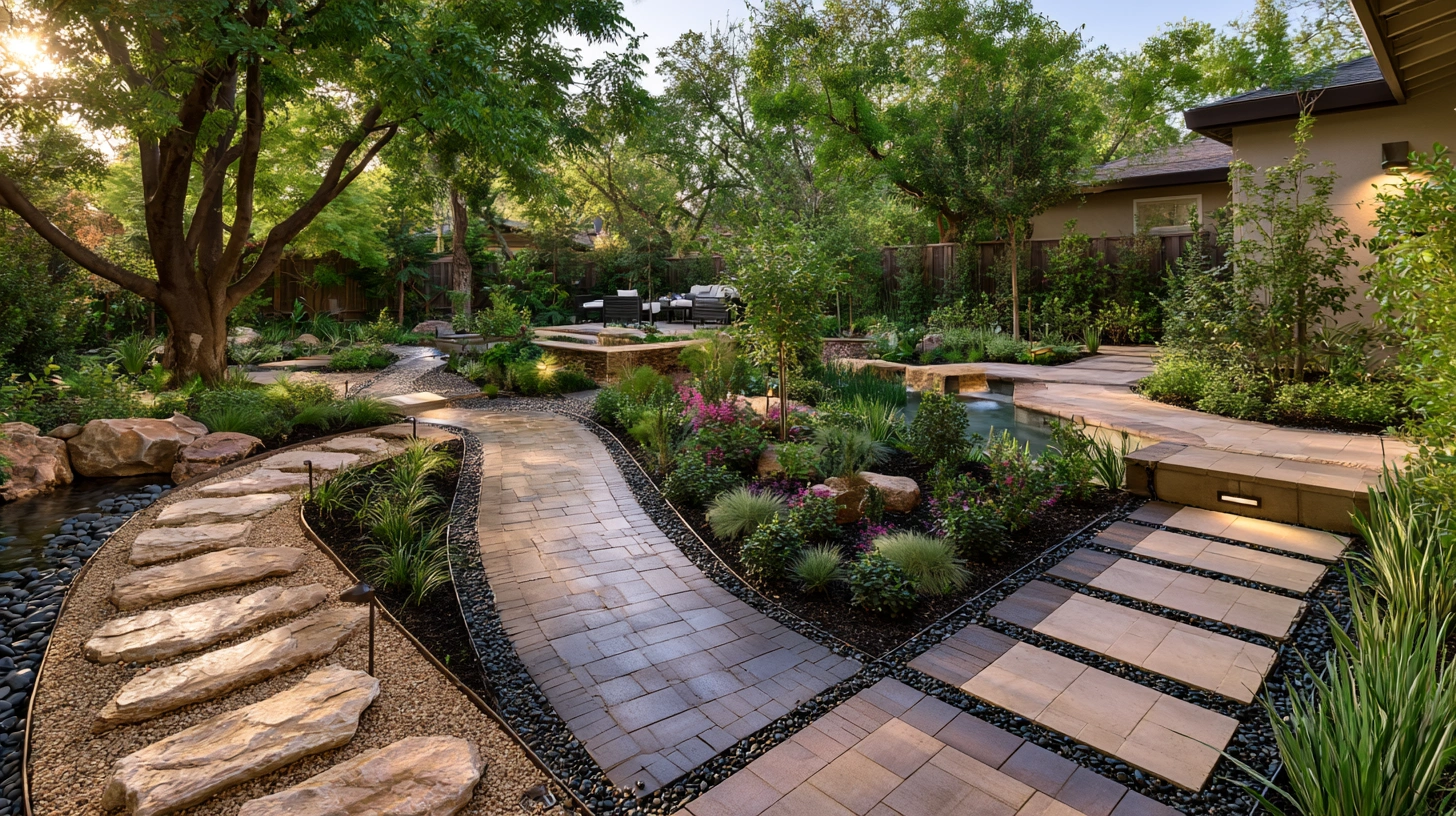
There is a specific quality that a well-designed garden path provides that no other single element manages quite as well. It gives the garden direction. A planted border, however beautiful, simply exists.
A path through it — or beside it, or between two of them — turns the garden into somewhere that has places to go, reasons to move through it, and the particular pleasure of arriving somewhere that was worth the walk. The path does not merely connect two points; it makes the space between them worth experiencing.
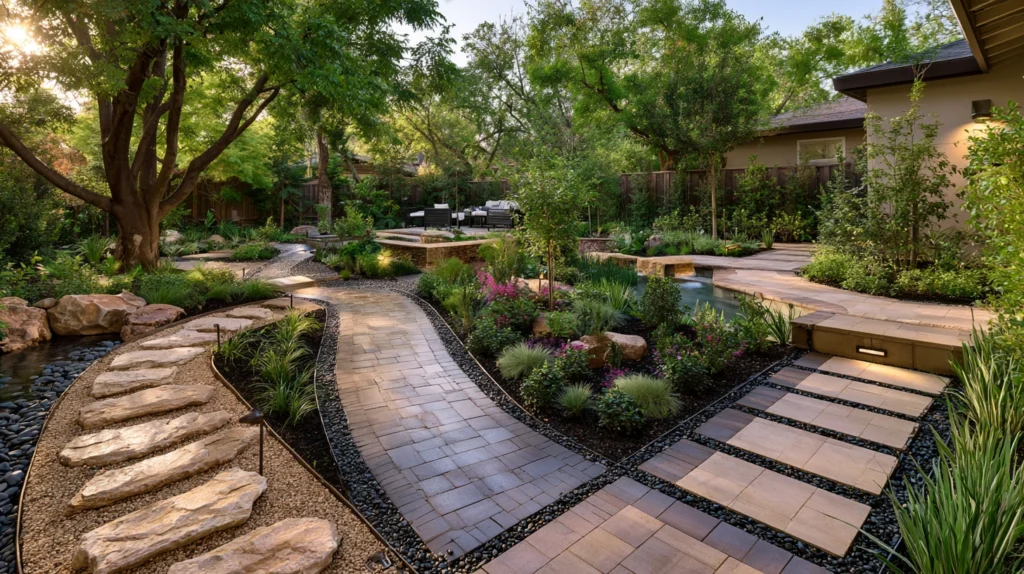
The garden walkway at its best is not a practical solution to the problem of getting from the back door to the shed without walking on the grass. It is a designed sequence of experience — the material underfoot, the planting on each side, the quality of the light along the route, the destination at its end — that makes every step a conscious and pleasurable act rather than a transit between more important positions. The path that achieves this quality is the path that makes the garden genuinely worth walking through rather than simply worth being in.
Each idea below is a specific approach to one type of backyard walkway. Each includes what you will need, what it will cost, and a practical tip to make the whole thing work as well as the inviting, considered path it is reaching for.
1. The Natural Stone Stepping Stone Path
Budget: $60 – $400
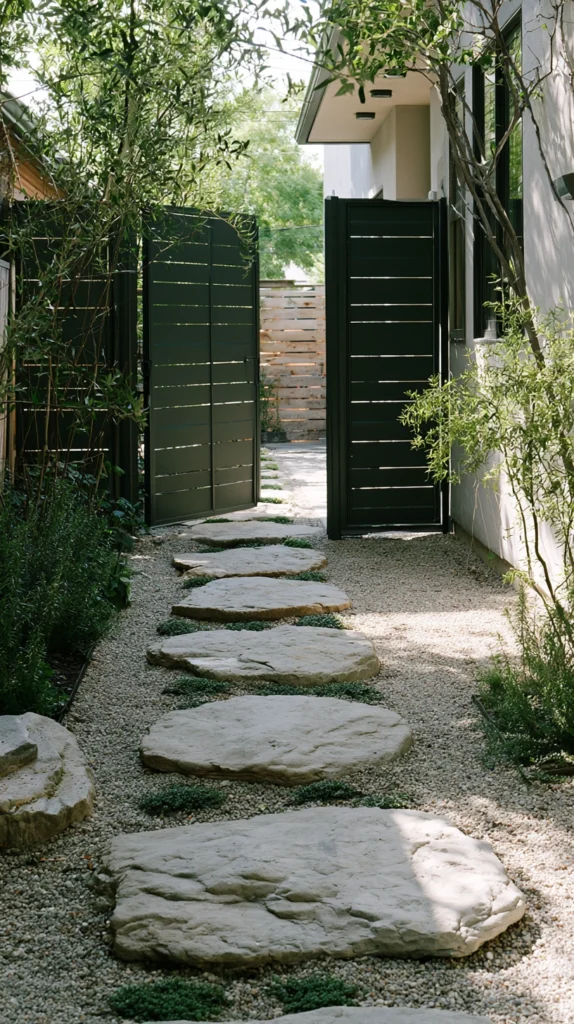
Large flat stones — sandstone, limestone, slate, or irregular fieldstone — laid as individual stepping stones with planting or gravel between them create the most naturalistic and most garden-specific of all the walkway formats.
The stepping stone path does not impose a hard surface on the garden; it offers a route through it that the visitor may choose to take or depart from, and the spaces between the stones — whether filled with creeping thyme, chamomile, gravel, or simply turf — are as much a part of the path’s character as the stones themselves.
Natural stepping stones of 40–60 centimetres in diameter cost $5–$15 each. A path of 6 metres at 60-centimetre intervals requires approximately ten stones — $50–$150 in stone material.
Set the stones into the ground at a depth that leaves their upper surface 10–15 millimetres above the surrounding grade — this is the specific height at which stones are stable underfoot while remaining visible as path markers and allowing the mower to pass over the adjacent turf without catching the stone edge.
Style tip: Vary the stone sizes and shapes along the path rather than using identical stones at regular intervals. A path of varied, irregular stepping stones reads as discovered; one of uniform stones at measured intervals reads as installed. The irregularity communicates the naturalistic quality that the stepping stone format is specifically designed to provide.
2. The Gravel Path with Edging
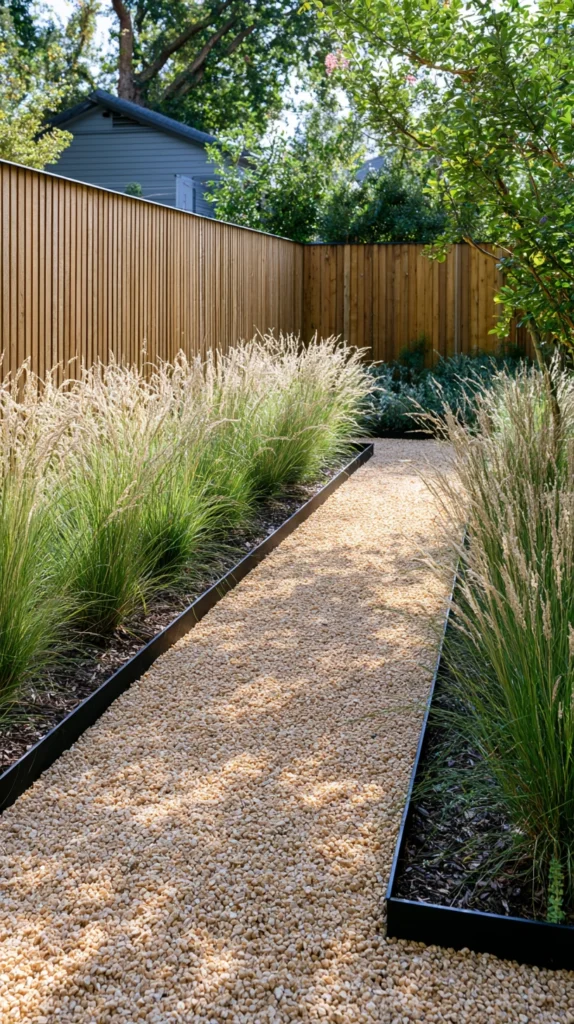
Budget: $60 – $300
A gravel path with clean, defined edges — either in timber, steel, brick, or a planted edging of low clipped box or lavender — creates one of the most versatile and most enduringly handsome garden walkway formats.
Gravel drains freely, requires no mortar or specialist laying, and provides the specific sound of footsteps that some gardens seem to require — the specific crunch of gravel underfoot that communicates arrival and movement in a way that hard paving, however beautiful, does not.
Decorative gravel in a coordinating tone costs $8–$15 per 25-kilogram bag. A 6-metre path of 60-centimetre width at 5-centimetre depth requires approximately eight bags — $64–$120 in gravel. A weed-suppressing membrane beneath the gravel costs $10–$20 per roll. Timber edging boards cost $3–$8 per linear metre. The total material cost for a standard gravel path runs $80–$200.
Style tip: Choose a gravel size of 10–20 millimetres rather than the fine pea gravel that most budget gravel paths use. The coarser gravel drains more effectively, compacts less into the surrounding soil at the path edges, and produces the more satisfying underfoot sound that the finer grades — which pack to a soft, slightly muddy surface after rain — do not provide.
3. The Brick Herringbone Path
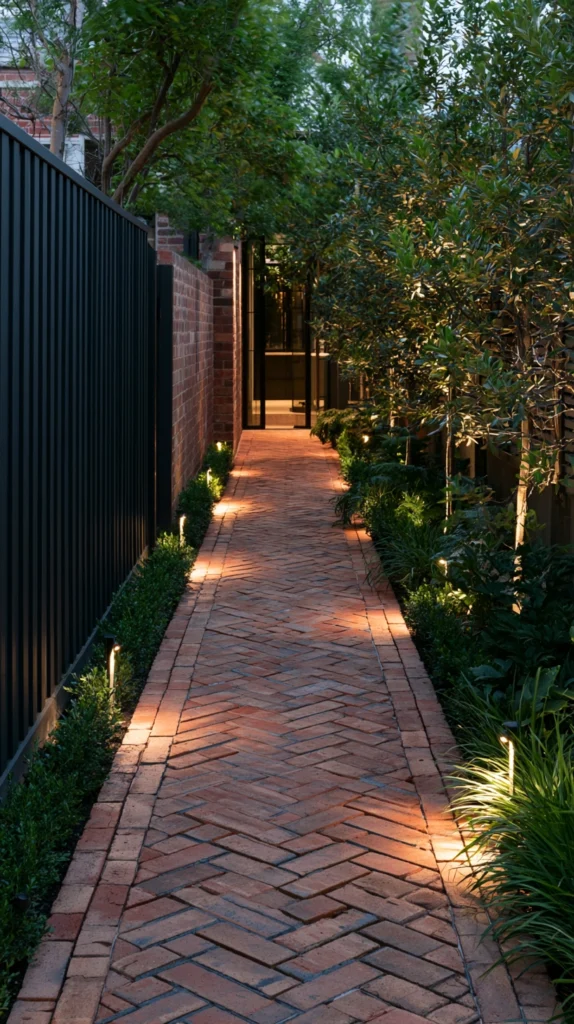
Budget: $100 – $600
A path of warm red or terracotta bricks laid in a herringbone pattern — each brick at 45 degrees to the path direction, interlocking with its neighbours in the classic double-angled arrangement — creates the most historically resonant and most specifically cottage-garden of all the hard path surfaces.
The herringbone brick path communicates age, craft, and the specific British garden tradition of the brick-paved kitchen garden and the walled garden path in a way that no other surface material or pattern achieves.
Reclaimed bricks cost $0.30–$1 each from architectural salvage yards. New terracotta pavers run $1–$3 each. A 6-metre path of 60-centimetre width at herringbone pattern requires approximately 270 bricks — $80–$270 in materials. Lay on a compacted sharp sand bed of at least 5 centimetres — a sand bed shallower than this allows individual bricks to sink differentially in wet conditions and creates an uneven surface that breaks the specific visual quality of the herringbone pattern.
Style tip: Lay the herringbone at 45 degrees to the path direction — the diagonal herringbone — rather than perpendicular to it. The diagonal herringbone draws the eye along the path and creates a visual sense of direction and movement; the perpendicular arrangement reads as static. The diagonal is the laying decision that makes the brick path actively lead the visitor rather than simply marking the route.
4. The Grass Path Between Borders
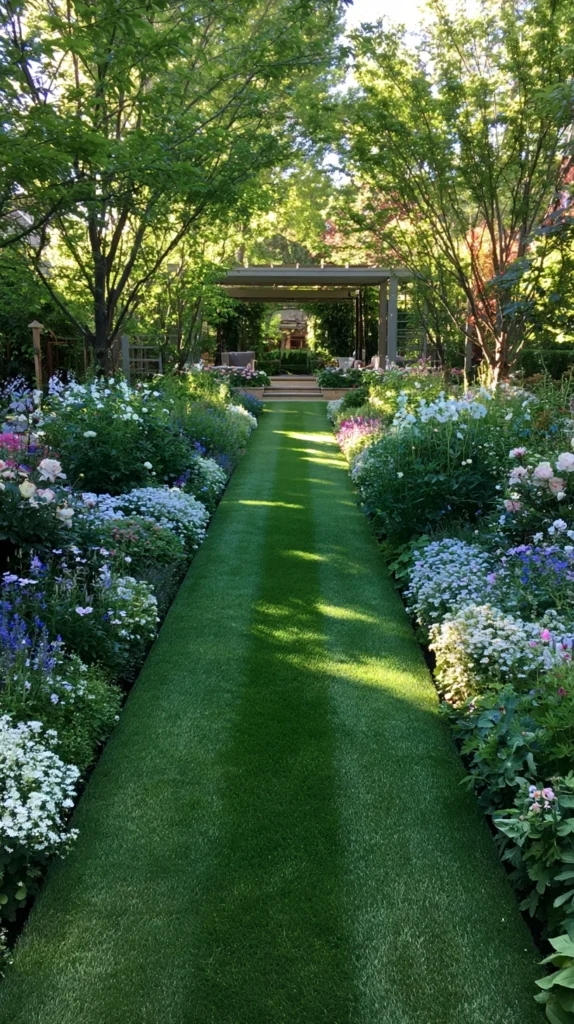
Budget: $0 – $50
A mown grass path between two planted borders — maintained by a weekly mowing at a slightly lower height than the surrounding lawn, edged precisely to create the clean boundary between the grass and the border planting — is the most quintessentially English garden walkway and the one that costs almost nothing to create in a garden that already has lawn. The grass path between borders creates the specific quality of a garden that was designed for walking through — the border on each side providing colour, fragrance, and interest at exactly the height and the proximity that a path between them offers.
The grass path requires only a lawn mower and an edging tool — the capital cost is zero. The ongoing cost is the specific attention to the edge cut — a grass path with precisely cut edges reads as designed; one with fuzzy, encroaching edges reads as a strip of unmown lawn between two beds. A half-moon edger costs $12–$25 and produces the clean line that distinguishes the designed grass path from the coincidental grass strip.
Style tip: Make the grass path at least 90 centimetres wide rather than the narrower single-file width that some garden paths default to. A 90-centimetre path allows two people to walk side by side and communicates a generosity of design that the narrower path, however precisely edged, does not convey. The width of the path is the proportional decision that most determines whether it reads as a designed walkway or a functional route.
5. The Bark Chip Woodland Path
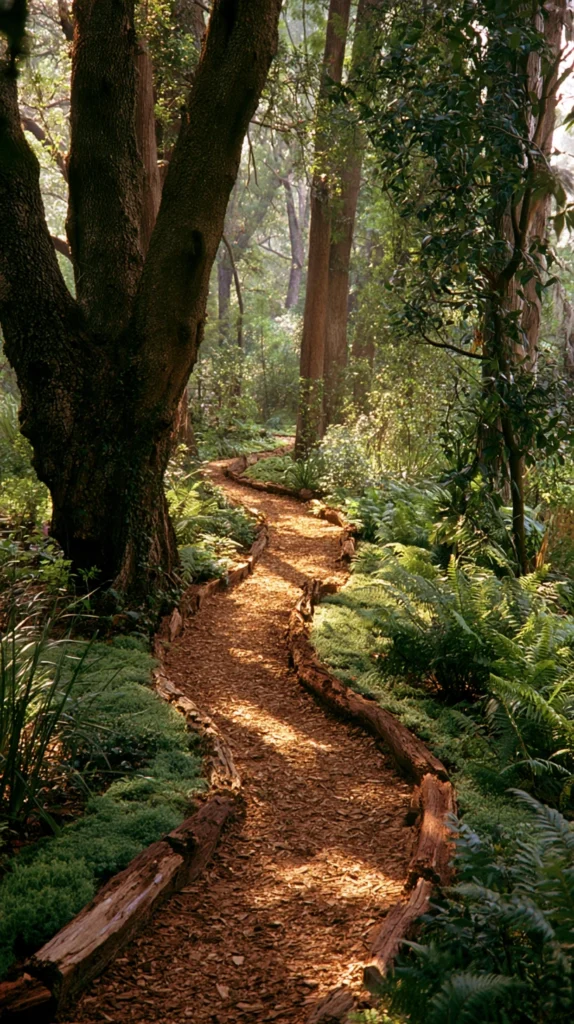
Budget: $30 – $150
A bark chip path through a shaded garden area — beneath a canopy of established trees, through a woodland-style planting of ferns and shade-loving perennials — creates the most naturalistic and most ecologically appropriate walkway for the shaded section of any garden. Bark chip is the material of the woodland floor, and a bark path in a shaded setting communicates the specific quality of a woodland walk compressed into the domestic garden in a way that any hard surface would disrupt rather than communicate.
Bark chips cost $8–$15 per bag. A 6-metre path of 80-centimetre width at 8-centimetre depth requires approximately eight bags — $64–$120 in material. A weed-suppressing membrane beneath the bark prevents the most persistent weed management problem of the bark path — the perennial weed that roots through the bark layer into the soil beneath and re-emerges regardless of how many times the surface is topped up.
Style tip: Top up the bark chip path annually in early spring before the growing season begins. Bark decomposes gradually into the soil beneath — which is ecologically beneficial — but the decomposition reduces the path depth and allows weed pressure to increase through the growing season. The annual top-up maintains the visual quality and the weed suppression of the bark path at the cost of two or three additional bags per season.
6. The Reclaimed Cobblestone Path
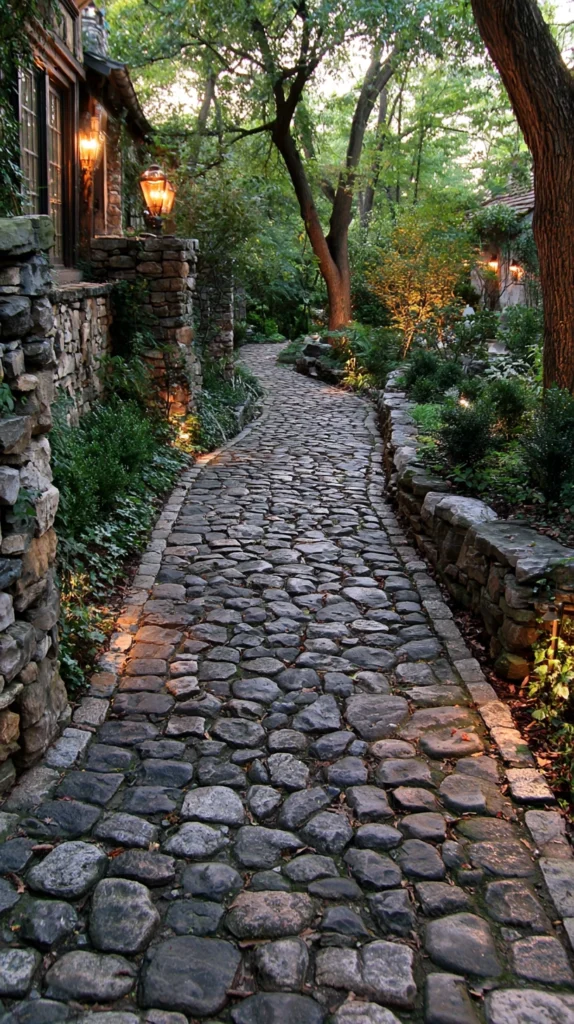
Budget: $100 – $600
A path of reclaimed granite cobblestones — the rounded, fist-sized stones of the Victorian street that are now available from architectural salvage yards as reclaimed material — creates a walkway of extraordinary material character and historical weight that no new paving material can approach.
Reclaimed cobblestones carry the accumulated quality of their previous context — the wear of decades of traffic, the specific surface variation of stone used for its original purpose — and in a garden setting this accumulated character communicates a quality of permanence and age that is beyond the reach of any material laid for the first time.
Reclaimed granite cobblestones cost $0.50–$2 each from salvage yards. A 6-metre path of 60-centimetre width requires approximately 250 cobbles — $125–$500 in material. Lay on a 10-centimetre compacted hardcore base with a 3-centimetre sharp sand bed — cobblestones require a deeper sub-base than flat paving to prevent individual stones from rocking and shifting underfoot.
Style tip: Lay the cobblestones with their longest axis vertical — standing upright in the sand bed rather than lying flat. The upright cobble provides a more stable, more load-bearing surface and shows the characteristic rounded top of the cobble rather than its flat underside. The vertical laying is the installation decision that produces the authentic cobblestone path rather than the flat-laid alternative that reads as irregular paving rather than genuine cobblework.
7. The Mosaic Pebble Path
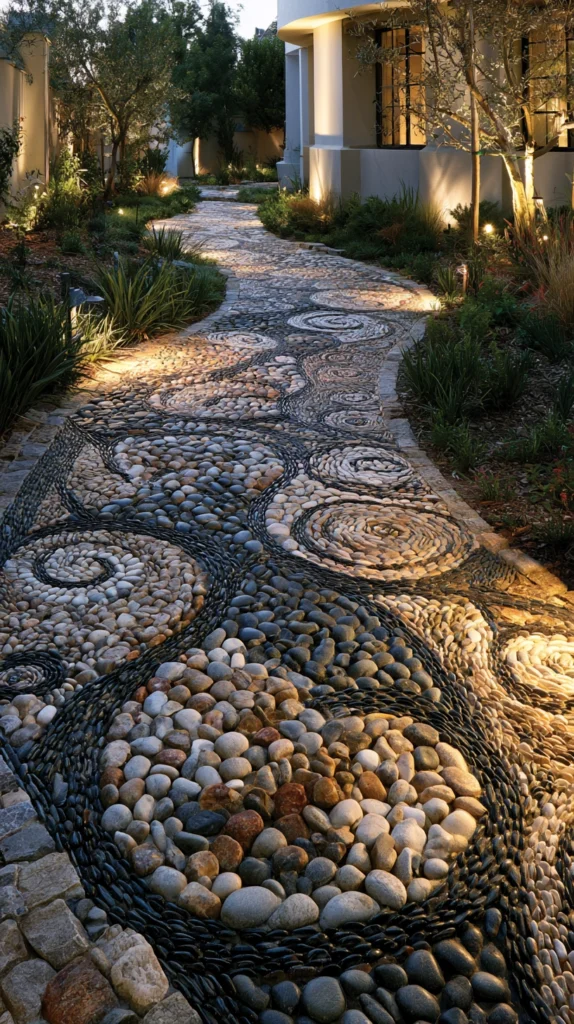
Budget: $40 – $200
A path of pebbles set on edge in a mortar bed — arranged in patterns using the natural colour variation of different pebble types, from pale cream through warm buff to dark charcoal — creates a walkway of permanent, maintenance-free decorative quality that uses the geological palette of natural stone rather than manufactured colour. The pebble mosaic path is one of the oldest forms of decorative paving — it appears in the courtyard gardens of medieval Spain and the classical gardens of ancient Rome — and its longevity as a design tradition communicates the specific quality of a pattern that has always been worth making.
River pebbles in a colour mix cost $8–$15 per kilogram. A mortar bed of sharp sand and cement costs $10–$15 in materials. Separate the pebbles by colour before laying and design the pattern on paper before beginning — the pattern resolved before installation produces a path of designed quality; the pattern worked out during laying produces a path of approximated quality that is visible in the result.
Style tip: Set all pebbles to the same exposed height by pressing each one to a consistent depth using a straight timber batten laid across the surface. A pebble path where the stones protrude at different heights creates an uneven surface that is uncomfortable to walk on; one where all pebbles are set to a consistent flush level is smooth underfoot while maintaining the textural visual quality of the individual stone faces.
8. The Sleeper and Gravel Combination
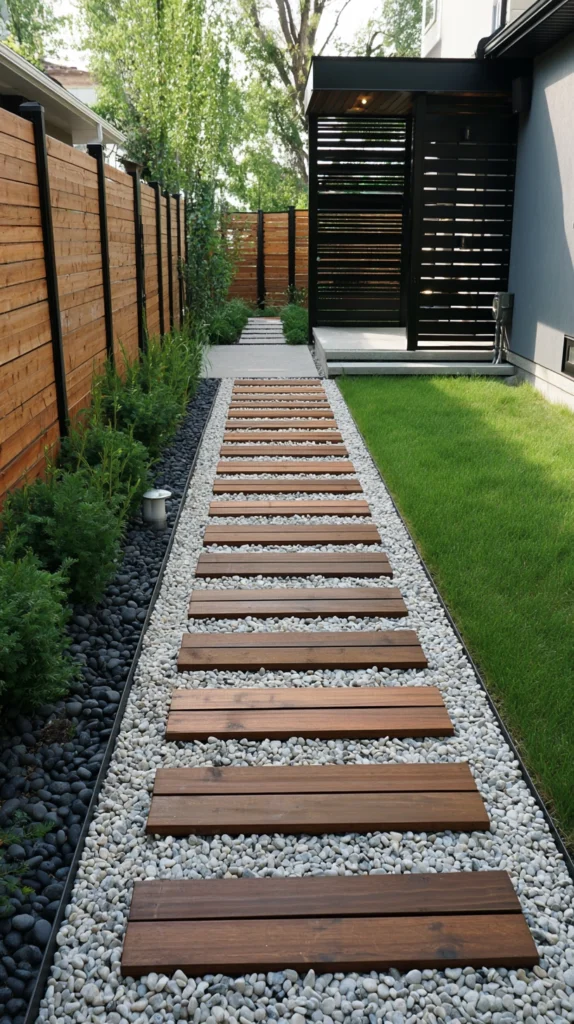
Budget: $100 – $500
Railway sleepers laid transversely across the path direction — with gravel filling the spaces between the sleepers — create one of the most visually structured and most specifically contemporary garden path formats. The sleeper-and-gravel combination provides the visual rhythm of the sleeper cross-sections at regular intervals against the horizontal plane of the gravel infill, and the material contrast between the dark timber and the pale stone creates a graphic quality that few other path materials achieve.
New hardwood sleepers cost $20–$40 each. Reclaimed railway sleepers run $15–$30 each. A 6-metre path of sleepers at 30-centimetre intervals with 15-centimetre gravel infill between them requires approximately twelve sleepers — $180–$480 in sleeper material plus $30–$60 in gravel. Fix the sleepers into the ground by drilling a pilot hole and driving a steel rebar stake through each sleeper end — the rebar stake prevents the sleeper from shifting laterally over time as the ground freezes and thaws.
Style tip: Choose sleepers of a consistent width and a consistent thickness rather than the mixed dimensions that reclaimed sleepers from different railway gauges produce. A path of consistently dimensioned sleepers reads as a designed alternation of timber and gravel; one of mixed-dimension sleepers reads as a collection of available timber laid in the approximate path direction.
9. The Planted Crack Paving Path
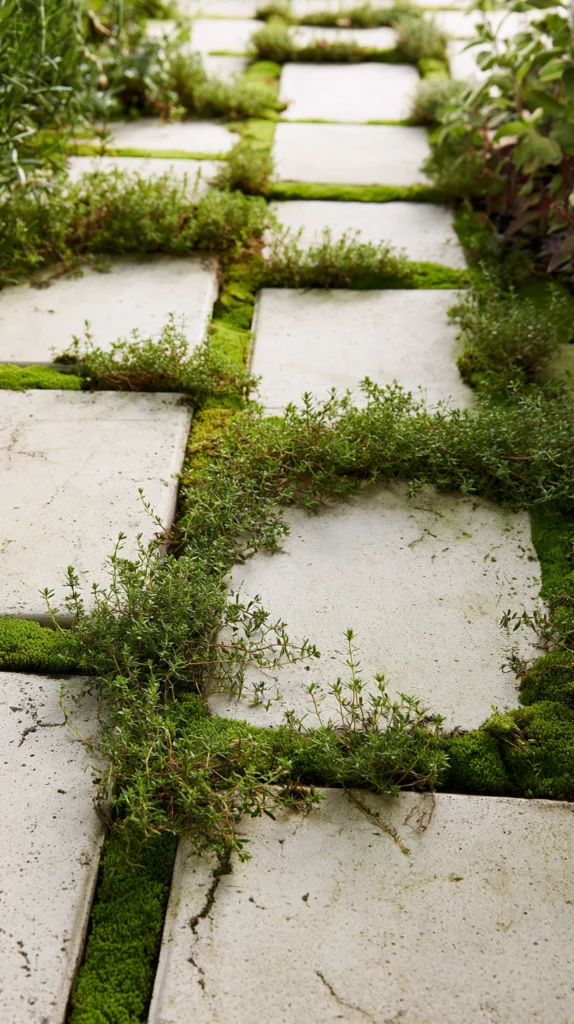
Budget: $80 – $400
Paving stones laid with generous joints of 3–5 centimetres, filled with gritty compost and planted with creeping thyme, chamomile, or mind-your-own-business — the path that grows in its own cracks — creates the most garden-integrated of all the hard-surface walkways. The planted crack paving communicates that the path grew from the garden rather than being imposed on it, and the creeping plants that colonise the joints — releasing fragrance when stepped on, providing a carpet of seasonal flower colour at ground level — give the path a quality of biological richness that bare-jointed paving cannot approach.
Paving stones of 40 by 40 centimetres cost $5–$12 each. A 6-metre path of 60-centimetre width requires approximately twenty-two stones — $110–$264 in stone material. Creeping thyme plants cost $3–$6 each — five to eight plants per square metre of joint area. Gritty compost to fill the joints costs $5–$10 per bag.
Style tip: Plant the crack plants before the joints have been walked on intensively — the first season of foot traffic is the hardest on newly established plants, and plants that have achieved some root penetration into the gritty compost before the path comes into regular use establish more successfully than those planted into a path that is already in daily use.
10. The Pergola-Covered Walkway
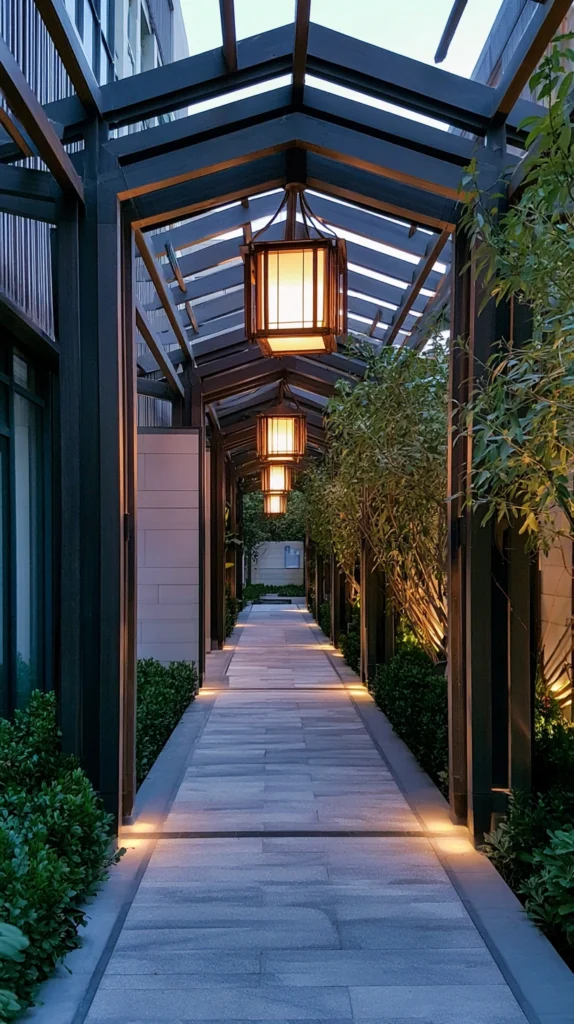
Budget: $300 – $2,000
A pergola structure over a garden path — four or more posts supporting connecting beams overhead, with a paved or gravel floor and climbing plants trained across the overhead structure — creates the most architecturally and most experientially complete of all the garden walkway formats. The covered walkway does not merely direct movement through the garden; it creates the experience of passing through a garden structure, of entering and leaving a defined space, of being enclosed overhead by planting before emerging into the open garden beyond.
A timber pergola walkway of 3 metres in length and 1.2 metres in width costs $200–$600 in materials. A longer 6-metre version runs $400–$1,200. A climbing rose or wisteria at each post costs $15–$35 each. The pergola walkway improves every season as the climbing plants establish — what begins as a timber structure with chairs becomes, by the third or fourth year, a tunnel of living growth of genuine beauty.
Style tip: Extend the pergola walkway slightly beyond the destination at each end rather than terminating precisely at the gate or the door. A pergola that extends a metre beyond its principal connection points creates the experience of emerging from the covered route rather than simply arriving at its end, and the emergence quality — the moment of stepping out from the overhead coverage into the open garden — is one of the specific pleasures of the covered walkway.
11. The Curved Path Through Lawn
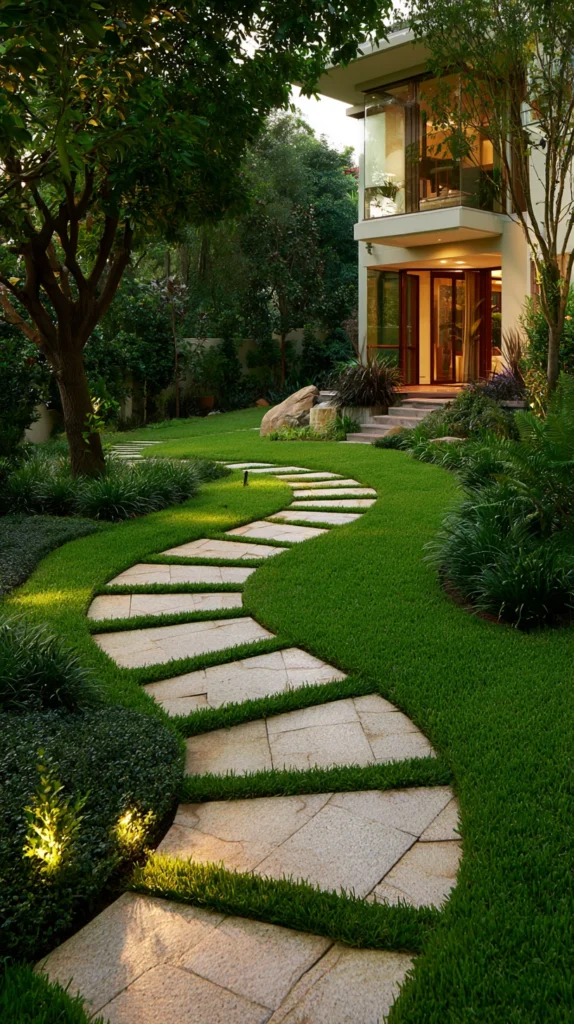
Budget: $60 – $350
A curved path through the lawn — either in stepping stones, mown grass, or a narrow gravel run — that sweeps gently from one garden zone to another without following the straight line between them creates the garden’s most specifically naturalistic movement quality. Water never runs straight in nature; paths in the naturalistic garden take their cue from this and curve rather than cut, making the journey through the garden as much about the experience of the route as the destination it eventually reaches.
A curved stepping stone path through lawn requires stones of $5–$15 each — the number depending on the path length. A curved mown grass path costs only the decision of which way to point the mower. A curved gravel run with flexible metal edging — the edging bends to accommodate the curve — costs $3–$8 per linear metre in edging plus $8–$15 per bag of gravel.
Style tip: Design the curve of the path so the destination is not visible from the starting point. A path that shows its destination from the beginning removes the quality of anticipation and discovery that the curved path is specifically designed to provide. The curve that hides the destination behind a planted mass or a garden structure creates the specific pleasure of a route that reveals itself progressively.
12. The Edged Border Path
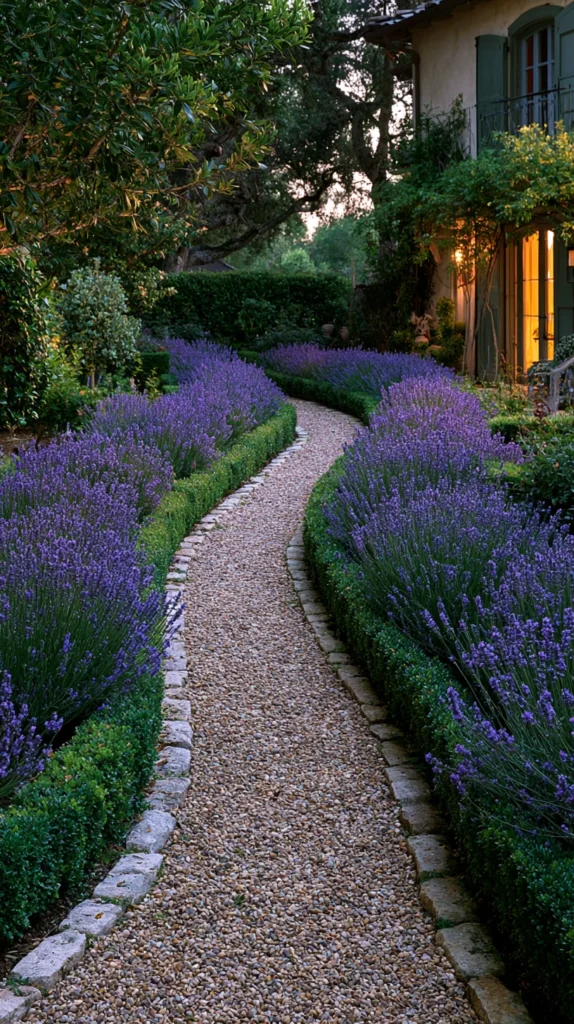
Budget: $50 – $250
A path defined by a consistent planted edging on each side — lavender, clipped box, catmint, or a low herbaceous planting — rather than a physical material boundary creates the walkway whose quality comes entirely from the planting that defines it. The edged border path is the purest expression of the idea that a path is a route through the garden rather than a surface imposed on it — the path exists because the planting on each side says that this is where the path is, and the quality of the path is entirely the quality of the planting that makes it.
Lavender for path edging costs $4–$8 each — a 6-metre path edged on both sides requires twelve to sixteen plants at $48–$128. Catmint (Nepeta) runs $4–$8 each. Clipped box for a formal path edging costs $5–$12 each. The edging plant species determines the character of the path — lavender communicates the Mediterranean kitchen garden, box communicates the formal parterre, catmint communicates the relaxed English cottage garden.
Style tip: Plant the path edging at a density that produces the immediate impression of a defined border rather than individual plants at measured intervals that need to grow together before the path is defined. The investment in more plants planted closer together produces the path-defining quality from the first season; the same plants at wider spacing produce the same result two to three seasons later.
13. The Japanese Garden Stepping Path
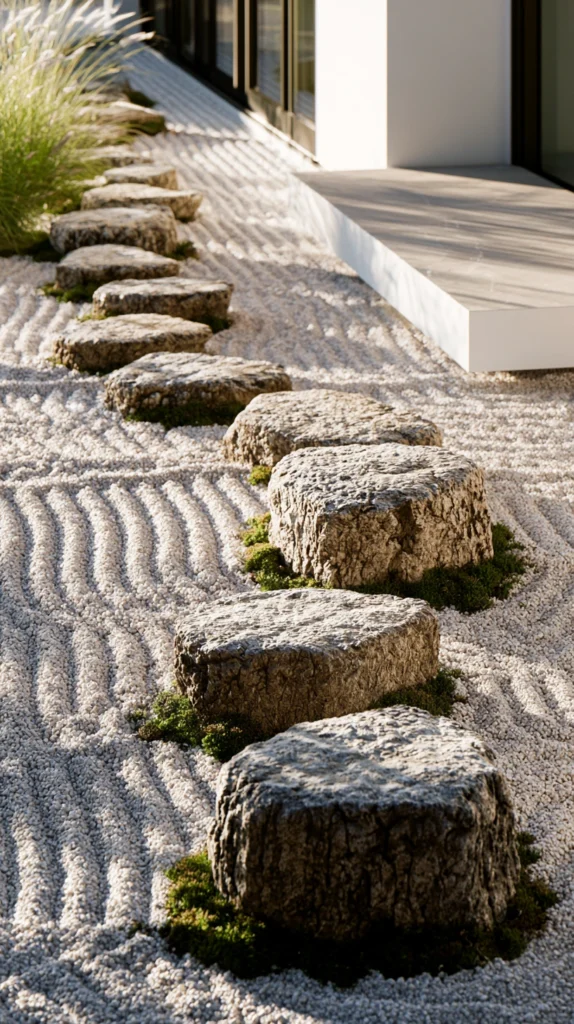
Budget: $80 – $400
A path of flat stones laid in the Japanese tradition — not at regular intervals but at the specific stepping rhythm of the human gait, each stone positioned for the foot that will land on it, with the path direction suggesting movement rather than prescribing it — creates the most specifically meditative and most precision-designed of all the garden walkway experiences. The Japanese stepping stone path is designed from the body rather than from the drawing board — the stones are positioned for the physical act of walking rather than for the visual quality of the path from a plan view.
Flat natural stones of 40–60 centimetres in the longest dimension cost $5–$15 each. A 6-metre Japanese stepping path requires eight to twelve stones — $40–$180 in material. Lay the stones so their upper surfaces sit 10–15 millimetres above the surrounding ground level — this specific height is the position from which the stone is most clearly visible as a stepping position while being low enough to mow over without catching the stone edge.
Style tip: Walk the path position before laying a single stone and mark each foot landing with a cane or a small stake. The Japanese stepping path is designed from the walker’s experience rather than the designer’s plan, and the stones laid at the actual foot-landing positions of a person walking naturally through the garden produces a path that is instinctively comfortable to walk along — the stones are simply there when the foot needs them.
14. The Lantern-Lined Evening Path
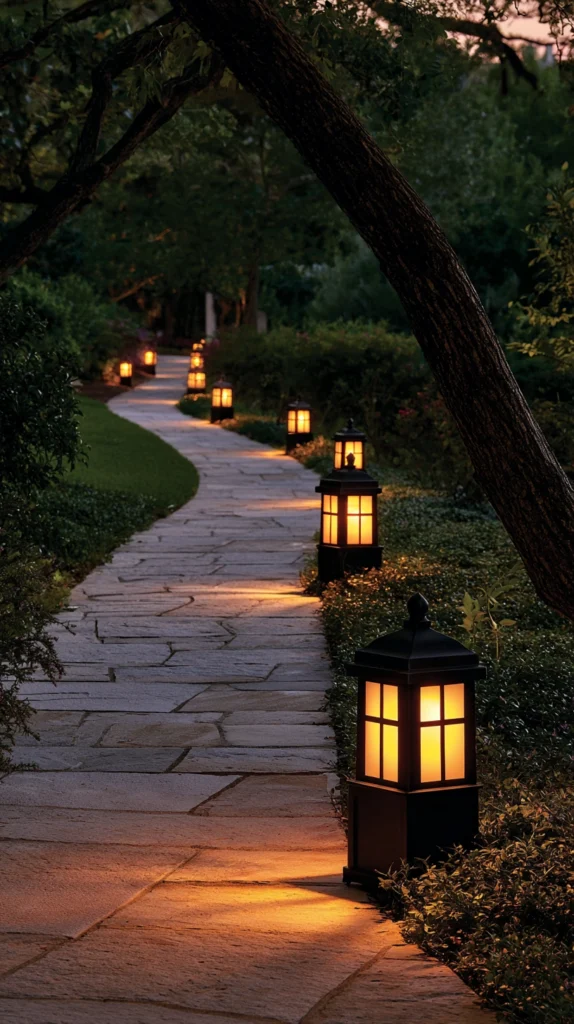
Budget: $40 – $200
A garden walkway defined at night by a row of lanterns or low pathway lights on each side — solar stake lights, hurricane lanterns with candles, or low-voltage LED bollard lights — creates the garden’s evening version of the walkway that may be very different from its daytime counterpart. The evening path is the path that makes the garden genuinely usable after sunset, that provides the quality of a lit route through the outdoor space for all the hours between dusk and bedtime that a summer evening provides.
Solar path stake lights in a warm amber LED cost $5–$15 each. A set of ten for both sides of a 6-metre path runs $50–$150. Hurricane lanterns with candles cost $8–$25 each and provide the most atmospheric path lighting available — the warm, flickering quality of candlelight in a glass lantern at path edge level is the lighting effect most specifically associated with the garden evening. Low-voltage LED bollard lights on a transformer system cost $15–$30 each.
Style tip: Position the path lights on alternating sides of the path rather than in a uniform row on one side. Alternating positions create a dappled, meandering quality of light along the path that reads as more atmospheric and more generous than a single-sided row, which reads as a lit edge rather than a lit route. The alternating positions also provide slightly better illumination of the full path width from both sides rather than from one.
The garden walkway that makes every step worth taking is not the most expensive or the most elaborately constructed. It is the one where the decision about the path material was made in relation to the garden around it, where the width was chosen for the generous quality of movement it allows, where the edging was planted for the fragrance it releases when touched in passing, and where the destination at the path’s end was worth the specific journey that the path was designed to make.
Design the path as an experience rather than as a connection. The garden that has paths worth walking along is the garden that has been understood as a sequence of experiences rather than a collection of features, and the path that achieves this understanding makes every journey through the garden genuinely pleasurable rather than simply functional.