13 Backyard Fire Pit Setups That Prove a Great Evening Costs Less Than You Think
13 Backyard Fire Pit Setups That Prove a Great Evening Costs Less Than You Think
There is something about a fire pit that changes a backyard entirely. The moment a flame is going, people stop looking at their phones, conversations slow down and deepen, and an ordinary Tuesday evening starts to feel like something worth staying up for. It is one of the few outdoor investments that pays back in atmosphere every single time, regardless of the season or the occasion.
Whether you are working with a sprawling garden or a compact patio, a generous budget or a tight one, the setups below cover every scale and every ambition. Each one includes what you will need, what it will cost, and a practical tip to make the whole thing work as well as the idea deserves.
1. The Classic Steel Bowl Fire Pit
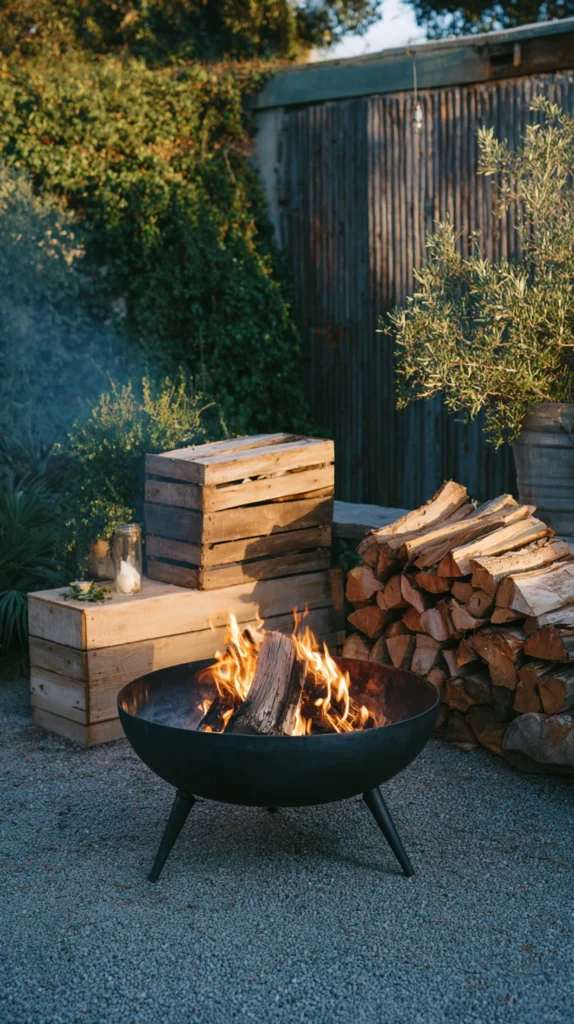
Budget: $40 – $120
A simple steel bowl fire pit on three legs is the most straightforward entry point on this list and, done well, one of the most satisfying. It requires no installation, no permits in most areas, and no permanent commitment — it can be moved, stored, and repositioned as the garden changes. For anyone who has been putting off the fire pit idea because it seems complicated, this is the setup that proves it is not.
A basic steel bowl fire pit costs $40–$80. A spark guard mesh lid runs $15–$25 and is worth having if children or pets are present. A log store or simple crate nearby ($15–$40) keeps wood dry and within reach. The total outlay for a complete, functional setup sits comfortably under $120.
Style tip: Position the fire pit on a circle of gravel or a flat stone pad rather than directly on grass. It protects the lawn from heat damage, gives the setup a defined footprint, and makes the whole arrangement look intentional rather than dropped in place.
2. The DIY Cinder Block Fire Pit
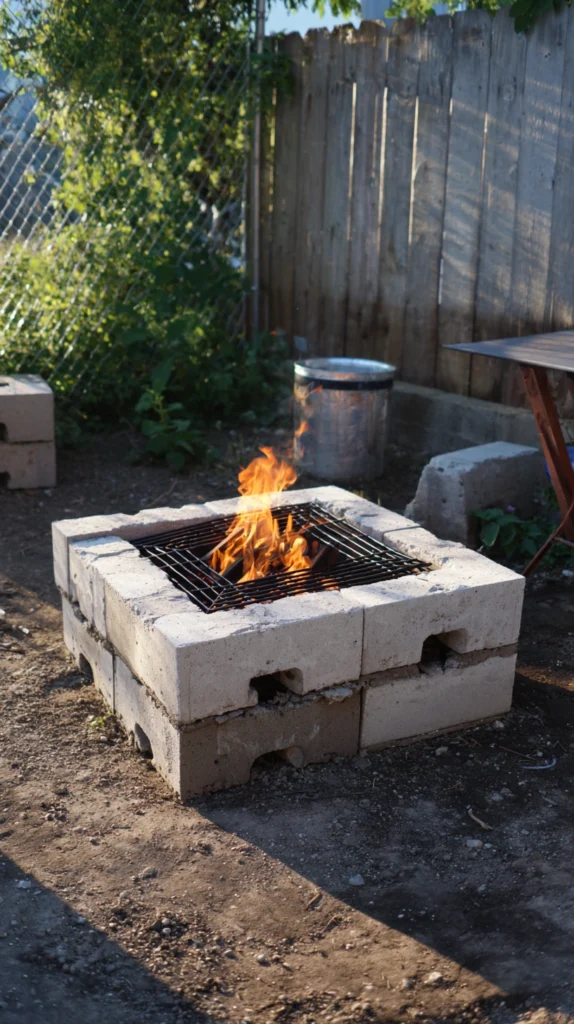
Budget: $20 – $60
Stack cinder blocks in a square or circular formation, leave gaps between them for airflow, and you have a permanent fire pit for almost nothing. It is the most budget-friendly build on this list and looks considerably better than its cost suggests, particularly once the blocks weather slightly and take on the patina of regular use. For renters, the same blocks can be unstacked and stored at the end of a tenancy.
Cinder blocks cost $1.50–$3 each — a standard square pit requires around sixteen. No mortar is needed for a basic setup, though a line of fireproof mortar between the top two courses ($8–$15 for a small tube) adds stability. A metal grate placed across the top ($10–$20) turns the pit into a functional cooking surface as well as a fire feature.
Style tip: Cap the top course with flat paving stones or coping bricks in a contrasting colour. It gives the pit a finished edge, makes it more comfortable to lean against, and visually separates the fire structure from the seating area around it.
3. The Sunken Fire Pit
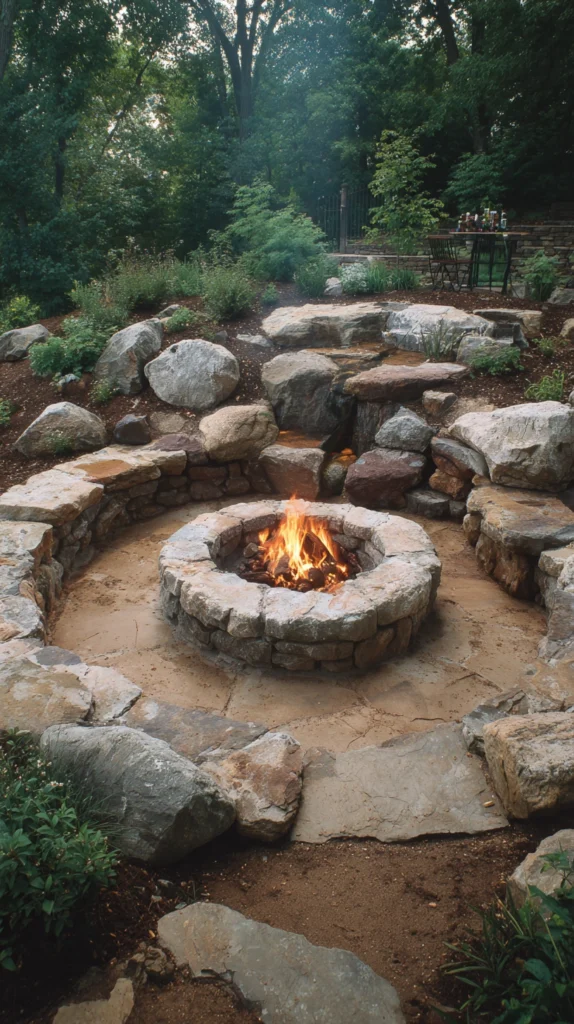
Budget: $80 – $300
Dig a shallow circular pit in the ground, line it with fire bricks or stone, and surround it with ground-level seating — flat stones, low timber benches, or simply the lawn itself. A sunken fire pit feels more permanent and more architectural than any above-ground option, and the lowered flame creates a campfire intimacy that taller setups rarely match. It also eliminates the wind problem that plagues raised pits, because the surrounding earth acts as a natural windbreak.
Fire bricks cost $1–$3 each — a lined circular pit of 60–80 centimetres in diameter requires around twenty. Excavation requires nothing beyond a spade and an afternoon. Flat sandstone or slate for surrounding seating runs $30–$80 depending on quantity. Once built, a sunken pit requires almost no maintenance and lasts indefinitely.
Style tip: Slope the sides of the pit slightly inward as you dig so the base is narrower than the rim. This concentrates the fire at the centre, improves draw, and makes the pit look deliberately designed rather than simply dug straight down.
4. The Chiminea Corner
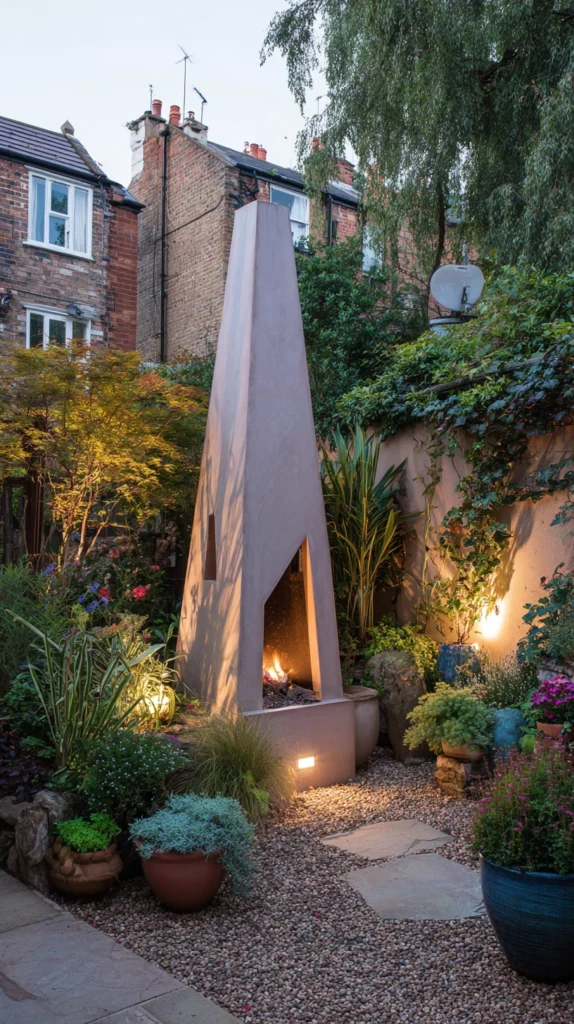
Budget: $60 – $250
A chiminea — the tall, front-opening clay or cast-iron fire vessel — concentrates heat directionally, sends smoke upward more efficiently than an open pit, and gives a corner of the garden a sculptural presence that flat fire bowls cannot match. It is the right choice for smaller gardens where smoke drift toward the house or neighbours is a genuine concern, and for anyone who wants a fire feature that looks considered from every angle.
A clay chiminea costs $60–$120. A cast-iron version runs $120–$250 and lasts significantly longer with less cracking risk in wet climates. A small gravel pad beneath the chiminea ($10–$20) protects the surface underneath and defines the space. A cover for wet weather ($15–$30) extends the life of a clay model considerably.
Style tip: Place the chiminea opening facing the primary seating direction so the radiated heat reaches the people in front of it. A chiminea positioned with its back to the seating area is delivering most of its warmth to the fence.
5. The Pallet Wood Lounge Setup
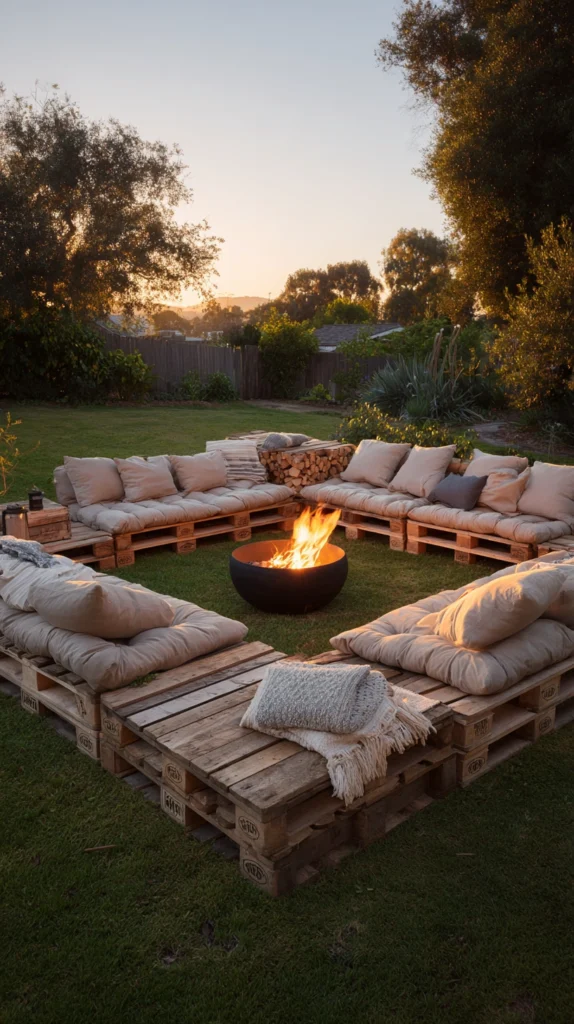
Budget: $30 – $100
Build low seating from reclaimed pallets — stacked two high with outdoor cushions on top — arranged in a U-shape around a central fire bowl or pit. Pallets are available free or nearly free from garden centres, builders merchants, and supermarkets, and the low seating height naturally draws people closer to the fire and to each other. It is the least expensive complete setup on this list and one of the most atmospheric.
Two pallets per seat run $0–$10 each depending on source — heat-treated pallets marked HT are safe for outdoor furniture use. Outdoor cushions or foam cut to size cost $15–$30 per seat. A tin of outdoor wood paint in charcoal or dark green ($10–$20) transforms the raw pallet look into something that reads as deliberate rather than improvised.
Style tip: Secure the top pallet to the bottom one with two short bolts at each corner before adding cushions. Unsecured pallet stacks shift when sat on, which is uncomfortable and undermines the otherwise solid look of the setup.
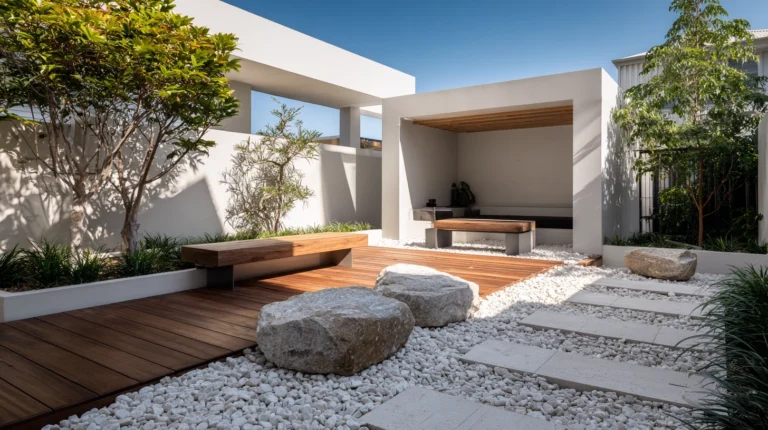
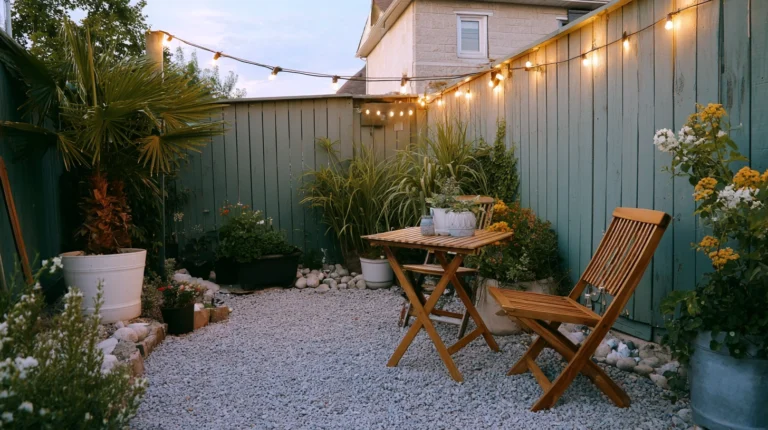
6. The Gravel Garden Fire Pit
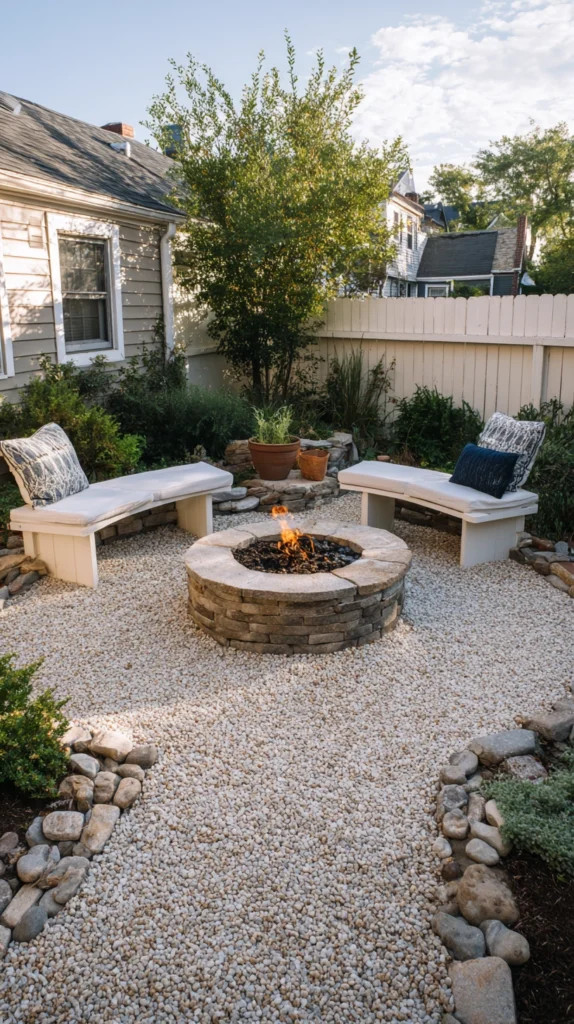
Budget: $100 – $350
Lay a defined circle or square of decorative gravel as the foundation, position a fire pit at the centre, and surround it with weatherproof chairs or benches within the gravel boundary. The gravel defines the fire pit zone as its own room within the garden, protects the ground from heat and ember damage, and requires no mowing or maintenance once laid. It is the lowest-effort permanent setup on this list.
Decorative gravel costs $30–$80 for enough to cover a 3-metre circle at a depth of 5 centimetres. A weed-suppressing membrane beneath the gravel ($10–$20) keeps it clean indefinitely. Metal garden edging to define the boundary of the gravel area runs $15–$40. Position the chairs within the gravel boundary rather than outside it to maintain the sense of an enclosed, defined space.
Style tip: Choose gravel in a warm tone — sandy buff, pale gold, or terracotta — rather than grey or white. Warm-toned gravel reflects firelight back into the space and makes the whole area feel noticeably warmer and more inviting after dark.
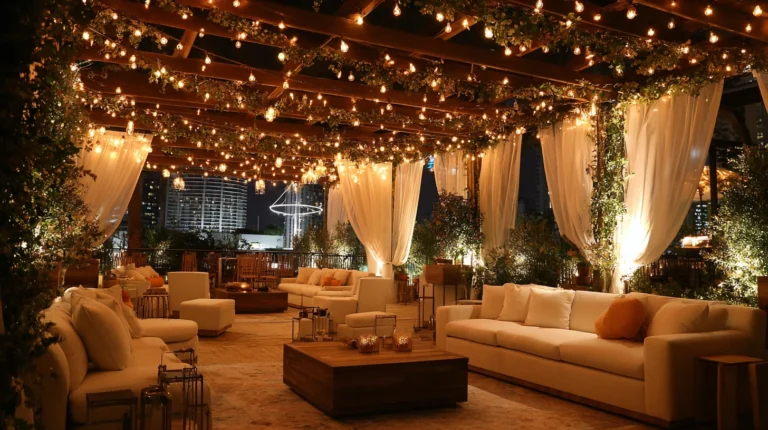
7. The Fairy Light Fire Pit Garden
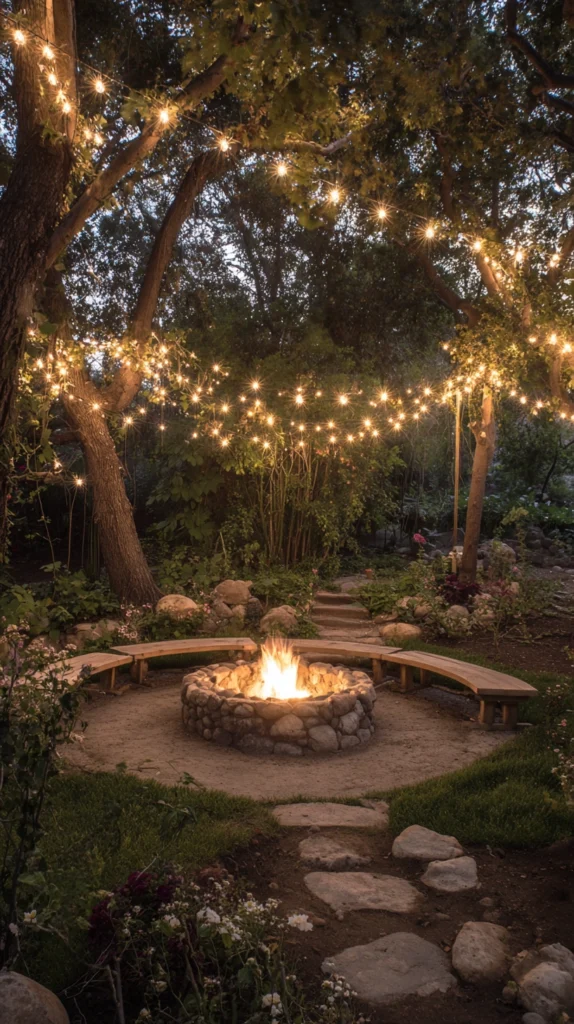
Budget: $50 – $180
String warm white fairy lights between posts, fence posts, or trees above and around the fire pit seating area, and the garden after dark becomes something that looks significantly more considered than any single element within it. The lights define the zone from outside the garden, give latecomers a visual target to walk toward, and complement firelight in a way that no other artificial light source does.
Outdoor fairy lights on a reel cost $10–$25 for a 10-metre length. Wooden or metal posts to string them between if no natural anchor points exist run $8–$15 each. Weatherproof connectors and outdoor extension leads cost $10–$20. Two or three reels of lights criss-crossed above the seating area provide enough coverage for a space of around 4 by 4 metres.
Style tip: Hang the lights lower over the seating area and let them rise toward the anchor points at the edges so the centre of the space feels canopied rather than simply lit from above. A dip of 30–40 centimetres between anchor points is enough to create this effect.
8. The Cooking Fire Pit Setup
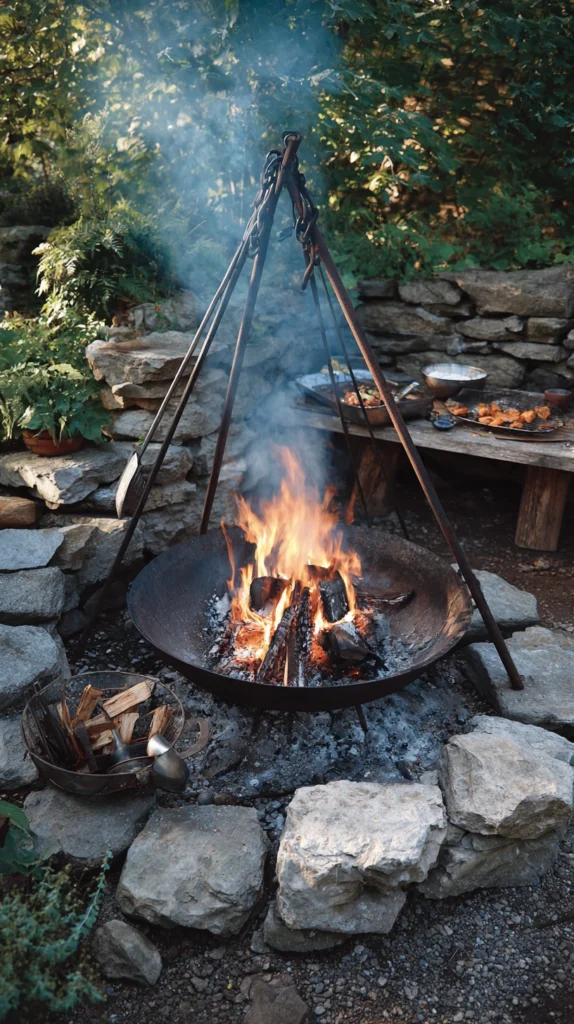
Budget: $80 – $300
Choose a fire pit specifically designed for cooking — with a swing-arm grill, an adjustable grate, or a tripod frame — and build the evening around the food as much as the fire. Skewered vegetables, flatbreads placed directly on the grate, corn in the husk, whole jacket potatoes buried in the embers: the cooking process becomes the activity and the conversation, which removes any pressure from the host to entertain separately.
A fire pit with a built-in swing-arm grill costs $80–$180. A tripod frame with a hanging pot or Dutch oven for fire cooking runs $40–$100. Long-handled fire cooking tools — tongs, skewers, a poker — cost $20–$40 for a set. Set up a simple prep station beside the fire pit with ingredients ready to go so the cooking happens continuously throughout the evening rather than in a single rushed batch.
Style tip: Let the fire burn down to hot embers before cooking rather than grilling over active flames. Embers provide more consistent, controllable heat than flames, which surge and drop unpredictably and char the outside of food before the centre is cooked through.
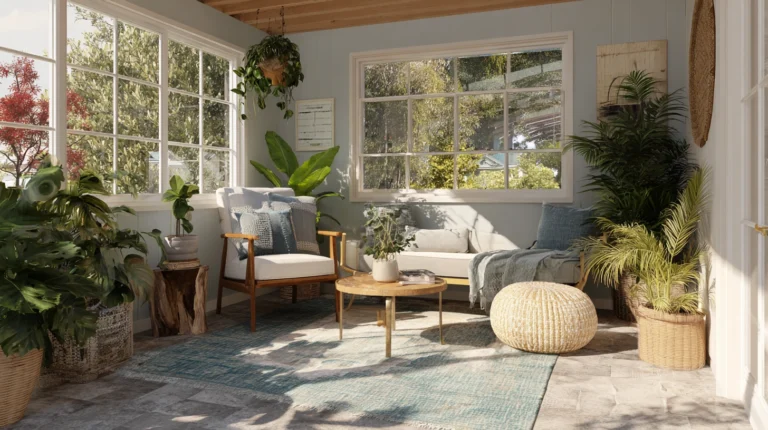
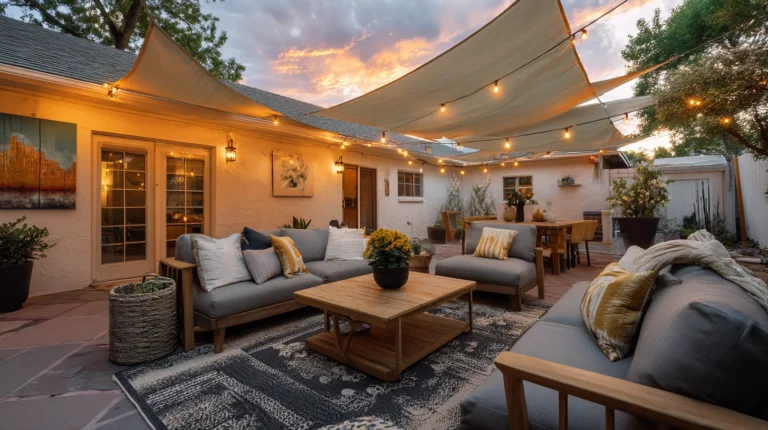
9. The Enclosed Courtyard Fire Setup
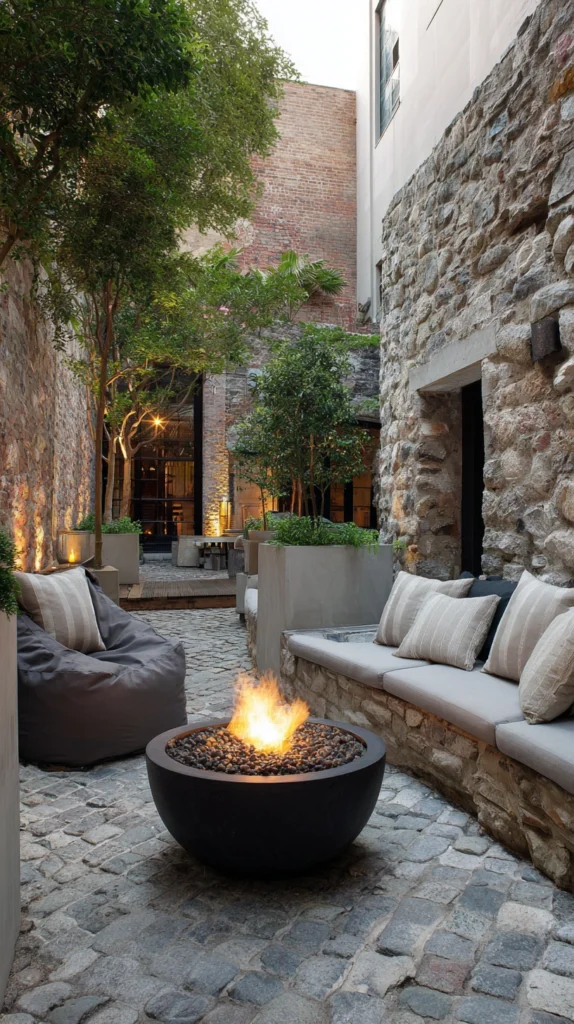
Budget: $60 – $200
In a small enclosed courtyard or walled garden, a compact bioethanol fire bowl or a contained gas fire pit gives all the atmosphere of a wood fire with none of the smoke — which in a small enclosed space is the one thing that ends an evening quickly. Bioethanol fires produce no ash, no smoke, and no sparks, and require no chimney or flue. The trade-off is a smaller flame and less radiated heat, but in a sheltered space the ambient warmth builds quickly.
A bioethanol fire bowl costs $40–$120. Bioethanol fuel runs $15–$25 per litre — a standard burn of three to four hours uses roughly one litre. A wall-mounted bioethanol burner ($60–$150) frees up floor space entirely in the smallest courtyards. Surround it with potted plants and lanterns to give the space layered warmth and texture.
Style tip: Fill the space with candles in addition to the fire feature — lanterns on the ground, tea lights on every surface — so the bioethanol flame is not the only light source. A single small flame in a dark courtyard creates atmosphere; the same flame surrounded by candlelight creates something genuinely special.
10. The S’mores and Storytelling Setup
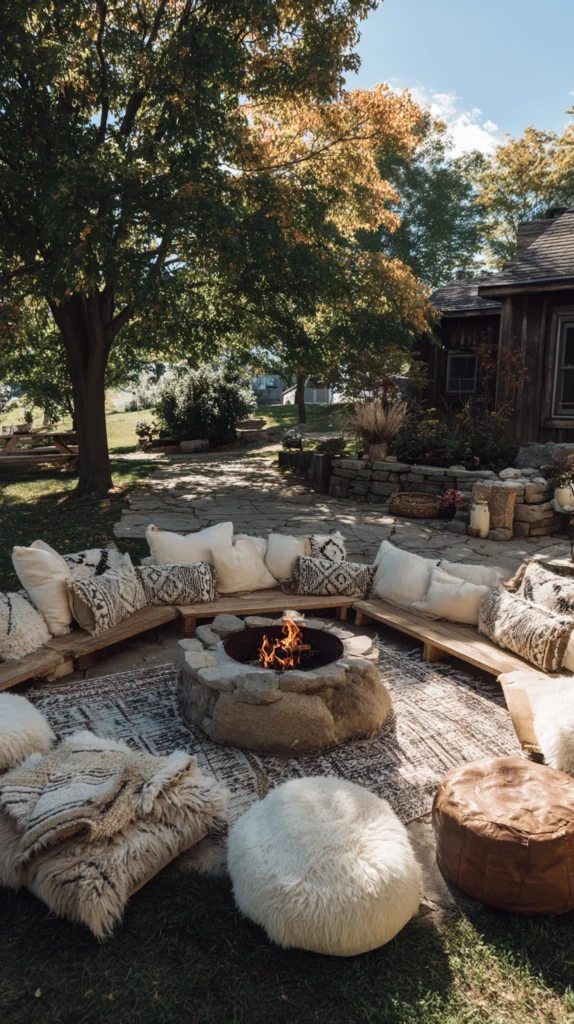
Budget: $30 – $100
Dedicate the fire pit evening explicitly to s’mores and stories — a basket of marshmallows, chocolate bars, and biscuits beside each seat, a set of long skewers in a pot by the fire, and a loose agreement that anyone who wants to tell a story, share a memory, or ask a question of the group is welcome to do so while their marshmallow toasts. It is particularly good for mixed-age groups and for evenings where people do not know each other well and need a gentle structure to settle into.
S’mores ingredients for ten people cost $15–$25. Long metal skewers run $8–$15 for a set of ten. A small printed card beside each seat with three conversation prompt questions ($2 at a print shop) gives anyone who wants it a way into the storytelling without feeling put on the spot. The setup requires no additional furniture or equipment beyond the fire pit itself.
Style tip: Keep a folded blanket on every seat before guests arrive. The moment someone wraps themselves in a blanket beside a fire, they settle in for the long version — which is exactly the atmosphere this setup is designed to create.
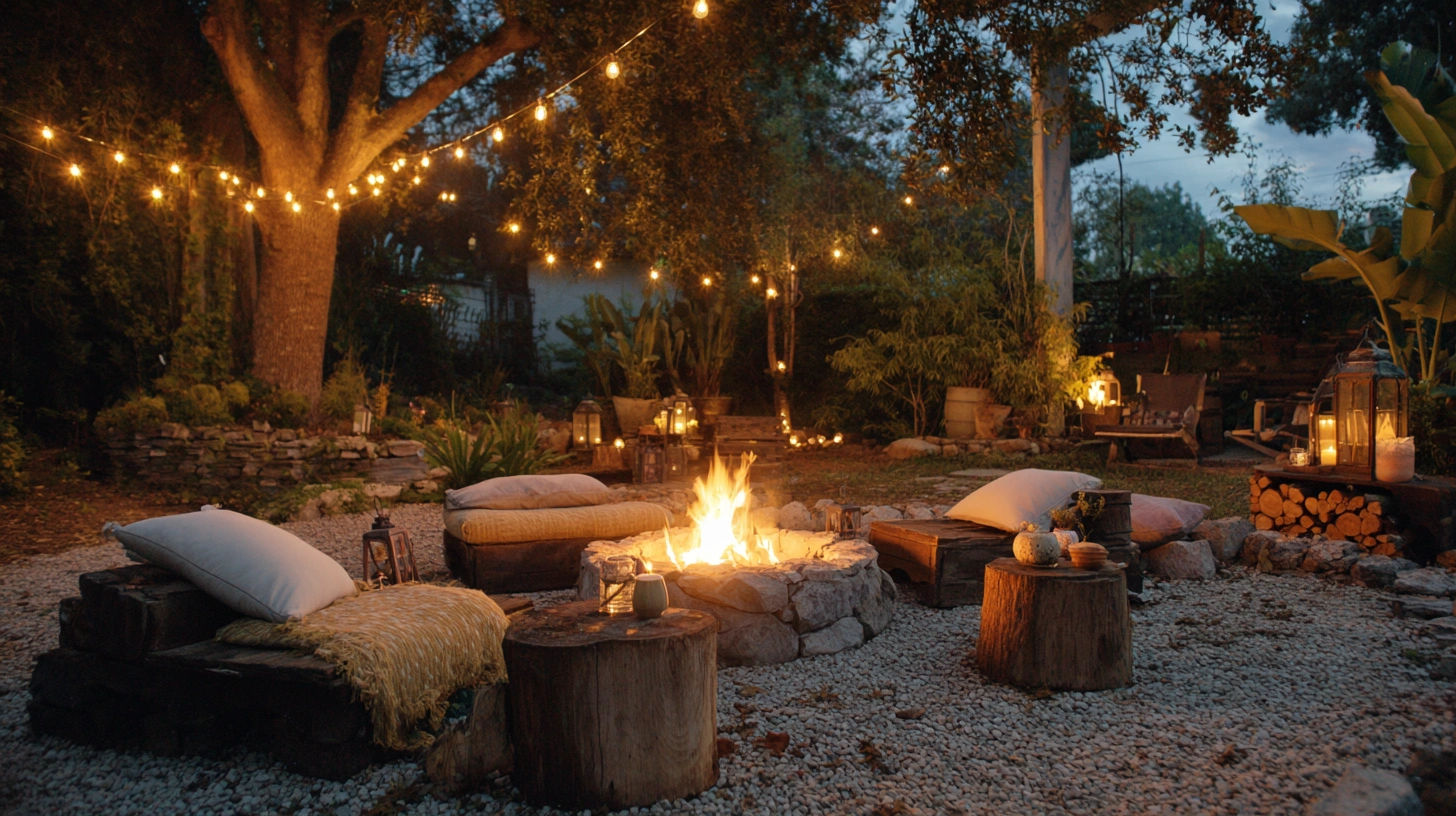
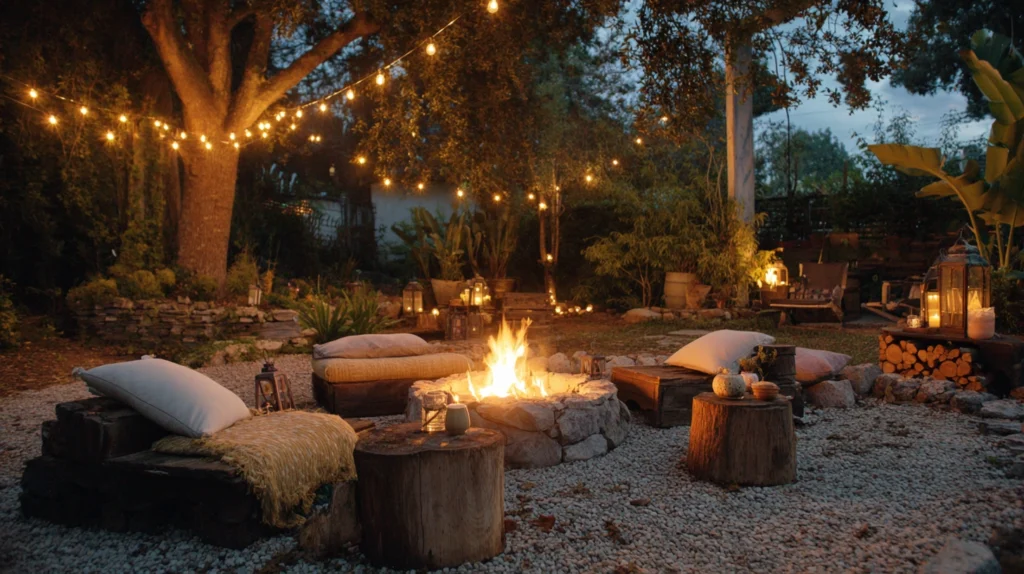
11. The Lantern and Log Seat Circle
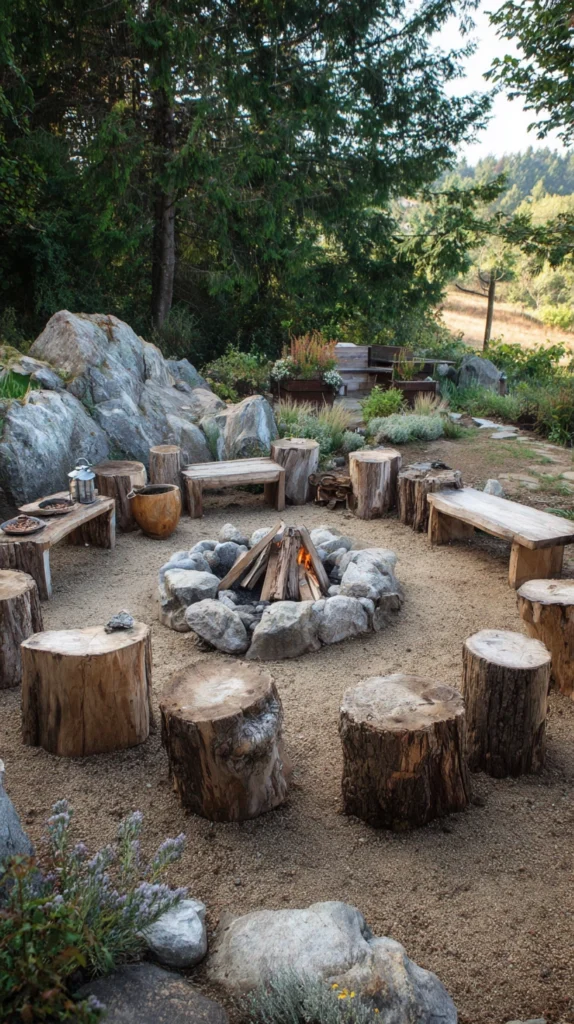
Budget: $50 – $160
Arrange short log rounds as seats in a circle around the fire pit — sourced from a tree surgeon, a timber yard, or cut from a fallen garden tree for almost nothing — and place a lantern on each one between the seating positions. The log seats are more comfortable than they appear, they eliminate the need for any furniture purchase, and the ring of lanterns around the fire gives the setup a campfire formality that folding chairs never quite manage.
Log rounds of a suitable sitting height (40–50 centimetres) cost $5–$15 each from a timber yard, or nothing if you have access to a fallen tree. Outdoor lanterns cost $8–$20 each. A candle inside each lantern ($1–$3 each) completes the setup for minimal outlay. Sand the top surface of each log round lightly so clothing does not catch on rough bark.
Style tip: Space the log seats evenly around the fire before anyone arrives and resist the temptation to add extra seating when more guests appear. A slightly crowded circle where people are close to the fire and close to each other is warmer, more intimate, and more enjoyable than a larger circle with comfortable spacing.
12. The Garden Cinema Fire Pit Combo
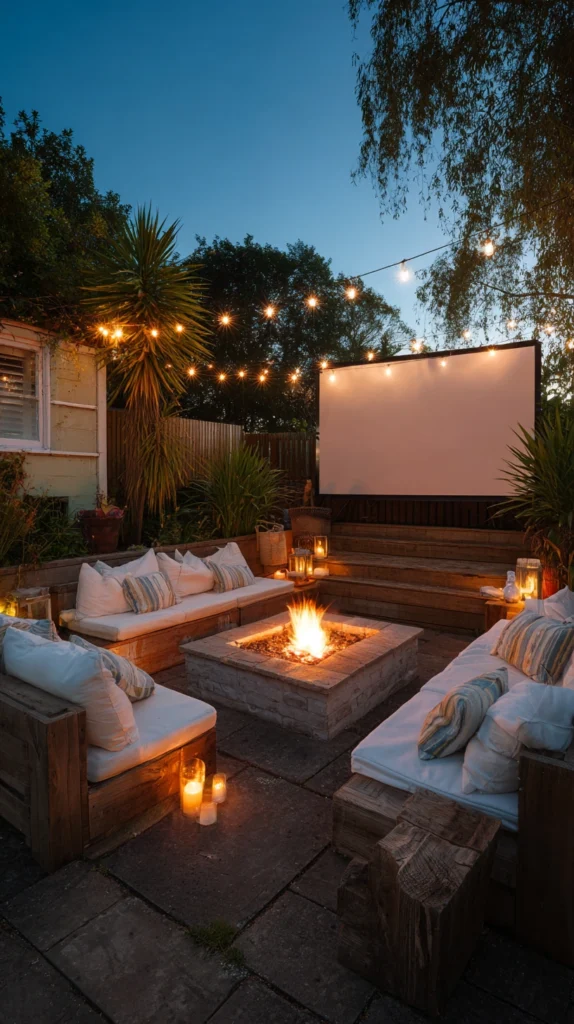
Budget: $120 – $500
Combine a fire pit with an outdoor projector screen — the fire at the back of the seating area, the screen at the front — and the backyard becomes two things at once: a cinema and a campfire. Guests face the film but feel the warmth behind them, drift toward the fire during slow scenes or the interval, and return to their seats without losing the thread. It is the most ambitious setup on this list and the one that generates the most conversation about doing it again.
A portable projector costs $80–$250. A freestanding or inflatable screen runs $60–$200. The fire pit itself is whatever suits the garden and the budget. The one technical requirement is positioning — the fire needs to be far enough behind the seating area that its light does not wash out the projected image, which means at least 3–4 metres of separation between the fire and the screen.
Style tip: Start the fire before the film rather than after. Guests who arrive to a fire already going settle into the space more quickly and the fire reaches its most photogenic and comfortable state — a steady, established burn rather than a tentative new flame — by the time the opening credits roll.
13. The Year-Round Wrapped-Up Setup

Budget: $70 – $250
Design the fire pit setup specifically for use beyond summer — a deeper fire bowl that holds heat longer, a stack of thick wool blankets in a weatherproof basket, a thermos station with hot drinks, and a windbreak of lattice panels or potted tall grasses on the exposed side of the seating area. A fire pit that is only comfortable in July and August is a seasonal novelty; one designed for October and November becomes a genuine extension of the living space for most of the year.
A windbreak lattice panel costs $20–$50. A weatherproof storage basket for blankets runs $30–$60. A simple thermos station — a tray with a flask of hot chocolate and a flask of coffee — costs whatever you choose to fill it with. Wool blankets thick enough for genuinely cold evenings run $20–$50 each and last for years with basic care.
Style tip: Light the fire thirty minutes before guests arrive rather than when they appear. An established fire on a cold evening — already glowing, already warm — is welcoming in a way that a fire being coaxed to life while guests stand around in their coats is emphatically not.
The success of any backyard fire pit setup comes down to two things: warmth that actually reaches the people sitting around it, and enough comfort that no one wants to go inside. Get those two things right — the right fire vessel for the space, enough seating close enough to the flame, and something warm to drink and something to eat — and the backyard does the rest.
Pick the setup that fits your space and your budget, get the fire going before anyone arrives, and let the evening find its own pace. A fire in the dark has a way of doing the entertaining for you.