14 Camp-Style Backyard Ideas for Kids That Make Every Day Feel Like an Adventure
14 Camp-Style Backyard Ideas for Kids That Make Every Day Feel Like an Adventure
There is a specific kind of childhood afternoon that parents remember long after the expensive toys are forgotten and the organised activities are a blur. It is the afternoon that happened outside, in a space that was just structured enough to ignite the imagination and just unstructured enough to let it run. A den made from sticks and an old sheet. A fire where marshmallows were burnt on purpose. A trail through the garden that felt genuinely wild to someone who was three feet tall.
The camp-style backyard does not require a forest or a field. It requires the specific intention of making the outdoor space feel like somewhere that belongs to the children who use it — somewhere with its own geography, its own activities, its own version of the world that is separate from the domestic interior of the house. A backyard designed for camp-style play is a backyard where children disappear for hours and emerge with stories.
Each idea below is a specific element of the camp-style backyard. Each includes what you will need, what it will cost, and a practical tip to make it work as well as the adventure it is reaching for.
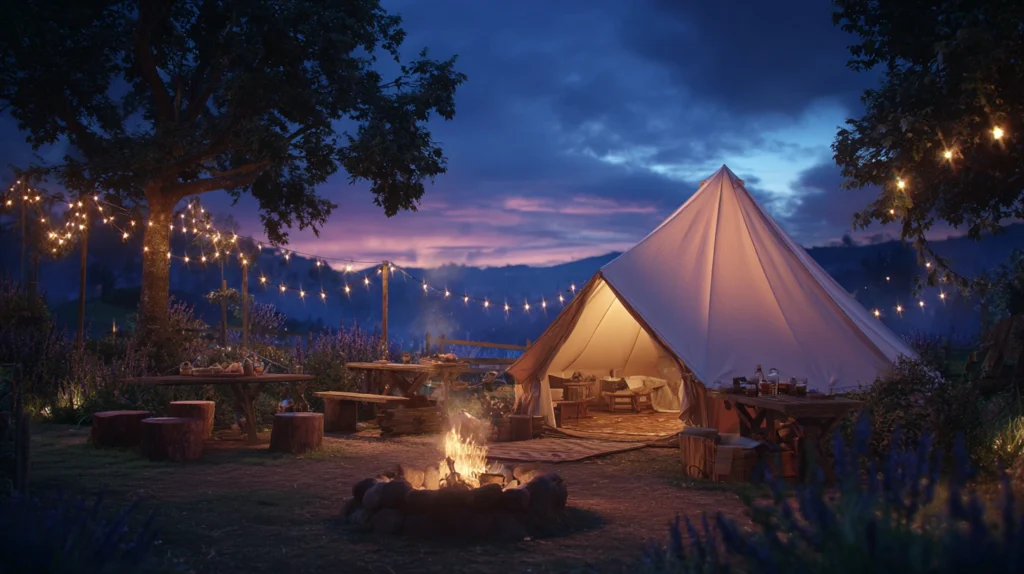
1. The Bell Tent Base Camp

Budget: $150 – $600
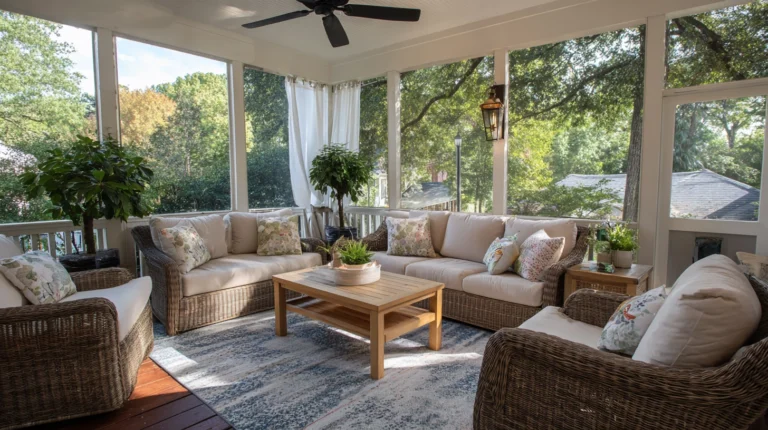
A bell tent pitched in the backyard — left up for the full summer rather than erected and dismantled for individual occasions — creates the most immediately transformative camp-style element available to any outdoor space. The bell tent is the base camp around which everything else in the camp backyard is organised, and its permanent presence through the summer communicates to the children who use it that the garden is genuinely their territory for the season.
A 4-metre bell tent costs $150–$400. A 5-metre version runs $250–$600. Pitch on a flat, well-drained area of the garden rather than over a low point that collects water — a tent pitched on wet ground becomes damp from below within days regardless of its weather resistance. Furnish the interior with sleeping bags, cushions, a battery lantern, and a small rug — the furnished tent is a room; the empty tent is a tent.
Style tip: Hang a string of battery-powered fairy lights from the central pole inside the bell tent. The lit interior visible from the house on a summer evening is the most inviting and most specifically camp-like image a backyard can produce, and the lights cost $8–$15 and transform the tent from a canvas structure into the season’s most atmospheric room.
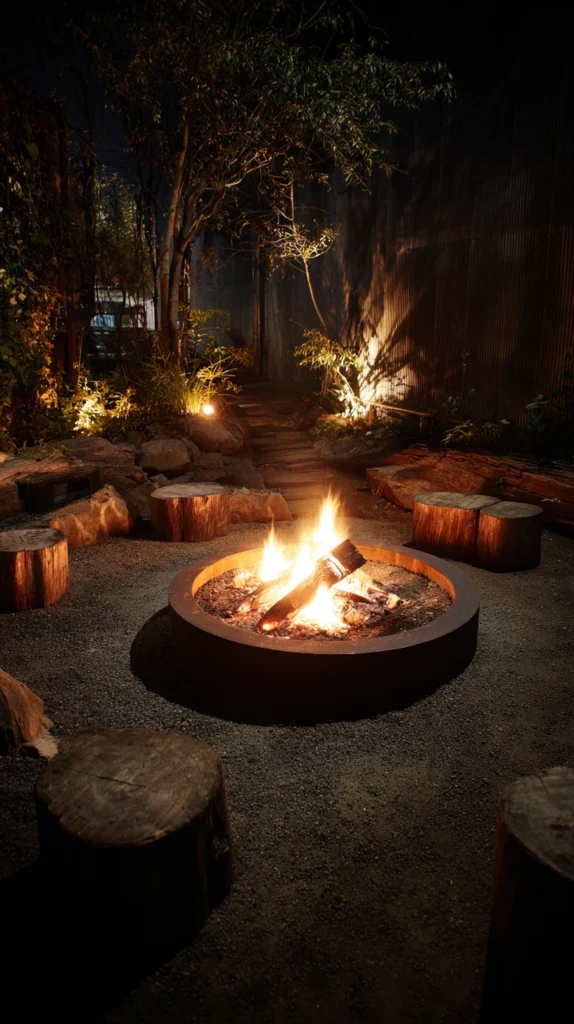
2. The Fire Pit Cooking Station
Budget: $60 – $300
A supervised fire pit — positioned safely away from structures and overhanging branches, with a proper spark guard, long-handled tools, and a dedicated s’mores kit — teaches children the specific, valuable, and increasingly rare skill of making and managing fire while providing the camp-style cooking experience that no kitchen activity approaches in its combination of excitement and genuine result. A marshmallow toasted on a stick over a real fire is not the same food as a marshmallow from a bag.
A portable steel fire pit costs $40–$100. A spark guard mesh runs $15–$25. A set of long marshmallow skewers costs $8–$15. A s’mores kit — marshmallows, chocolate, graham crackers — costs $8–$15. Always supervise children at the fire pit and establish clear rules about the fire before it is lit — the rules communicated before the fire is lit are the rules that are followed when the fire is burning.
Style tip: Create a designated s’mores preparation station beside the fire pit — a small table or a log round with the ingredients, the skewers, and a set of camp plates arranged before the fire is lit. The prepared station communicates that fire cooking is an activity with its own organisation rather than a spontaneous event, and the organisational quality of the station makes the children more serious and more careful participants in the activity.
3. The Survival Skills Trail

Budget: $10 – $60
A nature trail laid through the garden — a series of small numbered markers attached to plants, trees, fence posts, and garden features, each with a corresponding activity card at a base camp station — creates a structured outdoor activity that can be designed to suit any age from four to twelve. Activities might include identifying a plant by its smell, finding an insect under a stone, listening for a specific bird call, or identifying a tree species by its leaf.
Numbered wooden pegs cost $5–$15 for a set. Laminated activity cards printed at home cost $2–$5 for a full set. A magnifying glass for the nature investigation station runs $5–$15. The trail requires a one-time setup and can be refreshed each summer with new activities as the children’s skills and knowledge develop. A trail designed for a four-year-old needs replacing by the time the child is seven.
Style tip: Include at least one activity on the trail that requires the child to make something — a leaf rubbing, a stick bundle tied with twine, a small cairn of pebbles — rather than only activities that require observation or identification. The making activity produces a physical result that the child carries back to the base camp and that communicates the trail as genuinely productive rather than merely instructional.
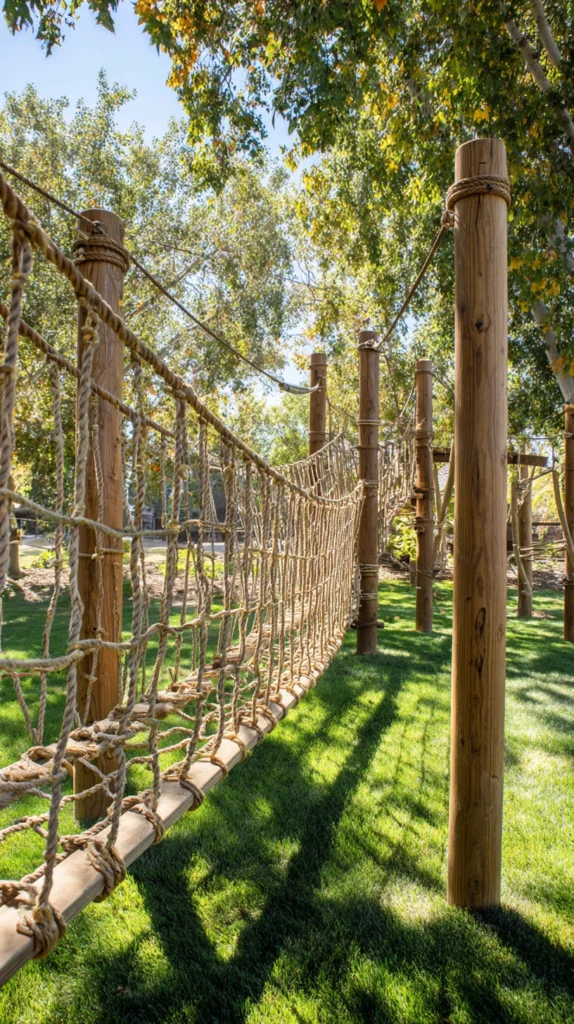
4. The Rope Course and Tree Obstacle
Budget: $80 – $500
A simple rope course — a balance rope between two trees or posts, a scramble net fixed to a fence, a rope swing from a strong branch, a climbing rope knotted at intervals — creates the camp’s physical activity zone. Children who have access to rope climbing equipment in a garden context develop upper body strength, spatial awareness, and physical confidence in a way that structured sports activities rarely replicate because the rope course is governed by the child’s own assessment of their ability rather than by an instructor’s programme.
A balance rope between two trees costs $15–$30 in rope and fixings. A scramble net for fence mounting runs $40–$120. A rope swing from a branch costs $15–$40 for a quality rope with a wooden seat. A climbing rope with knots costs $20–$50. Check all rope fixings monthly through the summer — rope that has been exposed to weather and use degrades at the fixing points faster than along its length, and a rope that looks fine may have a compromised attachment.
Style tip: Install the rope course elements at a height appropriate to the youngest child who will use the garden rather than the oldest. A rope swing hung for a ten-year-old is inaccessible and potentially dangerous for a five-year-old who attempts it regardless. The lowest common denominator height rule keeps the rope course accessible to all children while remaining engaging for older ones who simply cover the equipment more quickly.
5. The Mud Kitchen

Budget: $30 – $150
A mud kitchen — a small outdoor play kitchen constructed from reclaimed timber, with a hob area, a sink (a metal basin), shelves for containers and tools, and access to a sand and soil mix for the cooking ingredients — is the camp-style play element that produces the longest periods of uninterrupted independent play of anything in the outdoor space. Children who have access to a mud kitchen play in it for hours, and the mess is the point rather than the problem.
A DIY mud kitchen from reclaimed timber, an old metal basin, and basic carpentry costs $30–$80 in materials. A pre-made version runs $80–$200. Position on a surface that drains well and is easy to clean — pea gravel, bark chips, or a paved area — rather than directly on grass, which becomes a mud crater within the first week of regular mud kitchen use.
Style tip: Stock the mud kitchen with real kitchen tools — old pots and pans, metal spoons, a sieve, a ladle — rather than toy kitchen equipment. Real tools are more satisfying to use, more durable, and more camp-like than plastic play versions. A charity shop or a car boot sale provides a complete mud kitchen tool set for $5–$10.
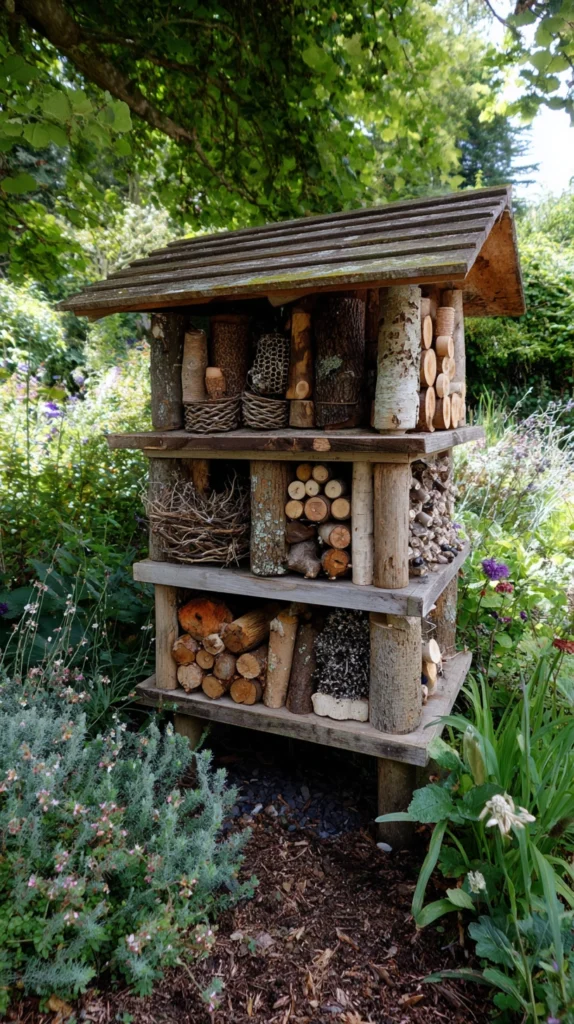
6. The Bug Hotel and Nature Station
Budget: $15 – $80
A bug hotel — a structured stack of natural materials (hollow bamboo stems, pine cones, straw, dried leaves, moss, bark) housed in a timber frame and positioned in a sunny, sheltered spot — creates a nature observation station that is both an ecological contribution to the garden and a genuinely fascinating camp activity. Children who have installed and maintained a bug hotel develop a specific and sustained interest in the invertebrate world that no classroom activity produces.
A DIY bug hotel frame from reclaimed timber costs $10–$30. Natural filling materials — bamboo stems, pine cones, dried straw — cost nothing if gathered from the garden and surrounding environment. A magnifying glass and a nature journal for recording observations cost $5–$20. Position the bug hotel in a south-facing position at 1–1.5 metres from the ground — the height and orientation that attract the greatest diversity of beneficial insects.
Style tip: Build the bug hotel with the children rather than for them. A bug hotel that the children helped to construct — gathering the materials, packing the tubes, positioning the frame — is a bug hotel they feel ownership of and will return to observe and maintain throughout the summer. One that appears ready-made in the garden is a garden feature they will notice and eventually ignore.
7. The Camp Kitchen and Storage Box
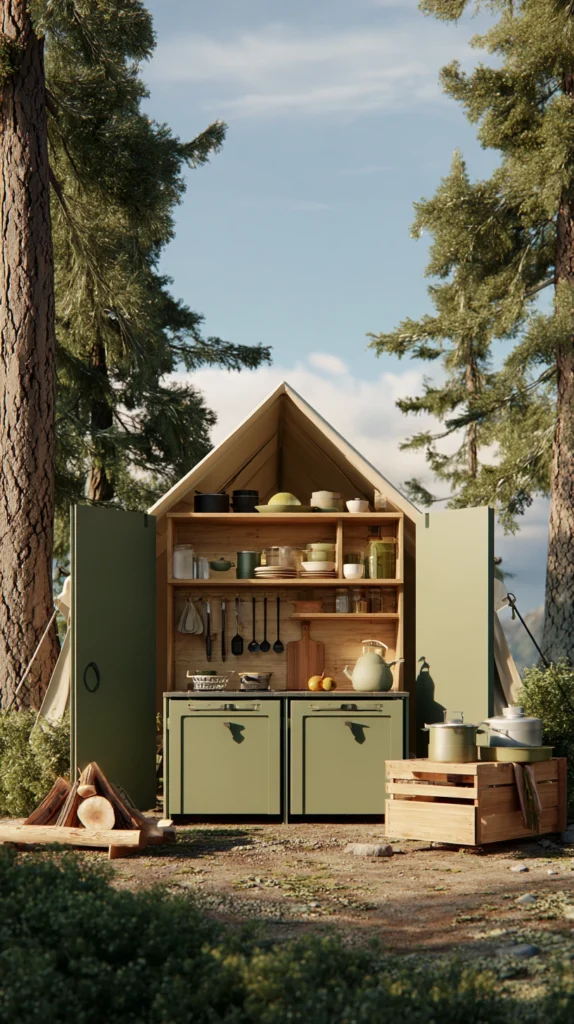
Budget: $40 – $200
A dedicated camp kitchen storage box — a weatherproof chest or crate containing the camp’s cooking supplies, activity materials, and nature tools — positioned beside the fire pit or the bell tent creates the organisational infrastructure that makes camp-style play sustainable rather than occasional. Children who know where the camp supplies are kept are children who can initiate camp activities independently rather than requiring adult setup each time.
A weatherproof storage box of 80-litre capacity costs $30–$80. Stock it with: a camp cooking set, a fire starting kit (for adult use), a nature identification guide, a first aid kit, a torch, a length of paracord, and a packet of activity cards. The box contents are the camp’s curriculum — the tools available within it determine the activities possible from it.
Style tip: Involve the children in deciding what goes in the camp box at the beginning of each summer and in reviewing its contents at the end. The annual box review is an activity in itself — deciding what was used and what was not, what needs replacing and what new tools should be added — and it communicates to the children that the camp is their project to manage rather than a service the adults provide.
8. The Stargazing Station

Budget: $20 – $100
A designated stargazing station — a blanket rolled and stored in a weatherproof basket, a printed star chart laminated for outdoor use, a simple 30-millimetre refractor telescope or a pair of binoculars, and a flat area of the garden away from the house lights where the sky is darkest — creates the camp’s most specific night activity and the one that extends the garden’s usability most naturally into the evening hours that summer makes available.
A laminated printable star chart costs $2–$5 at a print shop. A basic refractor telescope costs $30–$80. A pair of binoculars suitable for stargazing runs $20–$60. A waterproof outdoor blanket costs $20–$50. The stargazing station should be positioned as far from the house lights as the garden allows — even 5–10 metres from a lit window makes a visible difference to the darkness of the sky above the observer.
Style tip: Check the moon phase before planning a stargazing evening. A full moon is beautiful but bright enough to wash out all but the most prominent stars — the quarter moon or new moon nights provide the darkest sky and the most stars. Teaching children to check the lunar calendar and plan stargazing activities around the moon phase is a genuinely useful observational skill that connects the camp activity to genuine astronomical awareness.
9. The Den Building Zone
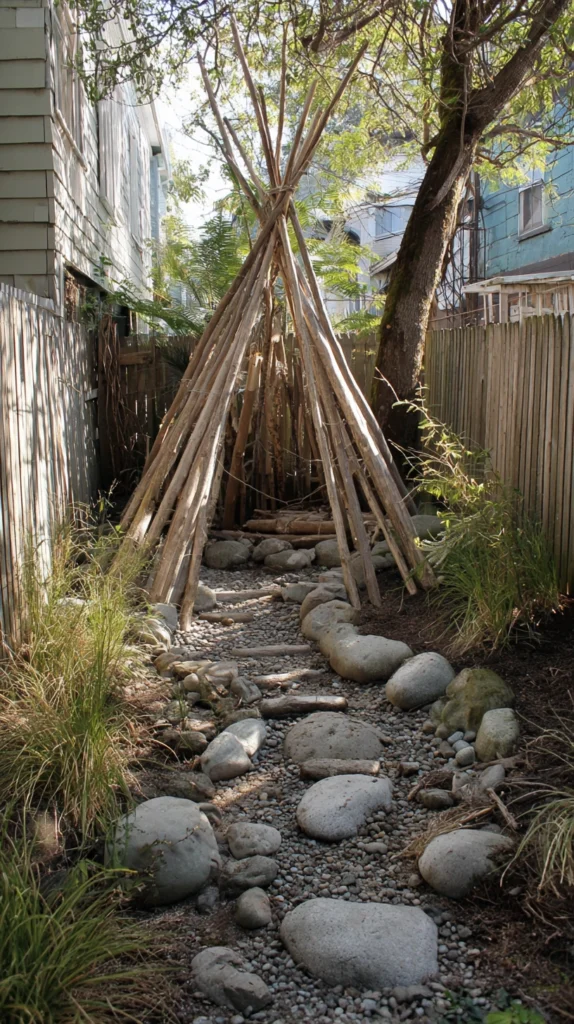
Budget: $15 – $60
A designated den building zone — a section of the garden stocked with the raw materials of den construction: bamboo poles, lengths of rope, old sheets and tarps, bungee cords, wooden pegs, and a set of basic knot-tying instructions — creates the most self-directed and most architecturally educational of all camp-style activities. Children who build dens develop spatial reasoning, structural problem solving, and the specific satisfaction of creating a sheltered space from unformed materials.
Bamboo poles of 180 centimetres cost $1–$3 each. A bundle of ten provides the structural basis for multiple den configurations. Lengths of natural rope cost $3–$8 per reel. Old bedsheets and tarps cost nothing if already owned. A laminated knot-tying guide costs $2–$5 to print. Store the den materials in a designated corner of the garden rather than in the shed — materials that are accessible without adult assistance are materials that are used for independent play.
Style tip: Resist the impulse to help with or improve the children’s den structure. The den that lists to one side, that has gaps in its roof, that required six attempts at the corner knot before it held — that den belongs to the child who built it. The perfect den built with adult assistance belongs to the adult. The imperfect den built independently is the camp activity; the perfect den is the garden feature.
10. The Camp Garden Veg Patch
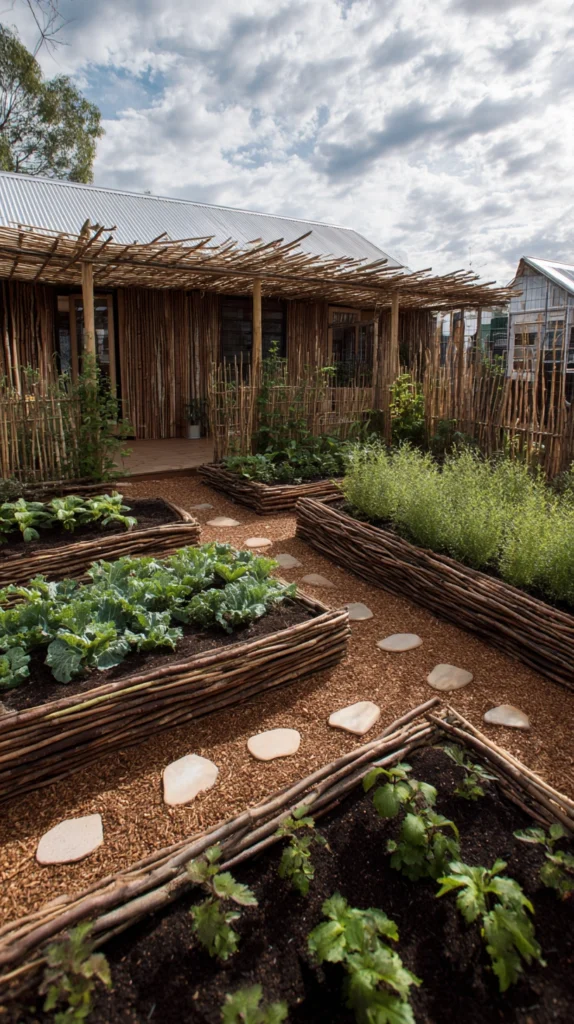
Budget: $30 – $150
A small raised bed or container garden designated as the children’s camp garden — planted with fast-growing, reliably productive vegetables and fruits that produce results quickly enough to sustain a child’s interest — is the camp activity that most directly connects outdoor play to food and to the understanding that things which are eaten were once growing in the ground. Cherry tomatoes, strawberries, French beans, and radishes all produce results within weeks and in quantities that children can harvest, prepare, and eat independently.
A raised bed of 90 by 60 centimetres costs $30–$60. Child-height garden tools run $10–$25 for a set. Cherry tomato plants cost $3–$6 each. Strawberry plants run $2–$4 each. Radish and lettuce seeds cost $2–$3 per packet. The camp veg patch requires a child-accessible water source — a watering can beside the bed, replenished from an outdoor tap — and the daily routine of watering is the activity that keeps the child’s connection to the garden consistent through the growing season.
Style tip: Allow the child to choose at least one plant for their camp garden rather than specifying the entire planting. The plant they chose — even if it is an unusual, difficult, or impractical choice — is the plant they will water every day. The plants chosen for them are the plants that receive attention when reminded. The owned plant is always the most consistently maintained.
11. The Outdoor Cinema Night
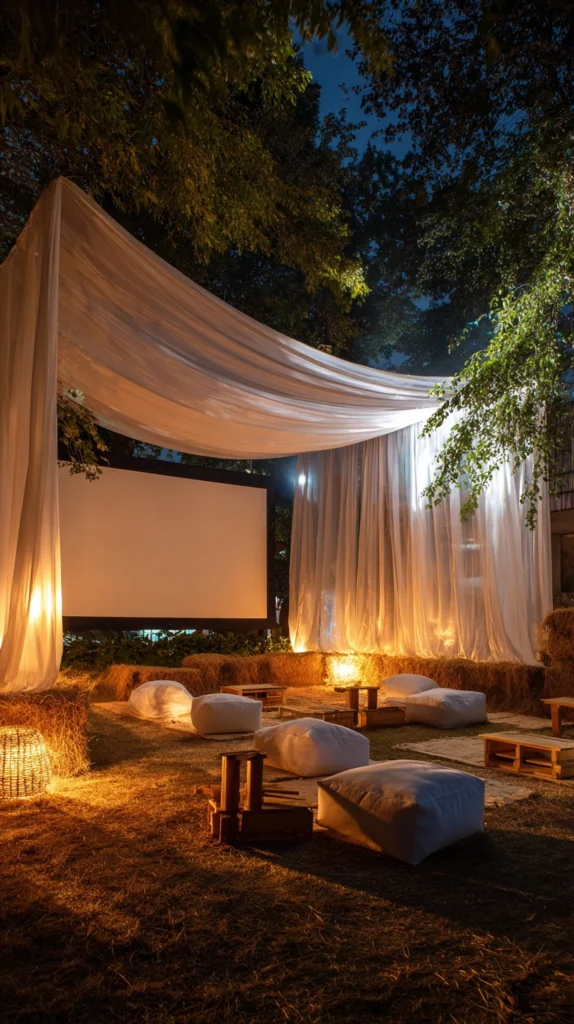
Budget: $60 – $250
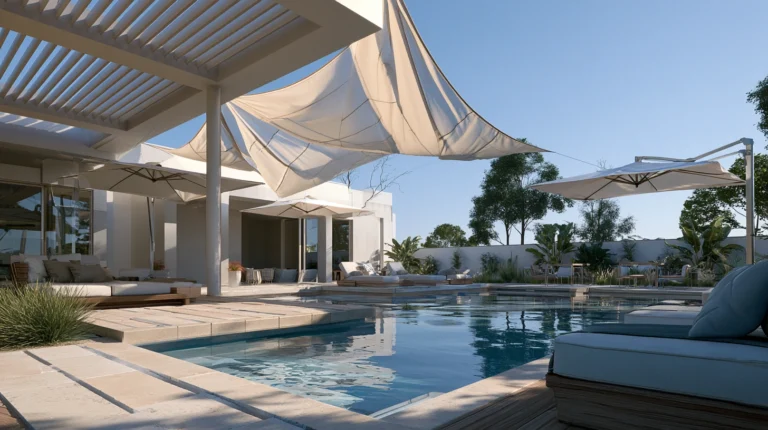
An outdoor cinema in the camp backyard — a projector pointed at a white sheet stretched between two posts, with sleeping bags and camp chairs on the grass, a popcorn station beside the fire pit, and a camp blanket for each viewer — creates the most complete camp evening activity available to a domestic garden. The outdoor cinema is the event that ends the summer day properly, that children remember, and that requires enough organisation to feel like a genuine occasion rather than simply watching a film.
A portable projector costs $80–$250. A white sheet for the screen costs $5–$20. A popcorn maker for outdoor use runs $20–$40. Camp chairs cost $15–$35 each. Start the film after full dark rather than at dusk — a projected image is genuinely vivid only when the ambient light is gone, and starting at dusk produces a washed-out picture for the first twenty minutes that undermines the cinema experience before it has begun.
Style tip: Let the children choose the film for the outdoor cinema night from a shortlist agreed in advance. The film chosen by the children is the film they watch with full attention; one chosen for them is the film they drift away from to look at the stars. The shortlist ensures the choice is appropriate; the choice within the shortlist ensures the engagement is genuine.
12. The Water Play Zone
Budget: $30 – $150
A dedicated water play zone — a paddling pool, a water table, a sprinkler on a timer, or a simple water wall of funnels, tubes, and guttering fixed to a fence through which water flows and is redirected — creates the camp’s cooling and most exuberantly played activity for hot summer days. Water play needs no instruction and no rules — children who have access to water in an outdoor context will play with it for hours in ways that no organised activity matches for duration and for genuine physical joy.
A paddling pool costs $20–$60. A water table runs $30–$80. A water wall built from plastic funnels, lengths of guttering, and PVC pipe attached to a fence costs $15–$40 in materials. Lay a waterproof mat or a section of artificial grass beneath the water play zone — bare soil beneath a water play area becomes a mud problem within the first session and remains a mud problem for the rest of the summer.
Style tip: Store the water play equipment in the camp storage box at the end of each day rather than leaving it in place. A paddling pool left full of water between uses develops algae within two to three days in warm weather and becomes unpleasant and potentially unsafe. A pool emptied, dried, and stored each evening is a pool that is fresh and inviting the following morning.
13. The Camp Craft Station
Budget: $20 – $80
A camp craft station — a low outdoor table with weather-resistant craft materials: natural dyes for fabric printing, beeswax for candle rolling, leather cord for bracelet making, clay for modelling, seed packets for pressing and labelling — creates a quieter camp activity zone for the children who need a rest from physical play without going inside. The craft station produces objects that can be used around the camp — the bracelet worn, the candle burned at the fire pit, the seed pressed and labelled in the nature journal.
A low folding outdoor table costs $20–$50. Beeswax sheets for candle rolling cost $8–$15 for a pack. Natural clay runs $8–$15 per bag. Leather cord for bracelet making costs $5–$10. A set of permanent markers for labelling nature finds runs $3–$8. Keep craft materials that deteriorate in damp or heat — natural clay, beeswax, natural dyes — in the weatherproof camp box rather than leaving them on the outdoor table between sessions.
Style tip: Connect the craft activity to the camp context rather than providing general craft materials. Candles that are burned at the fire pit, bracelets made from cord that is also used in den building, clay bowls that are used for collecting nature finds — the craft that produces a camp-specific object is the craft that children return to make again. The general craft activity is done once; the camp-specific craft becomes part of the camp’s material culture.
14. The Night Walk Torch Trail
Budget: $15 – $60
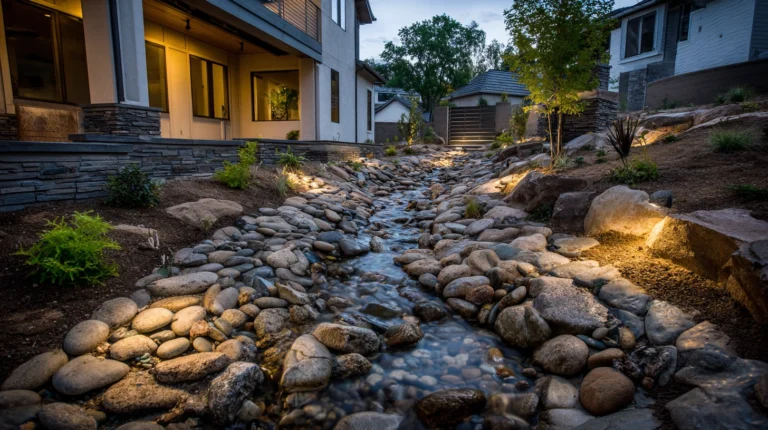
A torch trail laid through the garden for night exploration — a series of reflective markers, glow-in-the-dark stones, or small LED lights marking a route that visits the bug hotel, the pond, the vegetable garden, and the den — creates the camp’s most specifically adventurous evening activity. The garden that is explored in daylight is the familiar garden; the same garden explored by torchlight is a genuinely different environment with its own inhabitants, its own sounds, and its own quality of mild, manageable wildness.
Glow-in-the-dark garden stakes cost $8–$20 for a set of ten. Reflective tape for markers runs $3–$8 per roll. A head torch for each child costs $8–$20. A night walk identification guide — moths, nocturnal insects, bats, owl calls — can be printed at home and laminated for $2–$5. Brief the children on what to look and listen for before the torch trail begins — the child who knows to listen for a tawny owl or to look for a moth at the light source is the child who finds the garden genuinely wild.
Style tip: Do the night walk trail yourself before taking the children through it — at the same time of evening, with the same torch — to discover what is actually visible and interesting along the route on that particular night. A night walk that visits three genuinely interesting things is better than a route that visits ten unremarkable ones, and the prior reconnaissance allows you to brief the children on what they are going to find rather than hoping they find it independently.
The camp-style backyard is the one that gives children the specific gift of a summer that happened outside — a summer of dens built and fires made and vegetables grown and stars watched and water played in and bugs found and torches carried through the dark.
These are not educational outcomes or developmental milestones. They are simply the experiences that summer in a garden can provide and that children will remember when everything else about the summer has faded.
Make the space theirs, stock it with the materials of genuine adventure, and then step back. The best camp is always the one the children ran themselves.