14 Backyard Shade Ideas to Beat the Heat
14 Backyard Shade Ideas to Beat the Heat
There is a version of summer that happens entirely in the shade. Not inside, not in front of a fan, but genuinely outside — in a chair, with a drink, in the particular comfort of air that moves freely but carries no direct heat. It is one of the best versions of summer available and also one of the most underrated, largely because most backyards make no provision for it whatsoever.
A lawn in full sun from ten in the morning until seven in the evening is a beautiful thing to look at and an unpleasant thing to sit in. The solution is not to go inside. It is to create shade — not incidentally, not by hoping a tree will eventually grow tall enough, but deliberately and in the right place, at the right time of day, for the people who actually use the space.
Each idea below includes what you will need, what it will cost, and a practical tip to make the shade work as well as the idea deserves — through the long afternoons and the late evenings when the garden is most worth being in.
1. The Classic Market Umbrella
Budget: $40 – $300
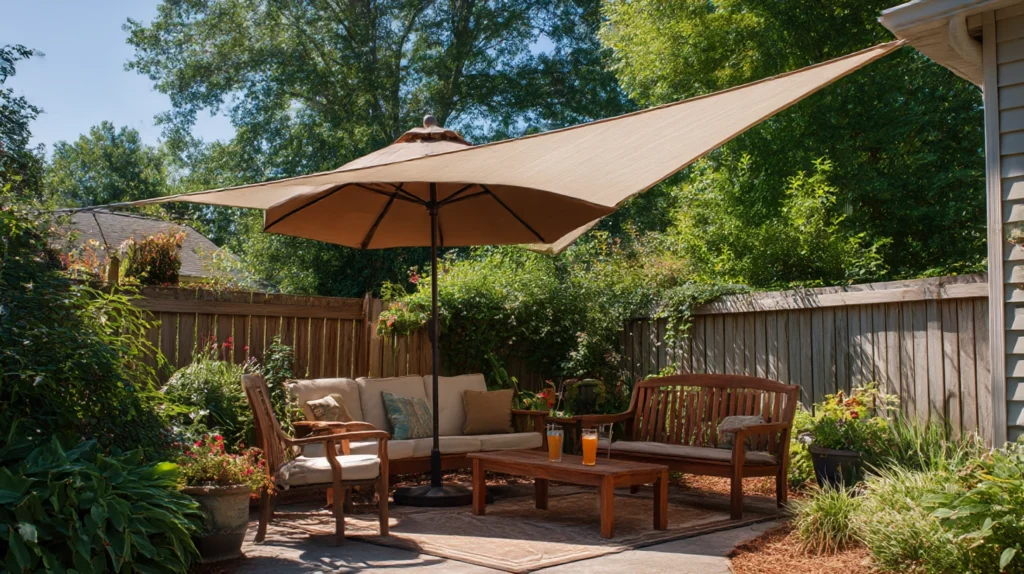
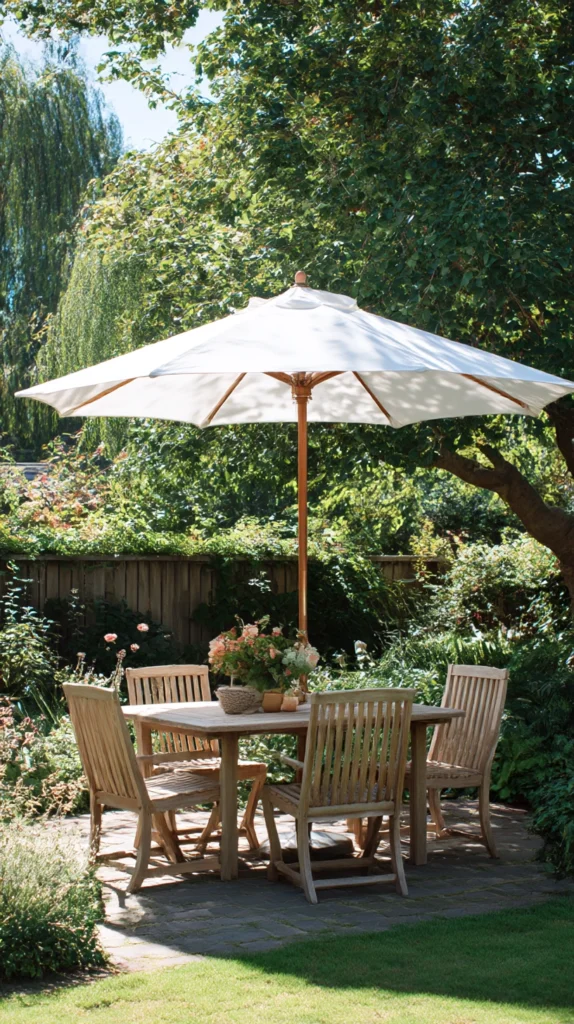
A large market umbrella — 2.5 to 3 metres in diameter — positioned over the primary outdoor seating or dining area is the fastest and most versatile shade solution available to any backyard. It requires no installation, no permanent structure, and no commitment beyond the purchase, and a quality umbrella in the right position makes a genuinely shaded outdoor dining table possible from midmorning through the hottest part of the afternoon.
A basic polyester market umbrella costs $40–$80. A UV-resistant olefin or solution-dyed acrylic canvas version runs $100–$250. A weighted base of at least 25 kilograms ($30–$80) is essential — an umbrella that blows over in wind is a hazard rather than a shade solution. Tilt the umbrella toward the direction of the sun rather than keeping it vertical — a tilted umbrella covers the seating area more effectively during the low-angle sun of morning and late afternoon than a perfectly upright one.
Style tip: Choose an umbrella one size larger than the table requires. A 2.5-metre umbrella over a 1.8-metre table provides shade that extends beyond the table edge and covers seated guests whose chairs are pulled back from the table — the position most people actually sit in when not actively eating. An umbrella that covers only the table surface provides no shade to the people around it.
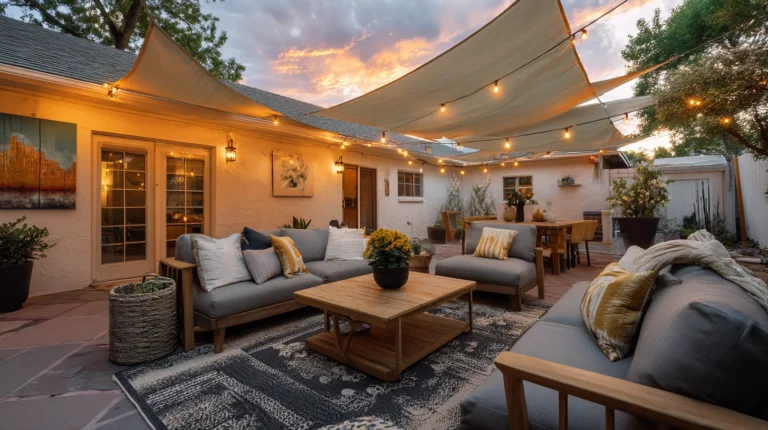
2. The Sail Shade Canopy
Budget: $30 – $200
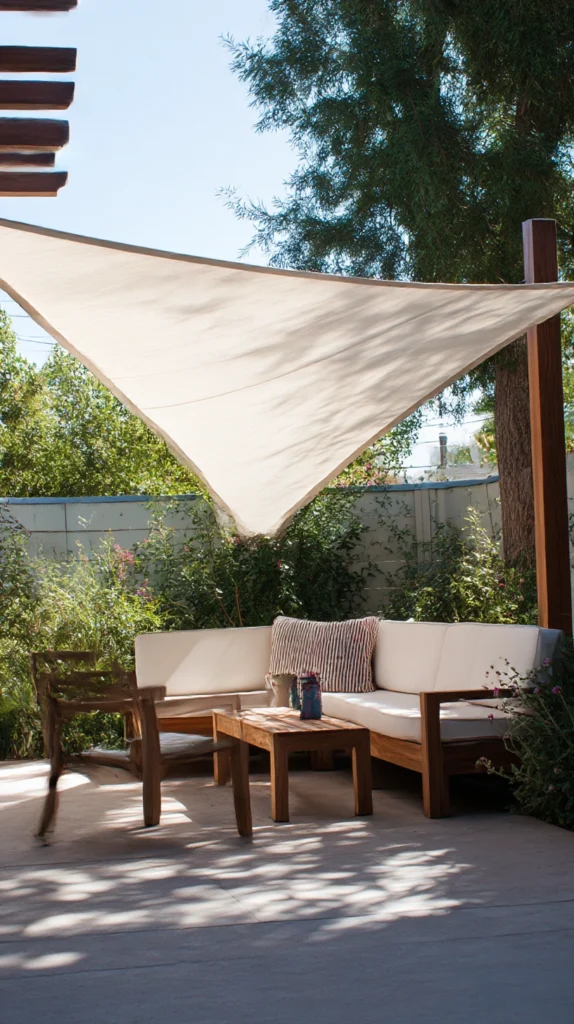
A tensioned shade sail — a triangular or rectangular panel of UV-blocking fabric stretched between three or four anchor points — provides fixed shade over a defined area of the backyard without the visual bulk of a pergola or the maintenance requirements of an umbrella. Shade sails filter rather than block the sun, which means the space beneath them remains bright and pleasant while the direct heat of the sun is significantly reduced.
A triangular shade sail of 3.6 metres per side costs $30–$80. A rectangular version at 3 by 4 metres runs $50–$150. Stainless steel anchor hardware — D-rings, turnbuckles, and fixing bolts — costs $20–$40 for a full set. Fix the sail to existing structures where possible — fence posts, house walls, a garden shed — rather than installing dedicated posts, which adds $40–$100 in materials and considerably more in installation effort.
Style tip: Angle the sail so it is higher on one side than the other rather than tensioning it horizontally. A horizontal sail collects water in its centre during rain and the accumulated weight strains the fixing points and deforms the fabric permanently. An angled sail sheds water to the lower edge and maintains the tension that keeps it taut and effective.
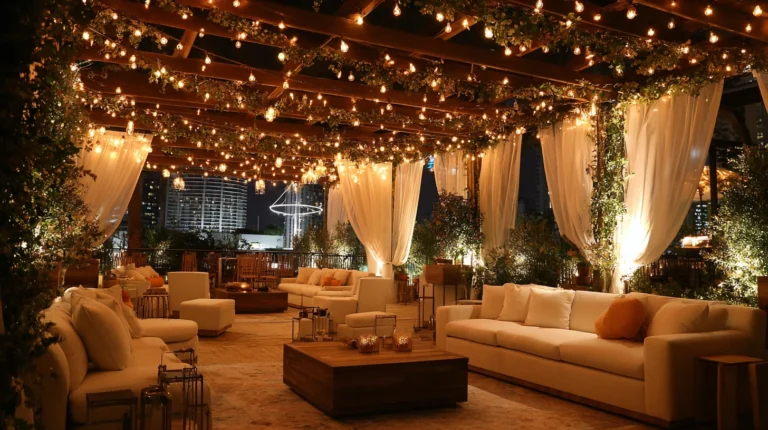
3. The Pergola with Climbing Plants
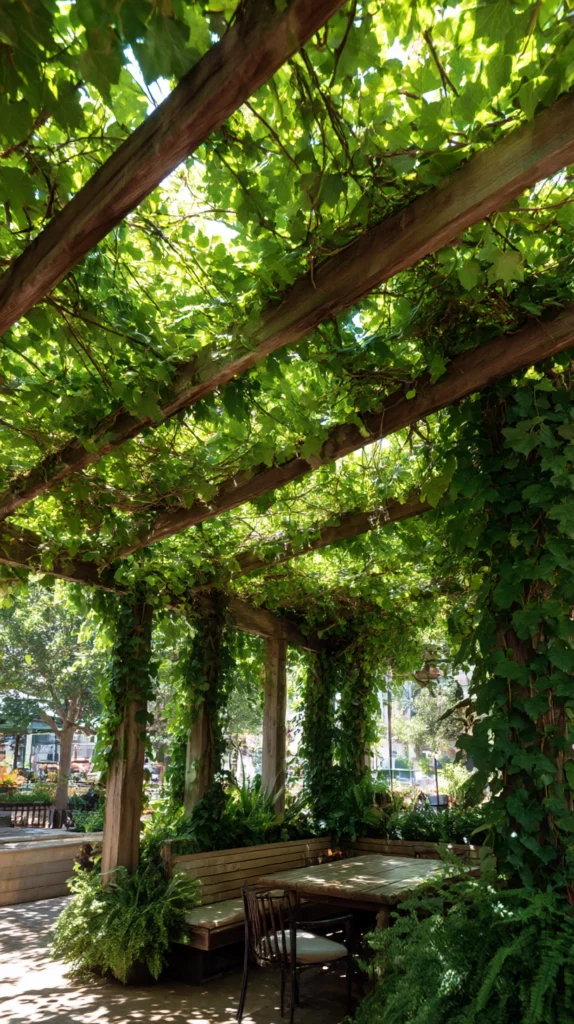
Budget: $200 – $1,500
A timber or aluminium pergola over the primary outdoor seating area — planted at each corner with a climbing plant trained across the roof beams — creates shade that improves with every growing season and eventually becomes a living canopy of foliage and flowers that no manufactured shade solution can replicate. A wisteria-covered pergola in June, a rose-covered pergola in July, a vine-covered pergola in August: each is a different and genuinely beautiful outdoor room.
A basic freestanding timber pergola kit in a 3 by 3 metre size costs $200–$500. An aluminium version with powder-coated finish runs $400–$1,000. Climbing plants cost $15–$40 each — one per post, trained upward and then outward across the beams. A grapevine is the most practical choice for pergola coverage: it grows rapidly, provides dense summer shade, drops its leaves in autumn to admit winter sun, and produces fruit as a secondary reward.
Style tip: Fix horizontal training wires across the top of the pergola beams at 30-centimetre intervals before planting the climbers. Without wires, the climbing plants have nothing to grip on the flat beam surfaces and grow straight up rather than across the roof. The wires are the invisible infrastructure that determines whether the pergola becomes a shaded canopy or a structure with four climbing plants on its corner posts.
4. The Retractable Awning
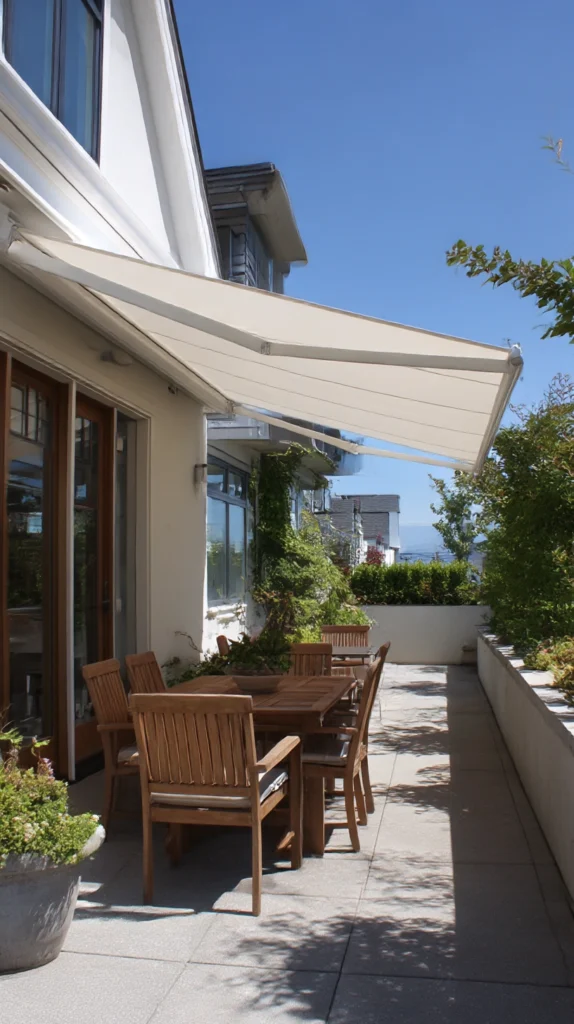
Budget: $300 – $2,000
A retractable awning fixed to the house wall above a patio door or window provides on-demand shade that can be extended on hot days and retracted when the sun is not a problem, when the space is not in use, or when wind makes an extended canopy unsafe. It is the most controllable shade solution on this list — shade precisely where and when it is needed, absent when it is not.
A manual retractable awning of 3 metres in width costs $300–$600. A motorised version with a remote control or a sun sensor runs $600–$2,000. Professional installation adds $100–$300 to the total. Fix the wall bracket into the structural masonry rather than into render or cladding — an awning in wind creates significant leverage on its fixing points and a fixing that works perfectly in calm conditions can pull free in the first significant gust if it is not anchored into solid material.
Style tip: Choose an awning fabric in a mid-tone colour rather than white or very pale. White and pale fabrics allow more UV light through than their appearance suggests — the shade they provide is visual rather than full UV protection — and they show dirt and mildew from the underside within a single season. A mid-tone solid colour in solution-dyed acrylic provides better UV blocking and maintains its appearance significantly longer.
5. The Shade Tree Planting
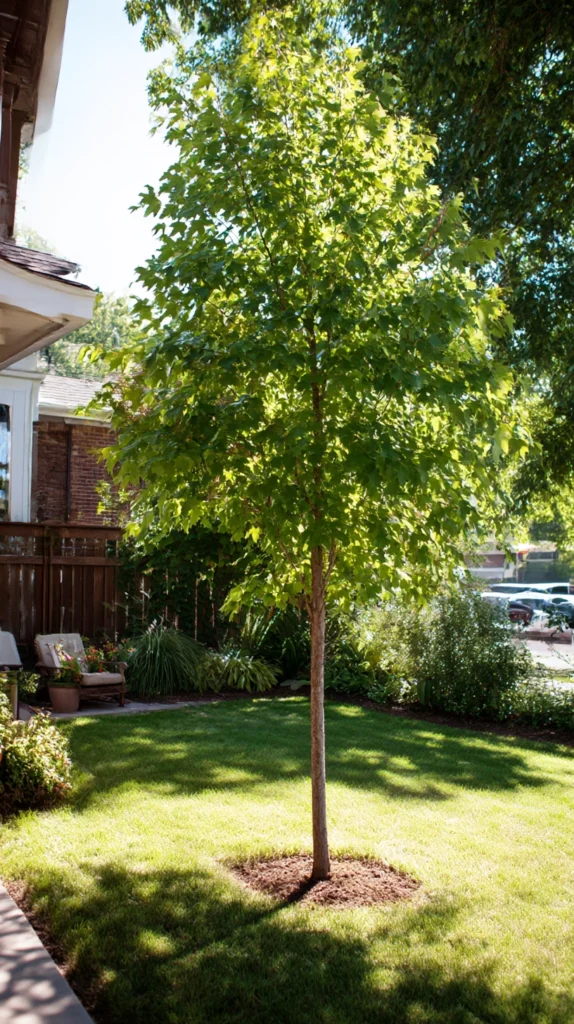
Budget: $20 – $200
Planting a tree in the right position is the only shade solution on this list that gets better every year rather than staying the same or gradually deteriorating. A tree planted on the western side of the primary seating area — where the afternoon sun enters — will provide meaningful shade within three to five years for a fast-growing species and within eight to ten for a slower one. It is the most patient shade solution and the most rewarding.
A young tree in a 10-litre pot costs $20–$60. Fast-growing shade trees — silver birch, rowan, amelanchier — reach a useful shade-providing height within four to five years and cost $30–$80 for a 1.5-metre specimen. Slower-growing but more substantial options — oak, hornbeam, field maple — cost $25–$60 and take longer but produce considerably more shade at maturity. Stake the tree for its first two years with a short stake at 45 degrees to the trunk rather than a tall upright one — the movement a short stake allows builds the trunk strength the tree needs to stand unaided.
Style tip: Plant the tree no closer than 3 metres to any structure — house wall, fence, shed — and research the eventual root spread of the chosen species before planting. A tree planted too close to a structure creates root and branch problems within ten to fifteen years that the shade it provides in the intervening period does not compensate for. The right position for the tree is more important than the species, the size at planting, or any other single decision.
6. The Bamboo Screen Shade Wall
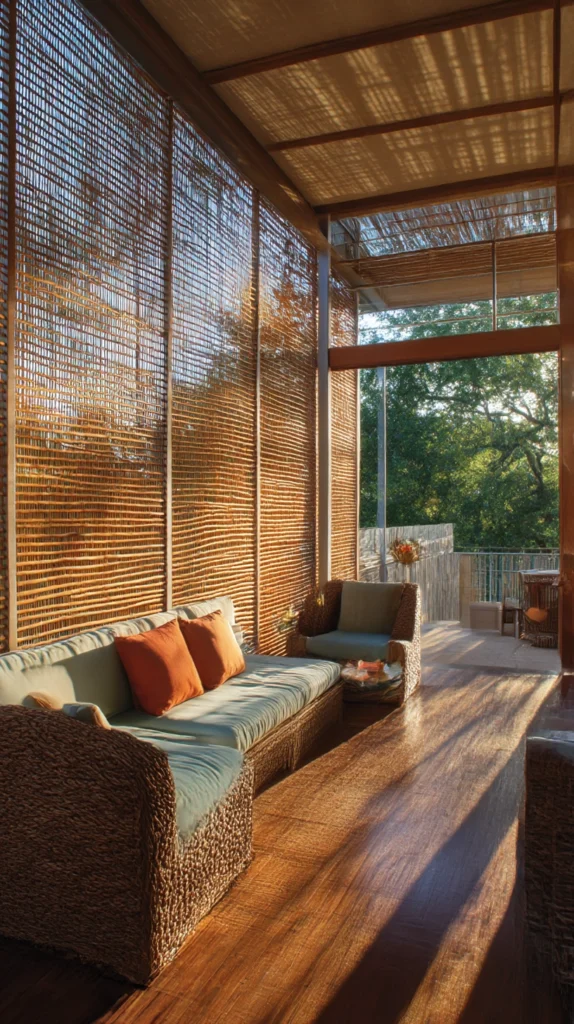
Budget: $30 – $150
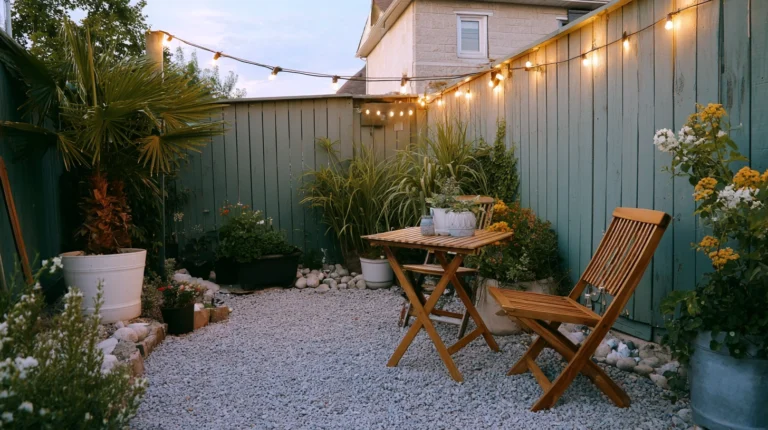
A bamboo roll screen or bamboo fence panel fixed along the side of the outdoor seating area that receives the most direct afternoon sun creates a vertical shade wall that blocks the low-angle sun of late afternoon — the most difficult sun to shade against with overhead structures — while maintaining airflow through the gaps in the material. It is the right shade solution when the problem is not overhead sun but the sun that enters the space sideways in the hours before sunset.
A bamboo roll screen of 2 by 1.8 metres costs $20–$50. Bamboo fence panels in a more structured format run $25–$60 for a 1.8 by 0.9 metre panel. Fix to an existing fence or posts with stainless steel cable ties ($5–$8) at 30-centimetre intervals along both the top and bottom edges. A bamboo screen that is fixed only at the top billows outward at the base in wind and progressively pulls away from its fixings within a single season.
Style tip: Mount the bamboo screen 10 centimetres away from the existing fence rather than directly against it. The gap between the screen and the fence allows air to circulate behind the bamboo, which prevents the moisture retention that causes bamboo screens to develop mould and deteriorate from the back face — the face you cannot see — more rapidly than the exposed front.
7. The Sail Shade Layered System
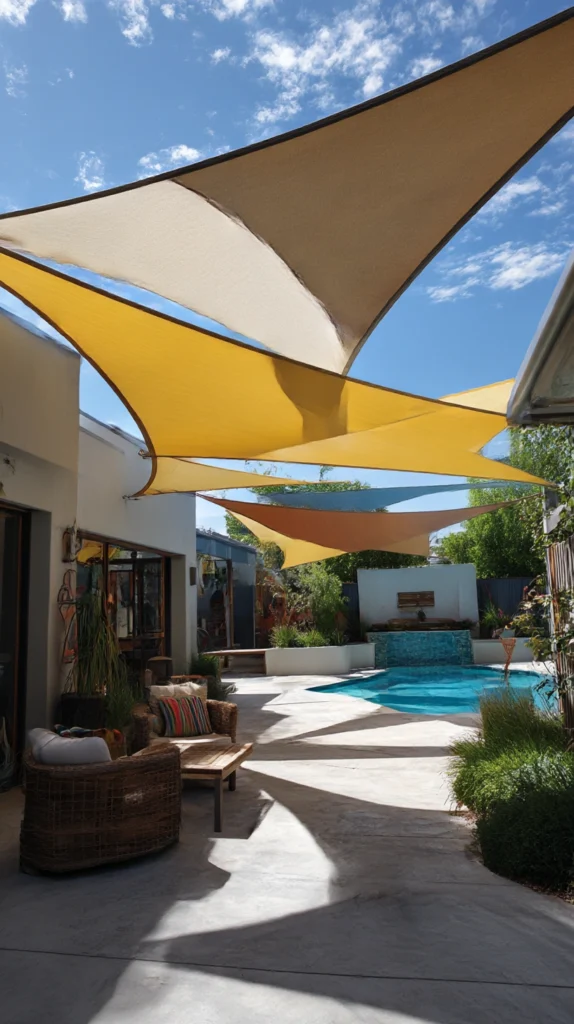
Budget: $80 – $400
Two shade sails overlapping at different heights — one higher and angled in one direction, one lower and angled in the other — create a shade system that covers more of the day’s sun arc than a single sail can manage, since the two panels between them block the sun from multiple angles without creating the dead flat canopy that a single horizontal panel produces. The layered system looks more architecturally considered than a single sail and creates a more pleasant shaded space below it.
Two shade sails of 3.6 metres per side cost $60–$160. Additional fixing hardware runs $30–$60. Use a different colour for each sail — deep charcoal above and lighter grey or terracotta below, for example — so the two layers read as distinct elements that are working together rather than a single sail that appears to have been installed incorrectly. The colour differentiation between layers also helps track the sun’s movement across the two panels throughout the day.
Style tip: Install the higher sail first and spend a week observing which areas of the seating space it leaves in direct sun before installing the second. The gap in coverage that the second sail needs to address is clearest when the first sail is already in place and the shadow it casts can be observed at different times of day — morning, midday, and late afternoon — before committing the second fixing points.
8. The Louvred Roof System
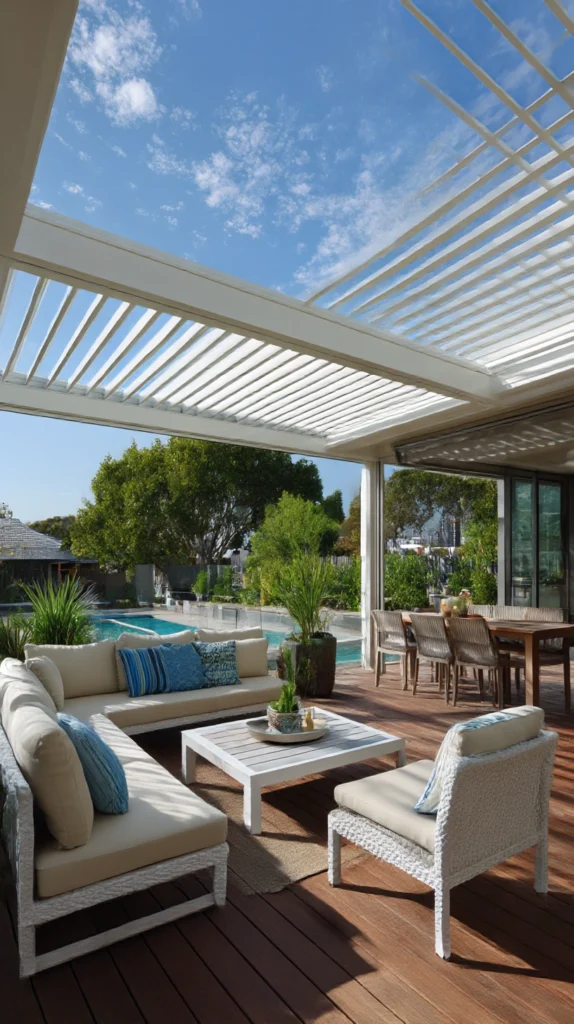
Budget: $500 – $3,000
A louvred aluminium roof — a pergola frame fitted with horizontal aluminium slats that rotate from fully open to fully closed — provides the most controllable and most weather-resistant shade solution available to a backyard. Open louvres allow full sun and air movement; partially open louvres provide filtered shade; fully closed louvres shed rain and provide complete overhead cover. The system works in every weather condition and requires no action other than adjusting the louvre angle.
A basic manual louvred roof kit of 3 by 3 metres costs $500–$1,200. A motorised version with rain sensor and remote control runs $1,500–$3,000. The investment is significant but produces an outdoor room that is usable in rain as well as sun, which in most climates more than doubles the number of days per year the outdoor space is genuinely usable. Fix to a concrete or paved base with the provided anchor bolts rather than to decking — the load the roof creates requires a solid, non-flexible base.
Style tip: Choose louvres in a dark colour — charcoal, dark bronze, anthracite — rather than white or silver. Dark louvres absorb heat rather than reflecting it downward into the space below, which makes the shaded area beneath a dark louvred roof cooler than the same roof in a pale finish. The aesthetic difference is also significant — dark louvres read as a considered architectural element while white versions read as a conservatory addition.
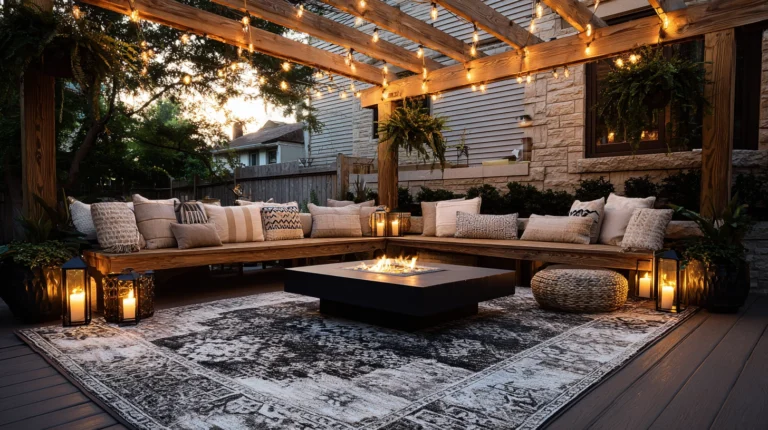
9. The Outdoor Curtain Shade Wall
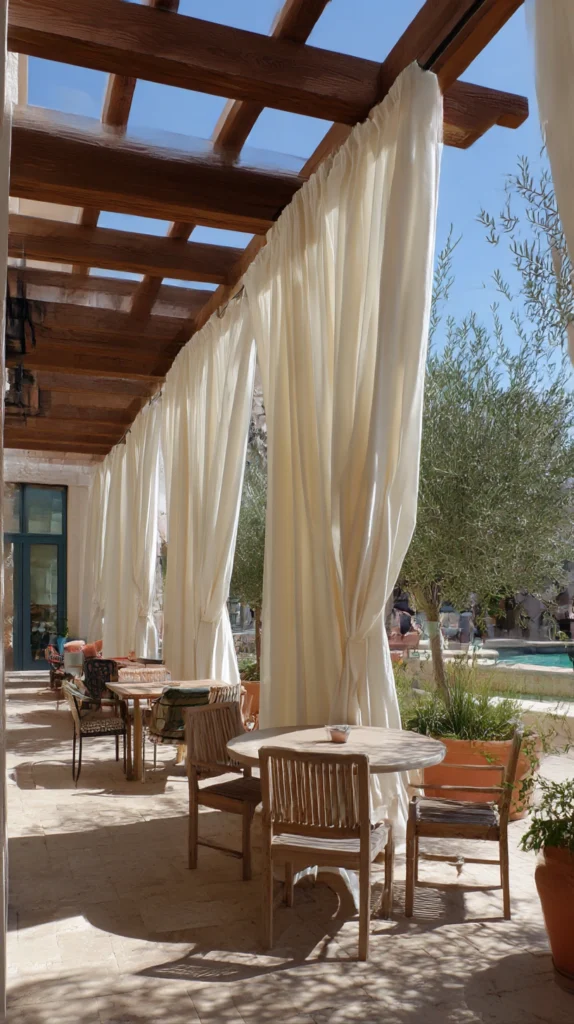
Budget: $30 – $150
Heavyweight outdoor curtain panels hung from a rod or wire along the sun-facing side of a pergola or patio structure — drawn across the afternoon sun and tied back when not needed — create a shade wall of fabric that is softer, more moveable, and more atmospheric than any rigid screen. Outdoor curtains in a warm linen tone filter the light that passes through them into something golden and gentle rather than blocking it entirely.
Outdoor canvas or acrylic curtain panels in a 250-centimetre drop cost $20–$50 each. A stainless steel curtain rod or tension wire for a 3-metre span costs $15–$30. Eyelet-top panels in a heavy fabric ($30–$60 each) hold their position in moderate wind better than lighter clip-top versions. Use at least two panels per 3-metre span rather than one wide panel — two panels that can be drawn separately give more flexibility in how much sun is admitted at any given time.
Style tip: Choose a curtain weight of at least 280 grams per square metre for an outdoor shade application. Lighter fabrics provide atmosphere but not meaningful shade — they billow beautifully in the breeze but allow direct sun through rather than blocking it. The heavier the fabric, the more actual shade it provides, and the shade is the primary purpose rather than the aesthetic.
10. The Living Wall Shade Screen
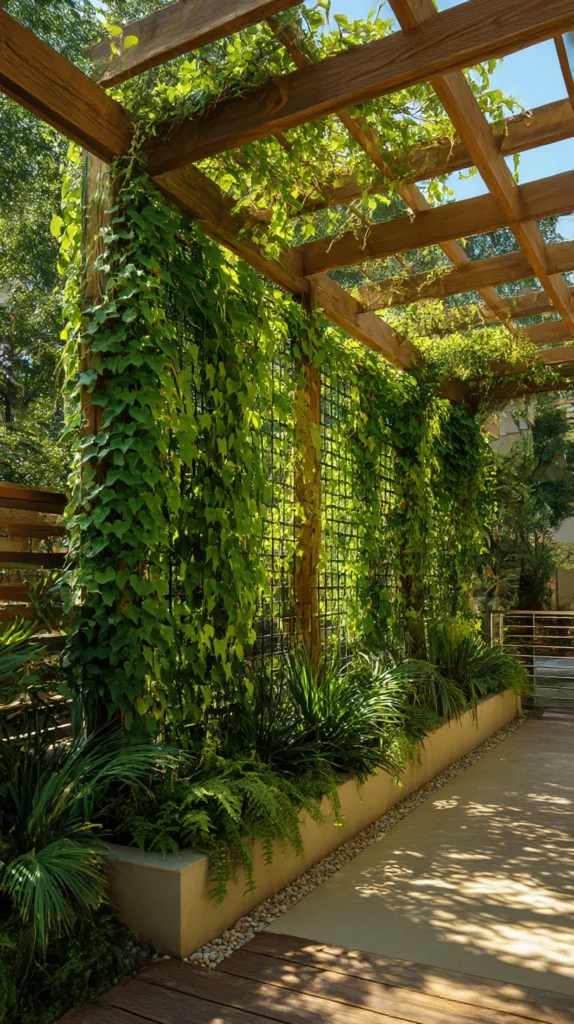
Budget: $60 – $250
A trellis panel planted with a fast-growing climber — positioned on the sun-facing side of the outdoor seating area — creates a living shade screen that improves throughout the season as the plant establishes and fills the trellis. Unlike fixed screens, a plant-covered trellis provides filtered rather than complete shade, which means the space behind it remains bright while the direct heat of the sun is substantially reduced.
A timber trellis panel of 180 by 90 centimetres costs $15–$35. Two panels side by side cover a standard seating area adequately. A fast-growing annual climber — morning glory, black-eyed Susan vine, runner beans — costs $3–$8 per plant and covers a standard trellis within eight to ten weeks. A perennial climber — clematis, jasmine, climbing hydrangea — takes two seasons to achieve full coverage but requires no replanting thereafter.
Style tip: Install the trellis panels before the growing season begins rather than when the shade is already needed. A trellis planted in May covers adequately by July; one planted in July when the need is urgent provides minimal shade for the remainder of the season. The living shade screen rewards forward planning more than any other shade solution on this list.
11. The Gazebo Structure
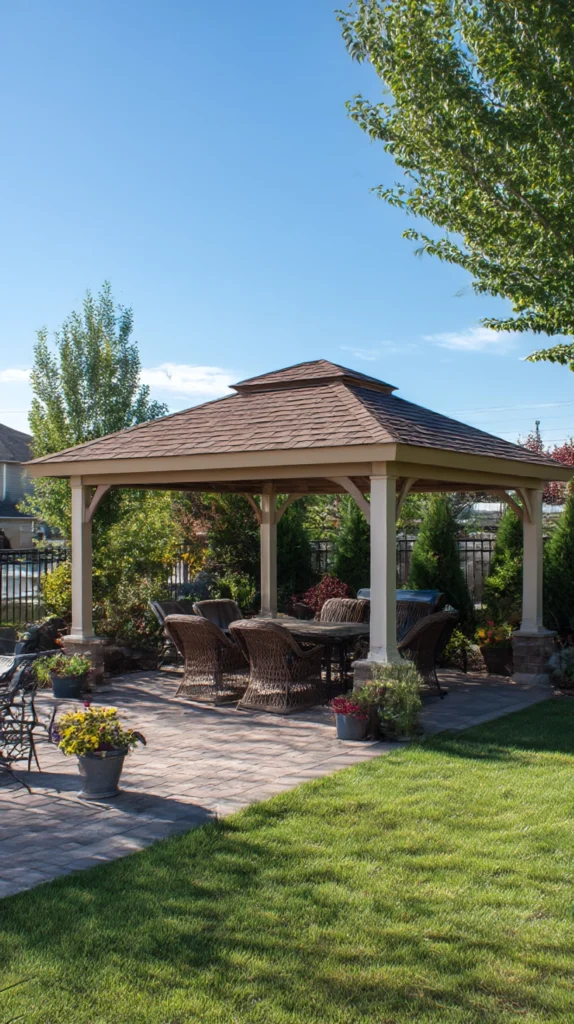
Budget: $150 – $1,000
A freestanding gazebo — a four-posted structure with a fixed or soft roof — creates the most complete and most enclosed shade solution available without permanent construction. A gazebo provides overhead shade, side screening if the panels are closed, and a defined outdoor room that functions independently of the house wall in a way that awnings and wall-mounted structures cannot. For backyards where the primary entertaining area is not adjacent to the house, a gazebo is often the only practical option.
A basic pop-up gazebo of 3 by 3 metres costs $80–$200. A more permanent timber or steel-framed hardtop gazebo runs $300–$1,000. Fix the legs of a permanent gazebo to the ground with concrete anchors ($10–$20 per anchor) rather than relying on the weight of the structure alone — a gazebo that is not anchored to the ground becomes a dangerous projectile in high wind regardless of how solidly it appears when calm.
Style tip: Remove the side panels of a gazebo on pleasant days even when shade is the primary motivation for having it. A fully enclosed gazebo on a mild summer afternoon is a hot box rather than a shade solution — the panels trap heat rather than admitting the air movement that makes shade comfortable. Side panels are most useful in direct sun and wind, not as permanent closures.
12. The Shade Cloth Over Raised Beds
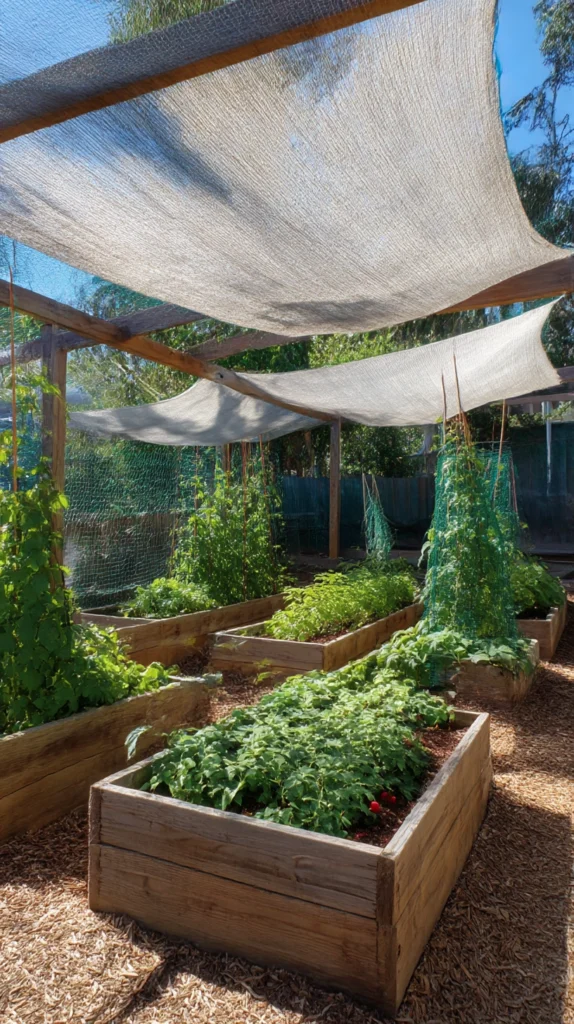
Budget: $20 – $80
For kitchen gardens and raised bed areas where the goal is not human comfort but plant protection from excessive summer heat, a simple shade cloth frame — four canes or posts with a UV-filtering fabric stretched across the top — provides 30–50 percent shade reduction that protects salad crops, brassicas, and other heat-sensitive plants through the hottest weeks of summer without reducing the light levels they need for photosynthesis.
A UV-filtering shade cloth of 50 percent density costs $8–$20 for a 2 by 3 metre piece. Bamboo canes for the frame cost $3–$8 for a pack of ten. Clip the shade cloth to the canes rather than tying it — clips allow the cloth to be removed quickly for harvesting or watering and reattached without re-tying, which is a small convenience that makes the difference between a shade cloth that is regularly removed and replaced and one that is left permanently in place because replacing it is too much trouble.
Style tip: Use 30–40 percent density shade cloth rather than the 70–80 percent versions sold for privacy screens. Vegetables and salad crops need light as well as shade — too dense a shade cloth reduces photosynthesis and produces the leggy, pale growth that indicates a light-starved plant rather than protecting the plant from heat. The goal is to reduce heat intensity while maintaining adequate light, and the lower density cloth achieves this balance.
13. The Hammock Between Two Trees
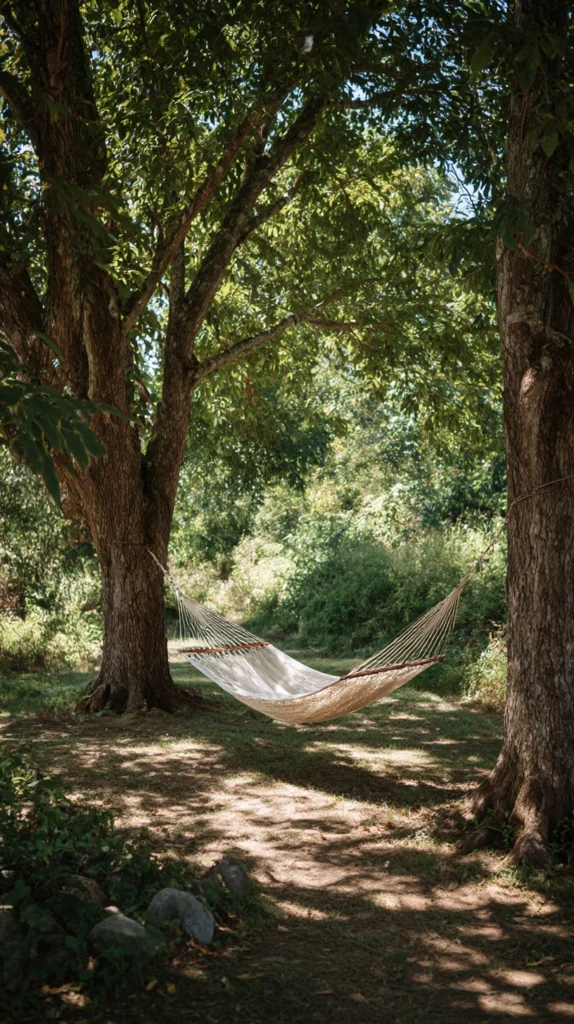
Budget: $25 – $100
A cotton or rope hammock hung between two existing trees at the shadiest part of the backyard — the position where the canopy is densest and the ground beneath it stays cool through the afternoon — creates the most effortless and most genuinely pleasant shade solution on this list. The shade already exists; the hammock simply allows you to inhabit it.
A cotton hammock costs $25–$60. Hammock straps ($10–$20 for a pair) protect the tree bark and allow positioning adjustment without retying knots. The trees need to be at least 15 centimetres in trunk diameter and no more than 4.5 metres apart for a standard hammock — wider trees on closer spacing produce the best hang angle. A hang height of 120–150 centimetres at the fixing points produces the right curve and swing height when the hammock is occupied.
Style tip: Hang the hammock perpendicular to the sun’s path rather than parallel to it. A hammock oriented east to west means the occupant lies with their head in shade and their feet in sun as the sun moves; one oriented north to south means the shade from the trees above falls across the full length of the hammock throughout the afternoon. The orientation of the hammock within the available tree positions is the detail most people do not consider and most benefit from getting right.
14. The Misting Fan System
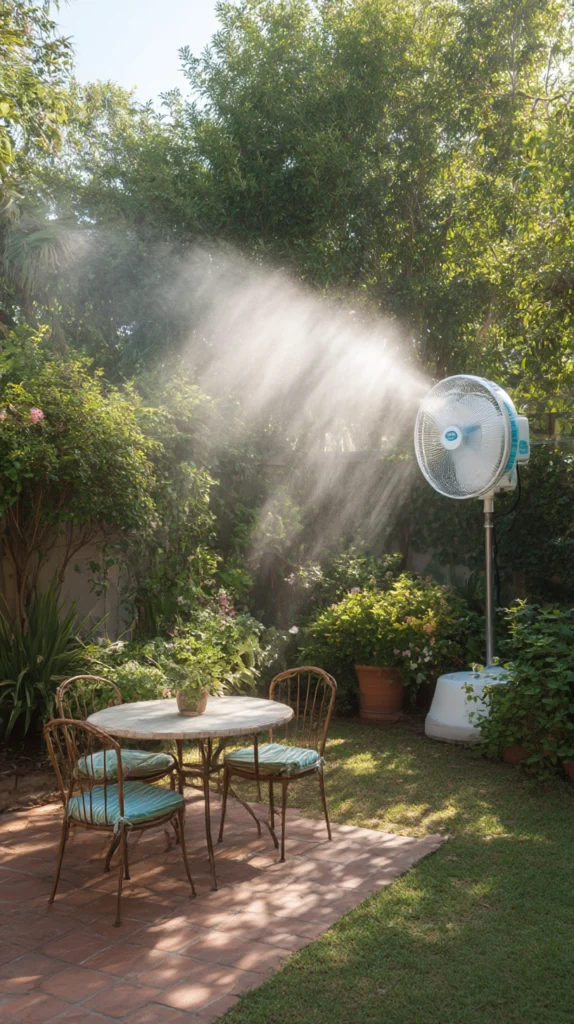
Budget: $40 – $300
A misting fan — an outdoor fan fitted with a water misting ring that sprays a fine cool mist into the air in front of the moving blades — does not create shade but creates the cooling effect of shade in areas where shade is not possible. In an exposed garden with no trees and no suitable fixing points for structural shade, a misting fan is the most effective heat management tool available and the only solution on this list that works independently of the sun’s position or direction.
A basic outdoor misting fan on a pedestal costs $40–$100. A wall-mounted misting system for a larger area runs $100–$300. Connect to an outdoor tap with a standard garden hose fitting — the water consumption is minimal. Position the fan so the mist is carried by the breeze toward the seating area rather than away from it — a fan positioned on the windward side of the seating area sends mist through the space; one on the lee side sends it in the wrong direction entirely.
Style tip: Run the misting fan for fifteen minutes before guests arrive rather than only during the gathering. A misting fan that has been running reduces the ambient temperature of the surrounding air and surfaces — furniture, paving, even the air itself — before people are seated, so the space is already cool when it is needed rather than gradually cooling while guests sit in the heat that existed before the fan was switched on.
The best backyard shade is the shade that is in the right place at the right time of day for the people who actually use the space — not the most elaborate structure or the most expensive solution, but the one that allows a chair, a drink, and an afternoon in the garden without the sun making any of it uncomfortable.
Observe where the shade falls in the backyard at the times the space is most used, choose a solution that addresses that specific gap rather than a general one, and install it before the hottest weeks of the year rather than during them. Summer shade planned in spring is shade that is ready when it is needed. Summer shade planned in July is shade that arrives in August.