13 Stadium-Vibe Living Rooms That Prove You Don’t Need a Ticket
13 Stadium-Vibe Living Rooms That Prove You Don’t Need a Ticket
There is something deeply satisfying about watching a match, a final, or a race from your own sofa and still feeling the electricity of a crowd. The right setup does not just display sport — it makes you feel the bass of a goal announcement in your chest, see every blade of grass in granular detail, and hear commentary so clearly you forget there is a wall between you and the pitch. And it costs a fraction of what a season ticket demands.

Whether you are a lone devotee of a single team, a household of mixed allegiances, or someone who hosts a dozen friends for every knockout round, the setups below cover every scale and every budget. Each one includes what you will need, what it will cost, and a practical tip to make the whole thing work as well as the idea deserves.
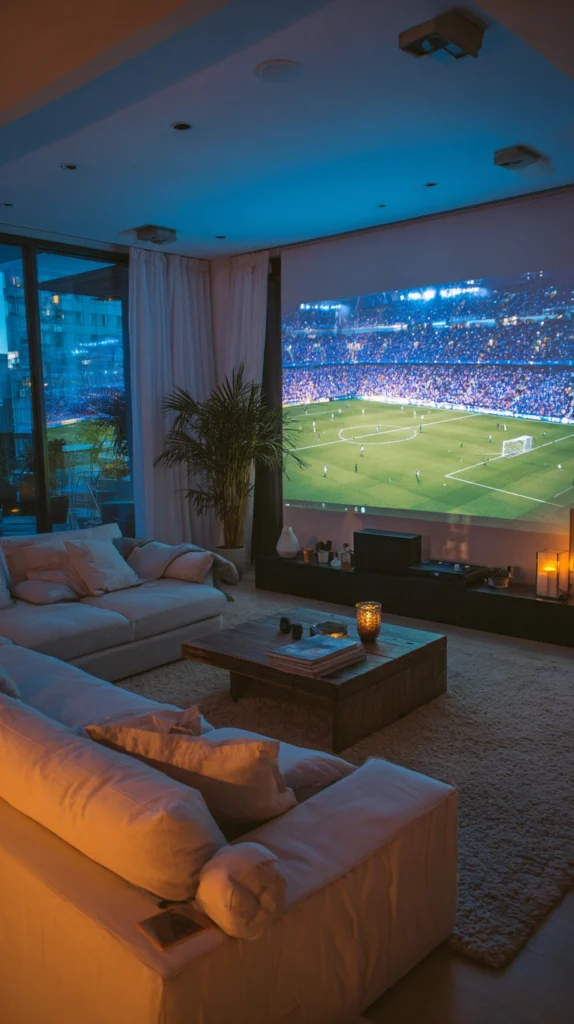
1. The Projector Wall Setup
Budget: $200 – $700
Paint one wall of your living room with a coat of white projector screen paint, position a short-throw projector on the coffee table, and you have a permanent 100-inch-plus screen that disappears completely when the lights are on. It is the most committed option on this list and also the most rewarding — the image fills your peripheral vision in a way that no television, regardless of its size, ever quite manages.
Projector screen paint costs $30–$80 and covers a standard feature wall. A capable short-throw 4K projector runs $400–$700, though 1080p options start around $200. Pair it with a soundbar or a modest 2.1 speaker system ($80–$200) and the living room is genuinely transformed.
Setup tip: Paint a second coat after the first dries fully, and use a foam roller rather than a brush to keep the surface texture as smooth as possible. Any texture in the paint catches the projector light unevenly and creates a mottled image. The smoother the wall, the sharper the picture.
2. The Widescreen Wall Mount
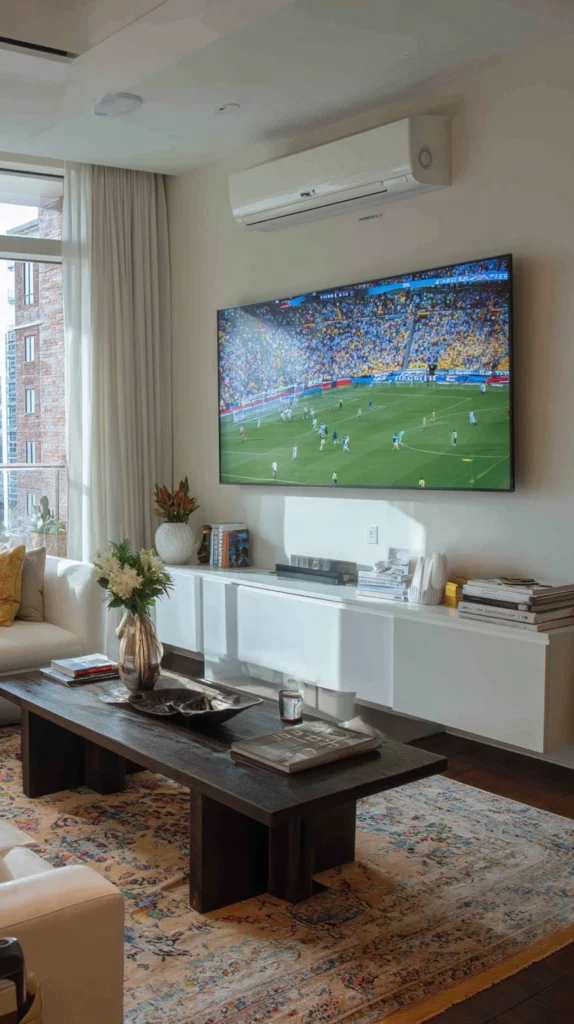
Budget: $500 – $2,000
A 75- to 85-inch television mounted at the correct height — eye level when seated, not towering overhead — is the simplest and most reliable route to a proper stadium feel. Modern large-screen televisions have closed the picture quality gap with projectors significantly, and for rooms where blackout curtains are impractical, a bright panel beats a projector hands down during afternoon kickoffs.
A quality 75-inch 4K television with good motion processing (important for fast sport) costs $600–$1,500. A wall mount rated for the size runs $30–$100. The critical and often-skipped step is cable management — a television floating on a wall with a trailing power cable and HDMI hanging below it looks unfinished regardless of the screen quality.
Setup tip: Measure seated eye level before drilling a single hole. The common instinct is to mount the screen too high, which causes neck strain over a two-hour match and makes the experience feel more like a cinema than a living room. Centre the screen at the eye level of the people who will actually be watching it.
3. The Surround Sound Upgrade
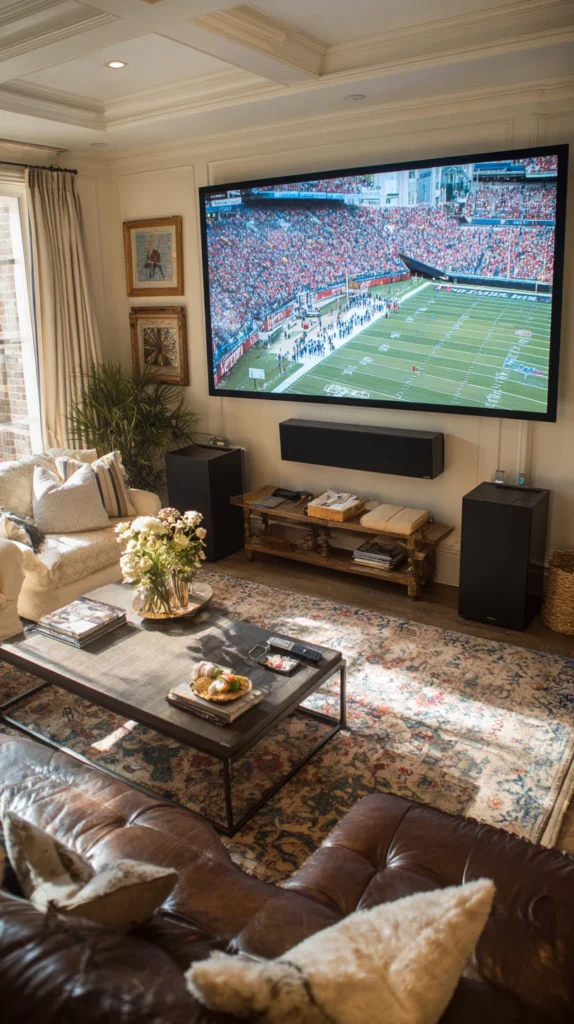
Budget: $150 – $1,000
No screen upgrade does more for the feeling of being at a game than proper surround sound. A 5.1 system — five speakers and a subwoofer — places you inside the atmosphere rather than in front of it. The roar of a crowd coming from behind you while commentary sits directly ahead is the closest a living room gets to the real thing without a crowd.
A starter 5.1 system with decent bass costs $150–$400. Mid-range systems with real speaker quality run $400–$1,000. Wireless rear speakers (available in most systems above $300) eliminate the cable-running problem that puts most people off this upgrade entirely. A subwoofer placed in a corner of the room rather than against a flat wall produces significantly deeper, more even bass.
Setup tip: Run the automatic calibration program that comes with virtually every modern AV receiver before your first match. It uses a microphone placed at the listening position to adjust speaker levels and delay times for your specific room — the difference between uncalibrated and calibrated sound in an irregular room is substantial.
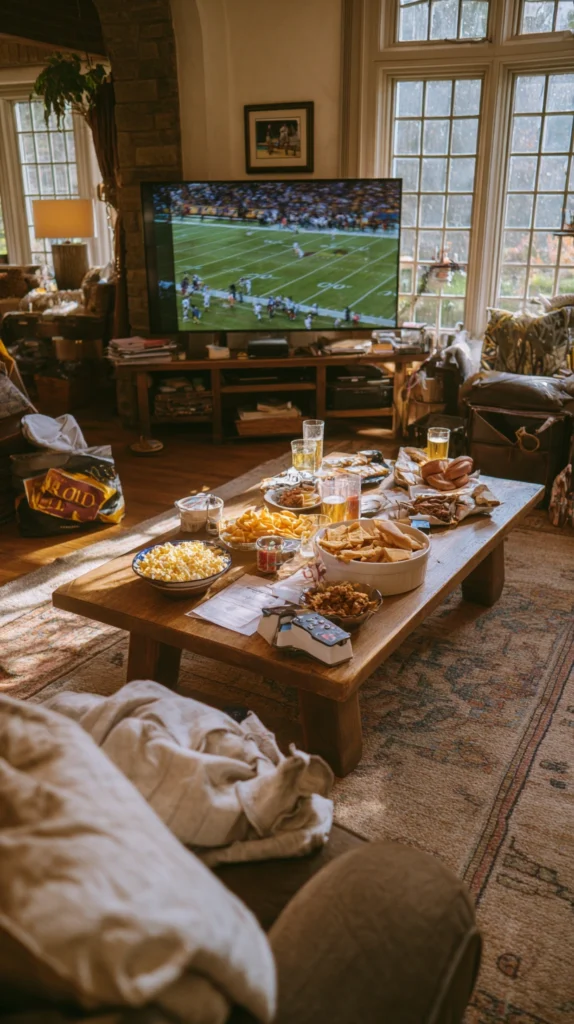
4. The Stadium Snack Station
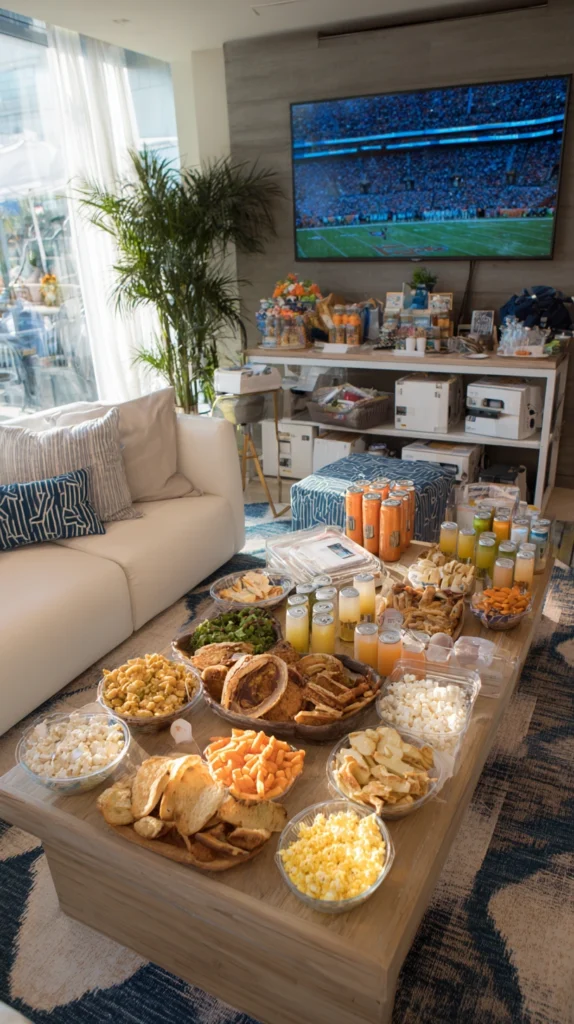
Budget: $40 – $200
A dedicated snack station set up beside or behind the seating area — loaded in advance, requiring no trips to the kitchen during play — solves the problem that ruins more watching experiences than bad picture quality: missing the decisive moment because you were getting a drink. A fold-out table or kitchen trolley stocked with everything before kickoff turns the living room into something that feels genuinely self-contained.
A fold-out table costs $25–$60. Stadium-style cardboard food trays ($8–$15 for a pack) and printed menu cards add a considered touch for very little money. A small cooler or countertop ice bucket ($20–$50) keeps drinks cold without requiring a return trip to the kitchen. Set it up thirty minutes before anyone arrives and leave it fully stocked.
Setup tip: Prepare foods that can be eaten with one hand and require no cutting or balancing. The goal is to eat without looking away from the screen, which rules out most things that require plates and cutlery. Wraps, sliders, chicken wings, and anything served in a cup are the functional categories.
5. The Recliner Row
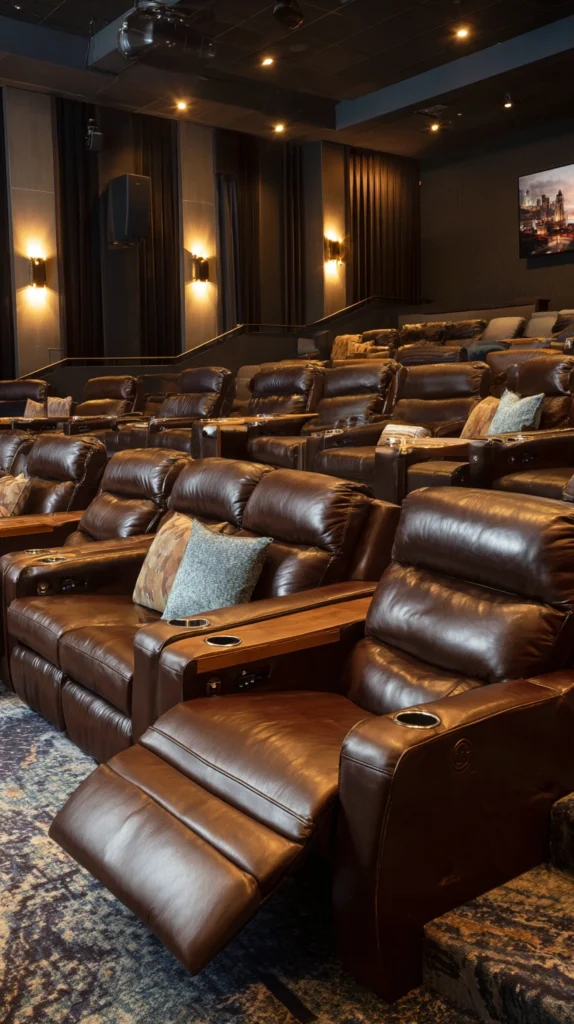
Budget: $300 – $2,000
Arrange two or three recliners in a slight arc facing the screen, with a low side table beside each one holding a cupholder tray. It is the stadium seat experience minus the plastic and the person in front of you blocking the view. The arc matters — seats arranged in a straight line mean the people at the ends are watching at an angle, which is fine for conversation but distracting during sport.
A decent recliner starts at $150–$400. Cinema-style cupholder trays that clip to armrests cost $15–$30 each. If the room is large enough, a small elevated platform built from plywood and painted to match the floor ($60–$120 in materials) raises the back row by 15–20 centimetres and gives everyone an unobstructed sightline — the same principle as tiered stadium seating, scaled to a living room.
Setup tip: Test the recline position of every seat before the event. A fully reclined chair often blocks the sightline of anyone seated directly behind it. Either agree on a no-recline rule during live action or build in the row offset described above.
6. The Giant Beanbag Pit
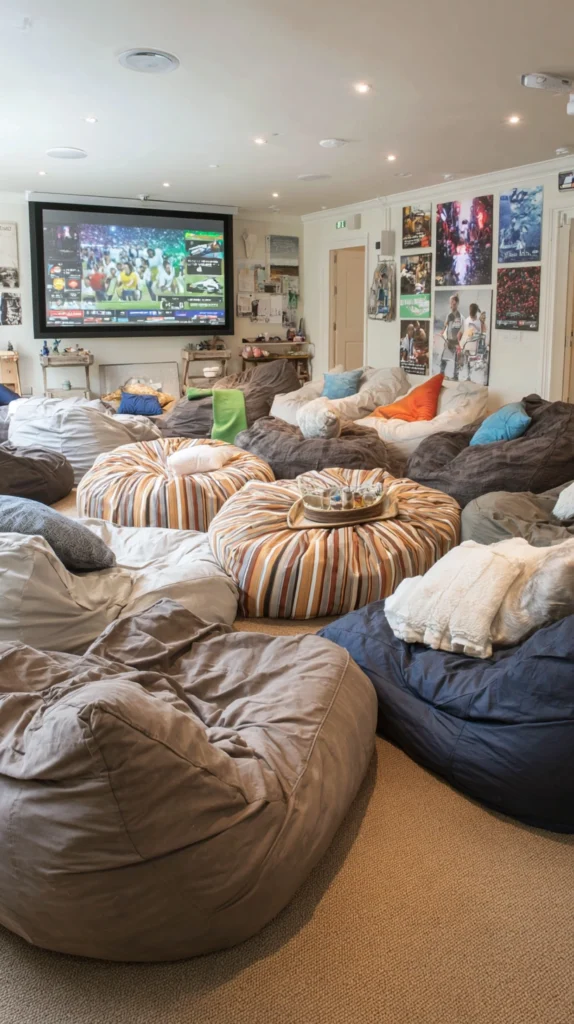
Budget: $100 – $400
Fill one end of the room with oversized beanbags, floor poufs, and large cushions, and let guests claim territory before the match starts. It has none of the formality of a seating arrangement and all of the comfort of something genuinely relaxed — people lie back, shift position, and settle in for the long view without ceremony. For younger crowds especially, it is often the most enjoyable setup of all.
A large beanbag (filled) costs $60–$150. Outdoor floor poufs — more durable and easier to wipe down after a messy final — run $30–$80. The floor covering matters: a large, thick rug under everything gives the pit cohesion and is far more comfortable than scattered cushions sitting directly on hard flooring.
Setup tip: Put the beanbags and poufs in position before anyone arrives and designate the best central spots as first-come, first-served. An unsettled shuffle for good positions once the pre-match coverage starts is avoidable and mildly irritating for everyone already seated.
7. The Themed Match Night
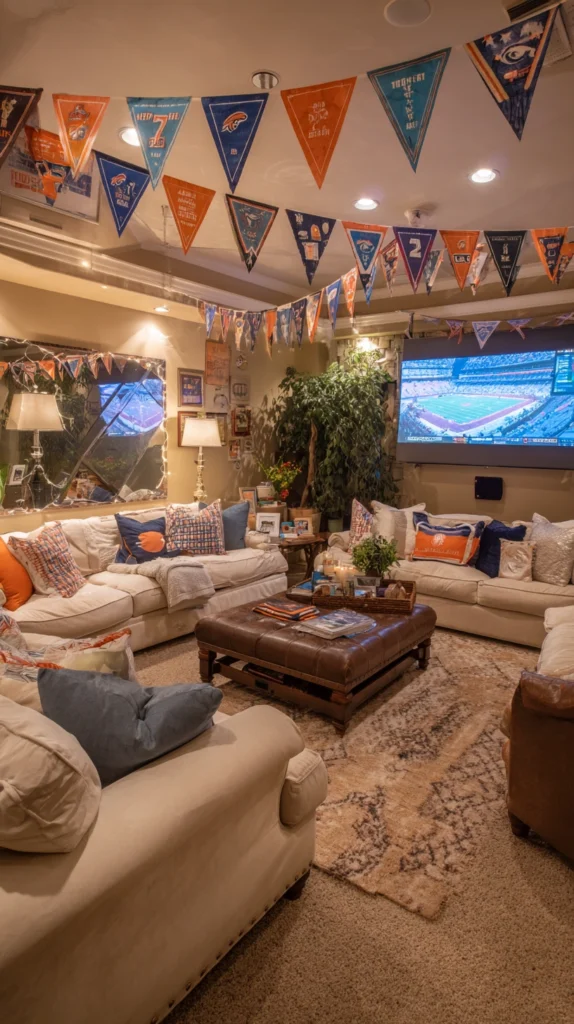
Budget: $30 – $150
Build the evening around the fixture. A Champions League final with the colours of both clubs split across the room. A World Cup match with the flags of both nations taped above the screen. A Grand Prix night with chequered-flag bunting and race-day red. The theming does not need to be elaborate — a consistent colour palette and a printed programme or team sheet taped to the wall transforms a routine evening into something more deliberate.
Themed paper cups, plates, and napkins cost $8–$20. Team scarves or printed flags run $5–$15 each. A printed bracket sheet or fixture programme made at home for pennies gives guests something to hold and refer to. Announce the theme in the group chat a day or two in advance and suggest one simple dress code item — a team shirt, a club colour — so that people who want to participate can do so without being surprised.
Setup tip: If the match involves rival fanbases, divide the room deliberately: team colours on each side, named sections above the seating areas. The mild tribalism this creates makes for better atmosphere and considerably better banter throughout the 90 minutes.
8. The Bar Cart Corner
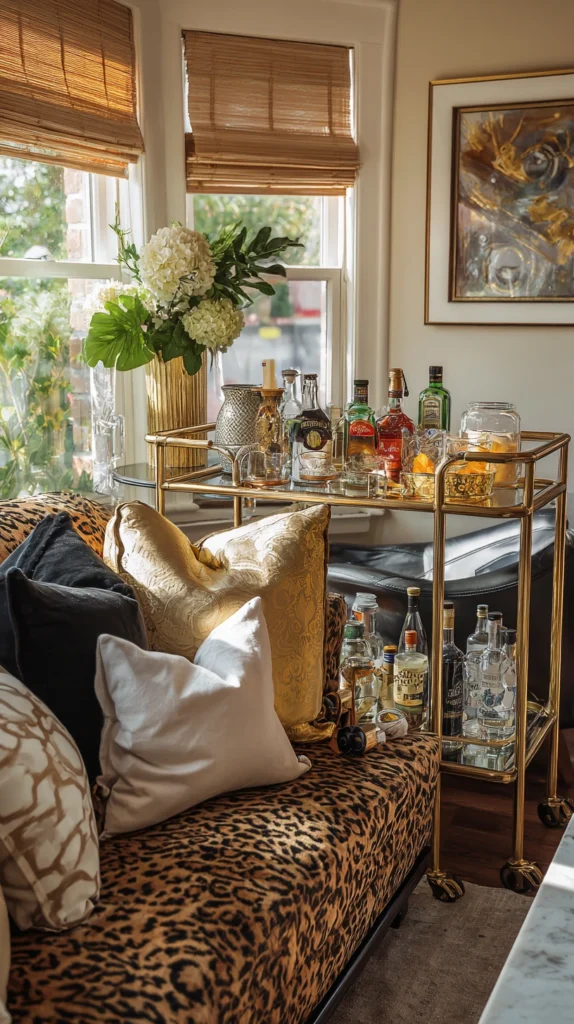
Budget: $60 – $300
A bar cart positioned near the seating area — fully stocked before the match begins — replicates the one genuinely good thing about watching sport in a pub: drinks that are close and easily accessible. Assign someone the role of bar manager for the evening and the drinks round practically runs itself. It is a small structural decision that pays off continuously throughout a long broadcast day.
A bar cart costs $50–$150. A cocktail shaker, muddler, and jigger set runs $20–$40. For non-alcoholic options, a selection of premium soft drinks and a bag of ice is everything you need. Label the bottles so guests can pour their own during the interval without asking, and keep a rubbish bag attached to the cart side for empties.
Setup tip: Pre-batch a signature drink specific to the match or occasion — a large jug of a simple cocktail or a thermos of hot drinks for cold-weather fixtures. Pre-batching removes the delay between someone deciding they want a drink and actually having one, which is always the friction point at informal gatherings.
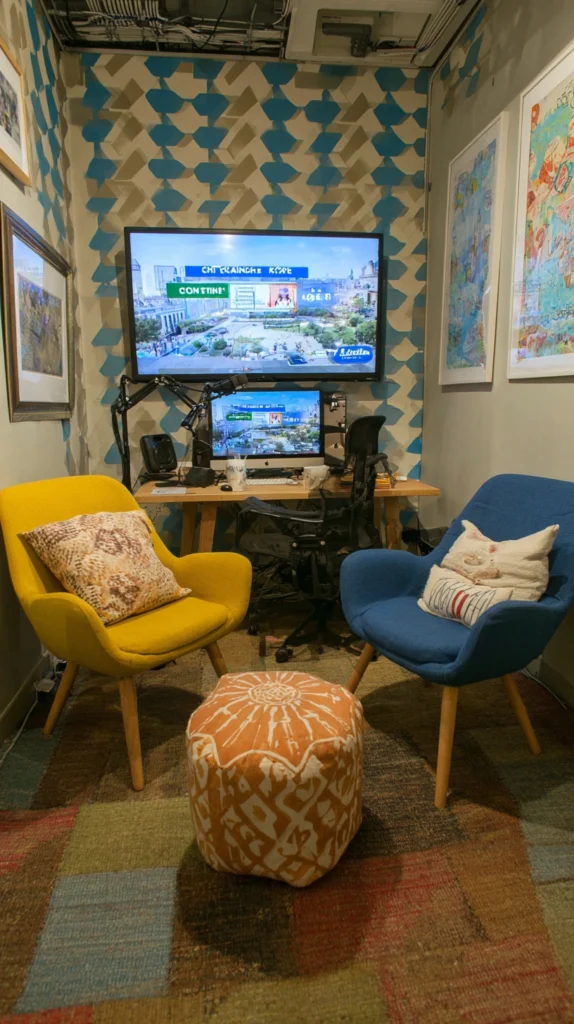
9. The Second Screen Setup

Budget: $50 – $300
Mount a smaller secondary screen — a 24- to 32-inch television or a tablet in a stand — beside the main display, running concurrent coverage, live statistics, or a second fixture at the same time. For events with multiple simultaneous games, this setup transforms the living room into something genuinely resembling a sports bar without any of its acoustic problems.
A secondary 32-inch television runs $100–$250. A monitor arm ($25–$60) positioned beside the main screen keeps the setup compact. Most streaming services allow simultaneous streams on the same account — check your subscription terms, but splitting a second fixture to the smaller screen typically requires no additional cost.
Setup tip: Keep the second screen’s volume low or muted, with subtitles on if the commentary is relevant. Two audio streams competing in the same room causes fatigue quickly and makes both harder to follow. Audio goes to the main event; the second screen is visual information only.
10. The Outdoor Extension
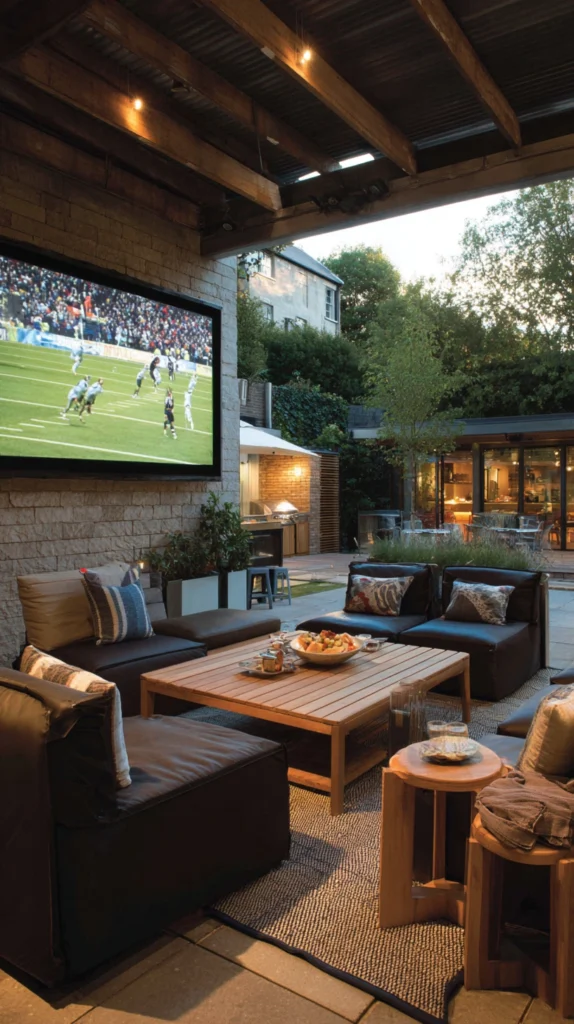
Budget: $80 – $400
Run an HDMI extender or a wireless transmitter from the living room to a garden screen or patio television, and open the back door so guests can move freely between the two viewing spaces. The indoor space handles comfort; the outdoor space handles atmosphere, volume, and the particular satisfaction of shouting at a goal without worrying about the neighbours. A wireless HDMI transmitter that sends a signal up to 30 metres costs $40–$100. An outdoor patio television rated for weather starts at $200, but a regular television under a canopy or porch overhang works adequately for a single event. Pair it with a portable Bluetooth speaker ($40–$80) for outdoor audio.
Setup tip: Sync the delay between the indoor and outdoor screens before guests arrive. HDMI extenders and streaming devices introduce different amounts of lag, and a five-second offset between two screens in earshot of each other — where you hear the indoor crowd react before you see the goal on the outdoor screen — breaks the experience completely.
11. The Scoreboard Wall
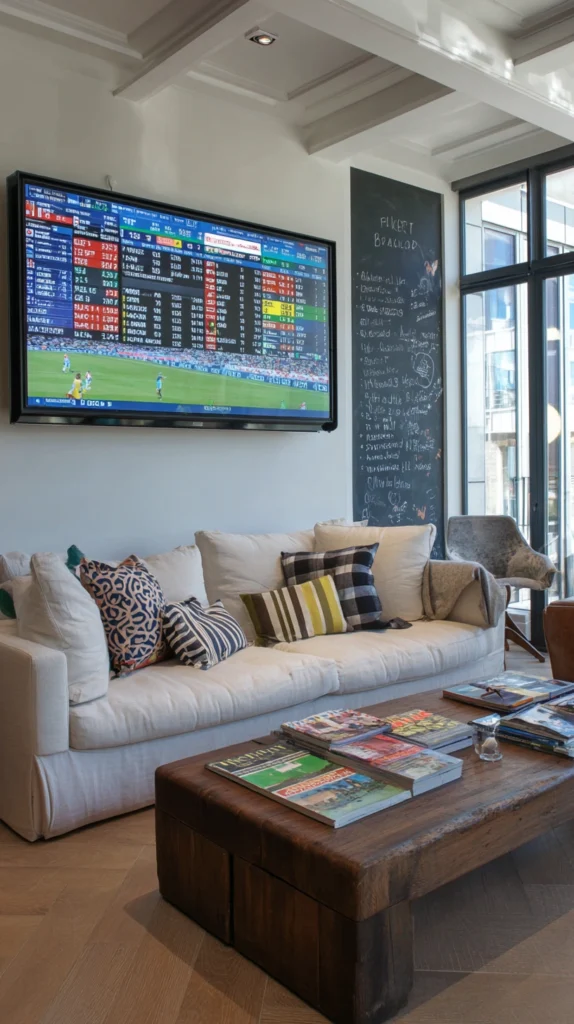
Budget: $20 – $80
Hang a small whiteboard or chalkboard on the wall beside the screen, assign someone the role of statistician for the evening, and update it live with goals, bookings, predictions, and running sweepstake scores. It adds a layer of participation to the evening that passive watching never generates, and it gives guests who are less invested in the football something concrete to engage with.
A whiteboard with a frame costs $15–$40. Coloured chalk markers run $8–$15 for a set. A printed sweepstake grid — available free from dozens of sports websites — handles the prediction pool more efficiently than the whiteboard alone. Keep the prize modest and agreed-upon in advance: a round of drinks, a box of chocolates, something proportionate to the occasion.
Setup tip: Start the sweepstake before kickoff, not after. Predictions made in the opening minutes, once the formation is clear and someone has already gone close, are less fun than blind predictions made in the half-hour before the whistle. Ignorance produces better arguments.
12. The Commentary Booth Corner
Budget: $30 – $100
Set up a microphone, a laptop, and a pair of chairs facing the screen and designate it as the amateur commentary booth for the evening. Two guests take the seats and provide running commentary — analysis, colour, the occasional invented statistic — while the rest of the room watches. Rotate the pair every fifteen minutes. It sounds absurd and it is, and almost without exception it is the element of the evening that people talk about afterwards.
A USB desktop microphone costs $20–$60. Printed cue cards with team names, player names, and a list of commentary clichés to use and avoid add structure for around $2 at a print shop. A small ring light ($15–$30) aimed at the booth gives it an unexpectedly professional look that heightens the comedy and the commitment.
Setup tip: Mute the television’s own commentary while the booth is active. Two overlapping commentary tracks produce chaos, and the real commentary tends to undercut the amateur version by simply being more accurate. The booth only works when it is the only voice in the room.
13. The Halftime Ritual
Budget: $10 – $60
Design the halftime interval as a deliberate event rather than a pause — a specific food that only appears at halftime, a prediction update round, a short outdoor walk if the weather allows, or a blind team-quiz with a five-question round about the fixture just watched. The structure transforms a dead fifteen minutes into something that gives the second half a different quality, because everyone has had a genuine break rather than a slightly restless wait.
Halftime-exclusive food costs whatever you choose to spend. A printed quiz card made at home runs to nothing. The key is that the halftime ritual is consistent — the same activity each time you host, so that regular guests begin to expect it and it becomes part of the identity of the evening rather than a one-off novelty.
Setup tip: Set a five-minute warning before the second half begins — a specific signal, a particular song, whatever works for your group — so that everyone is seated and the noise has settled before the whistle. The first minutes of a second half are often when the decisive goal arrives, and the two minutes it takes to herd everyone back into the room are exactly when you least want to be distracted.
The success of a stadium-vibe living room comes down to three things: picture quality big enough to read every run and every pass, sound full enough to feel the occasion, and enough comfort that nobody leaves their seat when they should be watching. Get those three right and the rest — the theming, the snacks, the second screen — becomes enhancement rather than compensation.
Pick the setup that fits your room and your crowd, get everything in place before the pre-match starts, and save the kitchen runs for the interval. The best moments in sport arrive without warning and last about three seconds. You want to be in the room when they happen.