13 Tub and Shower Combo Ideas
13 Tub and Shower Combo Ideas
There is a specific design challenge that the small bathroom presents that no other room in the house quite replicates. The requirement to provide a bathing and showering facility — two activities with different spatial, plumbing, and atmospheric requirements — within a floor area that challenges the comfortable provision of either one.
The conventional response to this challenge is the bath with a shower head above it, and the conventional execution of this response is a bathroom that provides both functions adequately and neither one particularly well.

The tub and shower combination at its best is not a compromise. It is a considered integration of two bathing formats into a single cohesive installation that provides both at the quality that the bathroom’s specific conditions allow — the tile selection that works as well behind a showerhead as it does surrounding a soaking bath, the enclosure that provides the shower containment without making the bath feel like a swimming pool, the material palette that communicates quality rather than the pragmatic accommodation of limited space.
Each idea below is a specific approach to the tub and shower combination for the small bathroom. Each includes what you will need, what it will cost, and a practical tip to make it work as well as the bathroom it is designed to serve.
1. The Freestanding Bath With Ceiling Shower Rose
Budget: $800 – $4,000
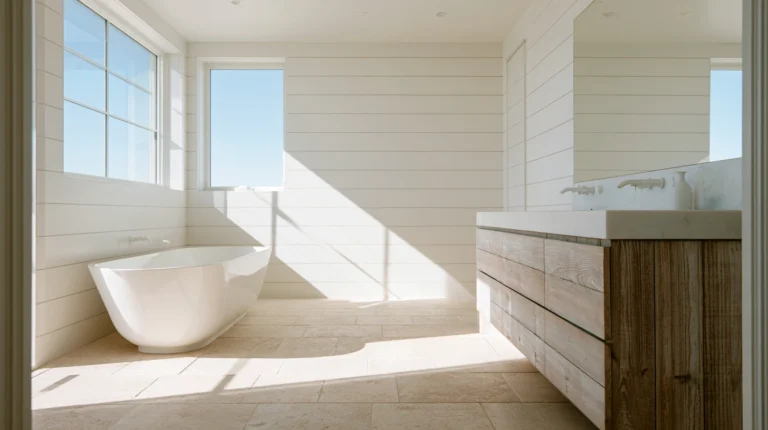
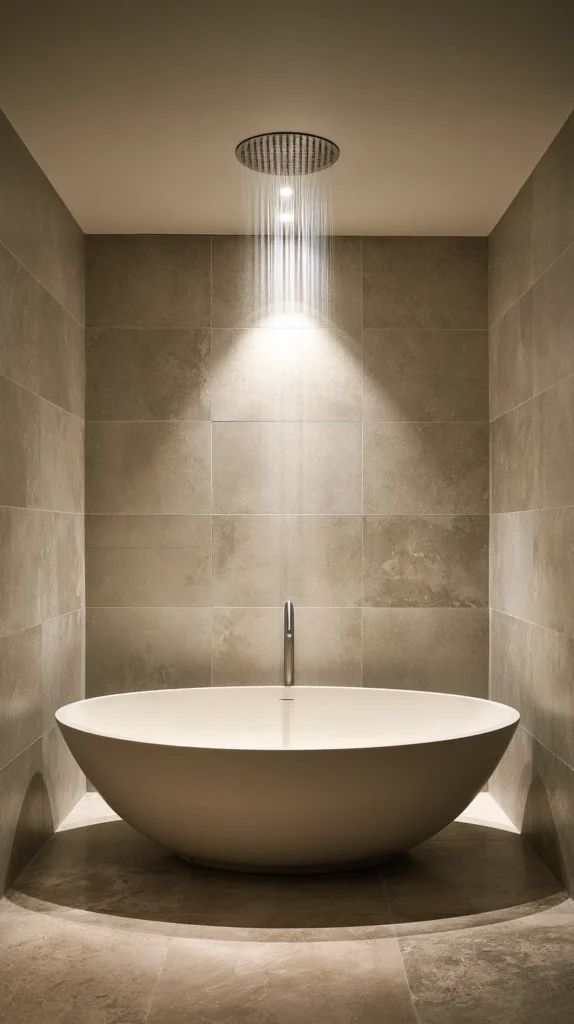
A freestanding bath positioned beneath a ceiling-mounted shower rose — the rose fixed to the ceiling directly above the bath, with the water falling straight down into the bath rather than through a lateral shower arm — creates the most spa-like and most specifically resort-quality of all the tub and shower combinations. The ceiling rose produces a rainfall shower experience of extraordinary quality, the freestanding bath provides the visual centrepiece of the bathroom, and the combination communicates a design intelligence that went beyond the standard over-bath shower bracket.
A freestanding acrylic bath costs $600–$1,500. A cast iron version runs $1,500–$4,000. A ceiling-mounted shower arm costs $80–$250. A large-format rainfall shower rose of 25–30 centimetres costs $60–$200. The ceiling rose installation requires a waterproof shower zone of 120 centimetres in diameter around the rose — the entire floor and wall surface within this zone must be waterproofed and tiled regardless of the bath surround treatment outside the zone.
Style tip: Choose a bath that is slightly shorter than the bathroom allows rather than filling the full length of the room. A bath with clear floor space at each end — 30–40 centimetres at minimum — reads as a freestanding object in the bathroom rather than a bath that was installed to fit. The spatial relationship between the bath and the room is the proportional decision that most determines whether the freestanding bath reads as a designed focal point or as a bath that was placed wherever it fitted.
2. The Standard Alcove Tub With Shower Screen
Budget: $400 – $2,000
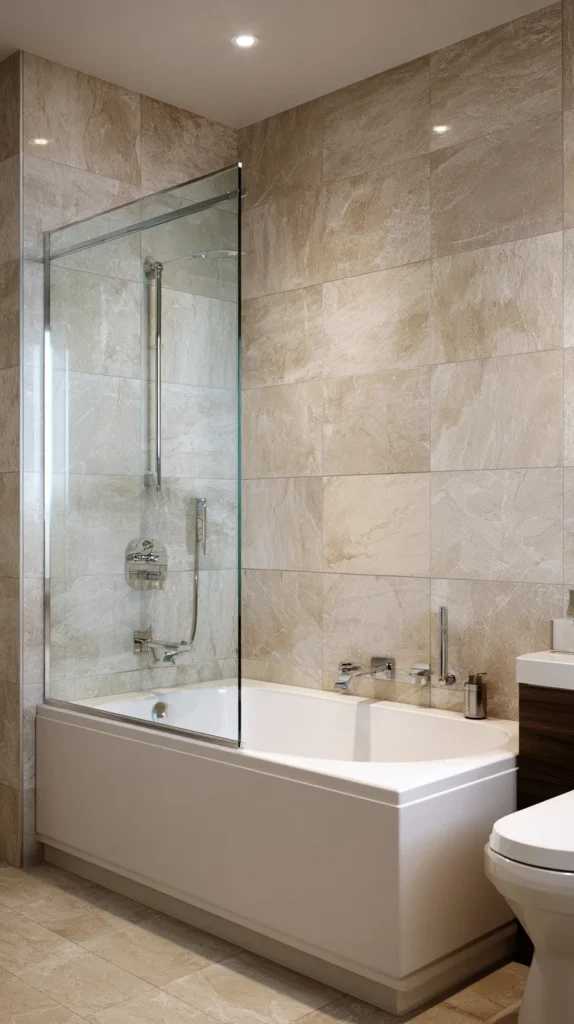
A standard alcove bath — positioned in the three-sided recess that most small bathrooms provide, fully tiled on all three surround walls, with a single glass shower screen of 80–100 centimetres in width at the shower end — is the most space-efficient and most practically functional of all the tub and shower combinations. The single glass screen rather than a full enclosure provides the shower containment without the visual weight of a full-width shower door, and the clean line of a single glass panel communicates a considered restraint that the shower curtain rail cannot approach.
A standard alcove bath in acrylic costs $200–$600. A single glass shower screen of 80 centimetres in width costs $150–$400. Full surround tiling costs $20–$50 per square metre in tile material plus installation. The glass screen must be fixed at a height of at least 150 centimetres to provide effective water containment — a screen of less than this height splashes water onto the bathroom floor on the shower side.
Style tip: Choose a frameless or semi-frameless glass screen rather than a fully framed version. A frameless screen reads as a glass element of the bathroom rather than as shower enclosure hardware, and the visual lightness of the unframed glass maintains the openness of the small bathroom in a way that a heavy aluminium frame works against. The frame is the hardware detail most visible from outside the shower and most consistently determining of whether the enclosure reads as designed or as installed.
3. The Roll-Top Bath With Decorative Shower
Budget: $600 – $3,000
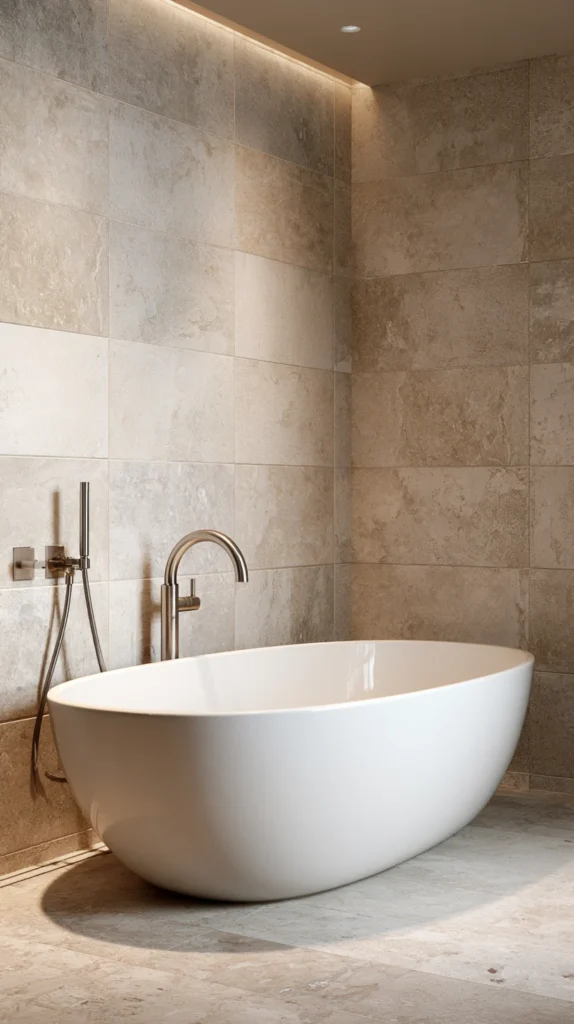
A roll-top bath fitted with a classic telephone-handshower — the traditional Victorian-style handshower on a flexible hose, used for hair-rinsing and body rinsing from the bath position — creates the tub and shower combination that most honestly acknowledges that the bathing and showering experiences it provides are fundamentally different in quality and that each has its appropriate use. The roll-top bath with a handshower is not pretending to be a shower; it is a bathing vessel with a rinsing facility, and the specific honesty of this distinction communicates a design intelligence that the conventional over-bath shower rail lacks.
A roll-top acrylic bath costs $600–$1,500. A cast iron version runs $1,200–$4,000. A period-style telephone handshower on a flexible hose costs $80–$250. A floor-mounted freestanding bath filler tap with handshower costs $300–$800. Position the handshower at the tap end of the bath — the end that the bather can reach most easily while seated — rather than at the head end where it requires the bather to reach across the full bath length.
Style tip: Pair the roll-top bath with a separate shower enclosure if the bathroom’s floor plan allows — however small. A bathroom with a roll-top bath and a compact 80 by 80-centimetre corner shower provides both bathing experiences at a quality that the over-bath shower cannot match, and the dedicated shower enclosure of 80 centimetres depth requires only 0.64 square metres of floor space.
4. The Japanese Soaking Tub With Adjacent Shower
Budget: $800 – $5,000
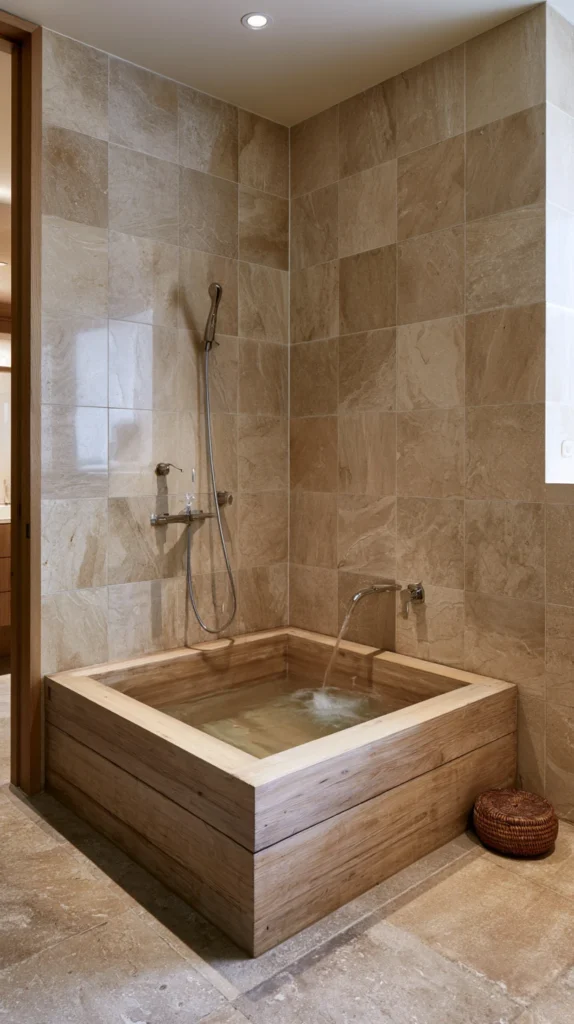
A deep, compact Japanese soaking tub — shorter in length than a standard Western bath but significantly deeper, designed for seated soaking rather than reclining, requiring far less floor area — with a separate shower position beside or above it creates the most specifically considered and most space-efficient of all the soaking and showering combinations. The Japanese soaking tub requires approximately 50 percent of the floor area of a standard Western bath while providing a soaking experience of superior quality — the greater depth of water over the body produces the therapeutic warmth that the shallower Western bath delivers only at maximum water volume.
A Japanese soaking tub in acrylic or cedar costs $600–$2,500. An overflow-style Japanese soaking tub that maintains constant temperature costs $1,200–$4,000. A wall-mounted shower above the soaking tub costs $200–$600. Position the soaking tub in the corner of the bathroom rather than in the traditional centre-of-the-room freestanding position — the corner position maximises the remaining floor space for the separate shower provision and the general bathroom circulation.
Style tip: Use cedar rather than acrylic for the Japanese soaking tub if the budget allows. Cedar has the specific quality of the traditional Japanese bath — the fragrance, the thermal quality, and the sensory experience of timber in warm water — that no manufactured material replicates, and a cedar soaking tub communicates the specific cultural tradition it references through the material rather than simply the form.
5. The Corner Bath With Wraparound Shower
Budget: $600 – $3,000
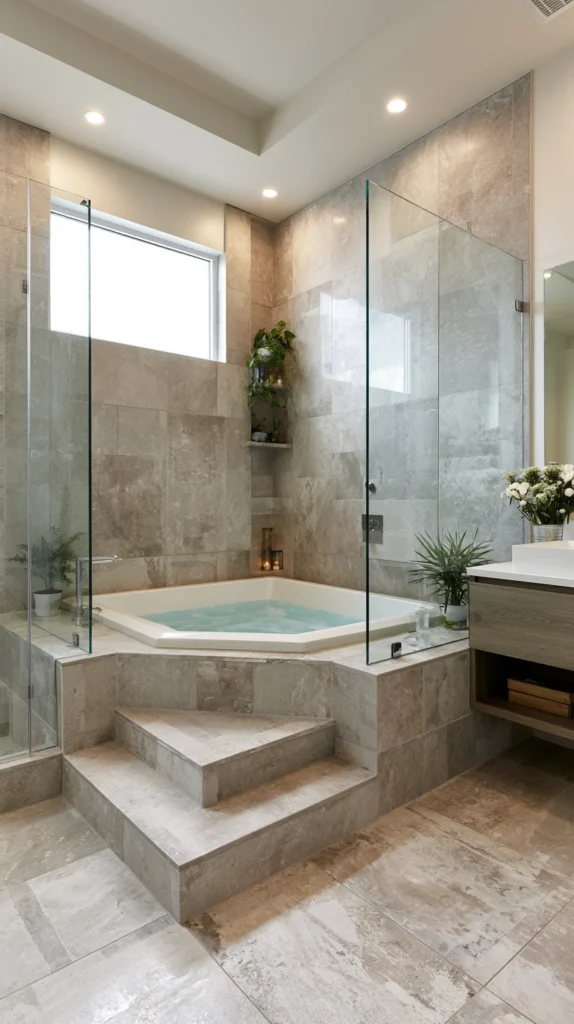
A corner bath — triangular or squared-off at the corner position, using the two bathroom walls as two sides of the bath surround — with shower provision above the wider bathing end and a single glass panel at the shower end creates the combination that provides the most generous bathing volume in a corner position while delivering shower containment without the full enclosure that a straight-sided bath requires. The corner bath is the bath format specifically designed for the room plan where no straight wall is long enough for a full-length bath without obstructing the door or the vanity.
A corner acrylic bath in a 120 by 120-centimetre format costs $400–$1,000. A whirlpool version runs $800–$2,500. Tiled surround panels for the two wall faces cost $20–$50 per square metre in tile material. A glass shower screen at the bathing end costs $150–$350. The corner bath requires the full two-wall tile surround to be waterproofed to shower height — 220 centimetres — across both walls, not merely the tile applied to the bath panels.
Style tip: Tile the corner bath surround in a large format tile of 60 by 60 centimetres or larger rather than the standard 30 by 30-centimetre format that most small bathroom tiling defaults to. A large format tile on a corner bath surround reduces the number of grout lines, creates a more continuous surface, and makes the corner bath area read as more generous than a small tile format in the same space.
6. The Wet Room Tub and Shower
Budget: $2,000 – $8,000
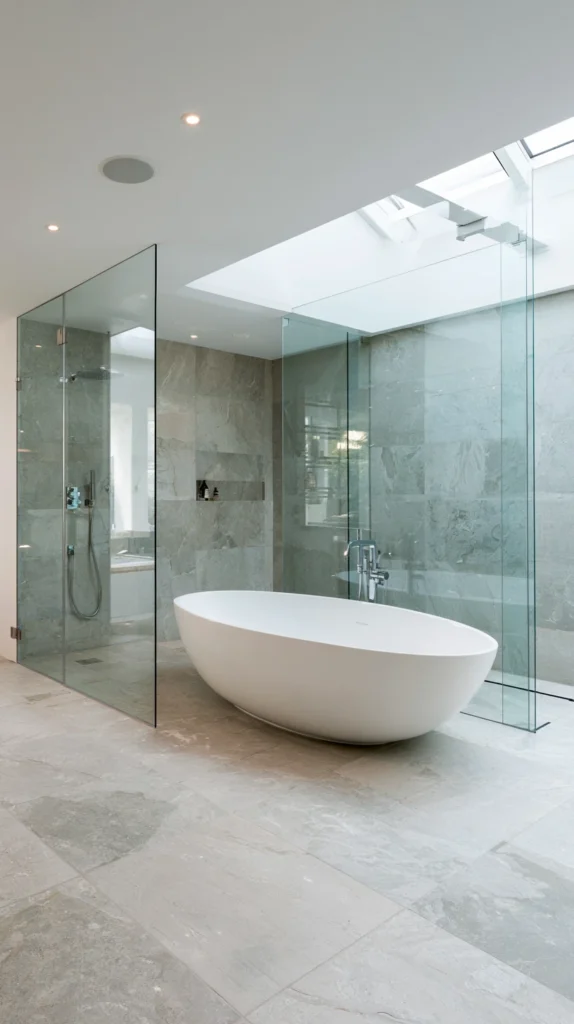
A wet room — a fully waterproofed bathroom where the shower drains from the open floor rather than from an enclosed shower tray, allowing the bath and the shower to occupy the same room without any enclosure separating them — creates the most open and most architecturally pure of all the tub and shower combinations. In a wet room, the bath is placed in the waterproofed room and the shower position is simply the floor area beside or adjacent to it — the water drains from both positions through the common floor slope and there is no enclosure element to visually divide the space.
A wet room conversion of a standard small bathroom costs $2,000–$6,000 in waterproofing, tanking, floor re-sloping, and re-tiling. A freestanding bath within the wet room costs $600–$2,500. The wet room requires a drainage system capable of handling the combined flow of a shower — minimum 30 litres per minute — from an open floor area, and the floor gradient must be sufficient to direct all water to the drain without pooling.
Style tip: Choose a slip-resistant floor tile for the wet room floor rather than the large-format smooth tiles that most wet room designs specify for their visual qualities. A smooth large format tile in a wet room is a floor that looks beautiful and is genuinely hazardous underfoot when wet. A slip-resistant tile of the same format costs the same, tiles the same, and provides the safety quality that the bathroom’s daily wet use demands.
7. The Bath Behind a Glass Partition
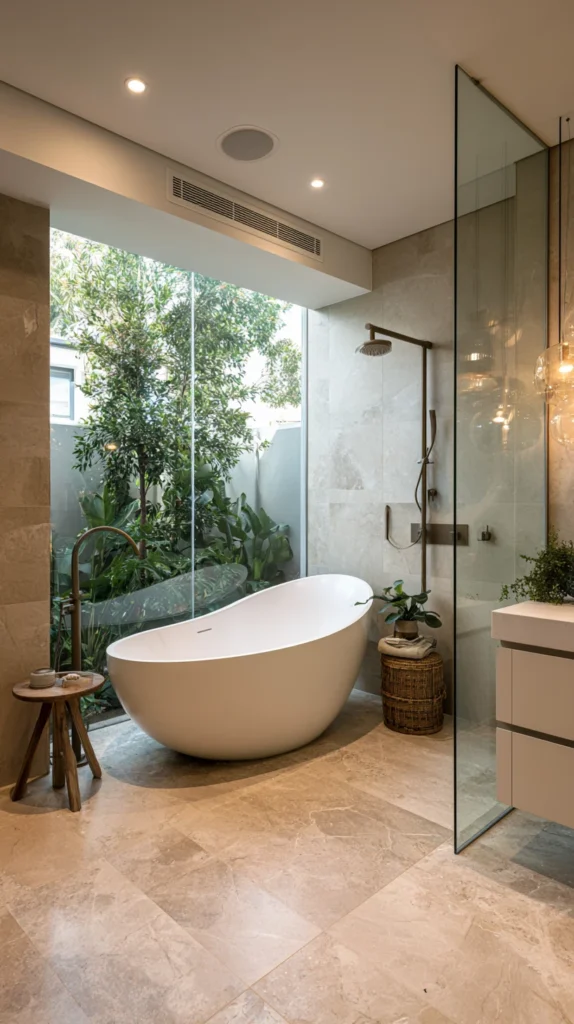
Budget: $800 – $4,000
A bath positioned behind a floor-to-ceiling glass partition — with the glass wall separating the wet zone of the shower and bath from the dry zone of the vanity and toilet — creates the most architecturally specific and most hotel-quality of all the small bathroom tub and shower arrangements. The glass partition provides the visual connection that keeps the small bathroom feeling open while providing the practical separation that allows different areas of the bathroom to be used simultaneously by two people.
A floor-to-ceiling glass partition of 90 centimetres in width costs $400–$1,200. A wider version of 120 centimetres runs $500–$1,500. A frameless version costs $600–$2,000. The glass partition requires a fixed panel rather than a door — the partition is a visual and spatial divider rather than an access control, and the opening beside or around the partition provides access to the wet zone without a door that requires hardware, hinges, and regular maintenance.
Style tip: Extend the same tile from the wet zone floor across the partition line and into the dry zone at the floor level — a single continuous floor tile throughout the bathroom on both sides of the glass partition makes the bathroom read as a single space divided by the glass rather than two separate areas with different surfaces. The floor continuity is the material decision that makes the glass partition read as an architectural element rather than a dividing wall.
8. The Bath in a Tiled Niche
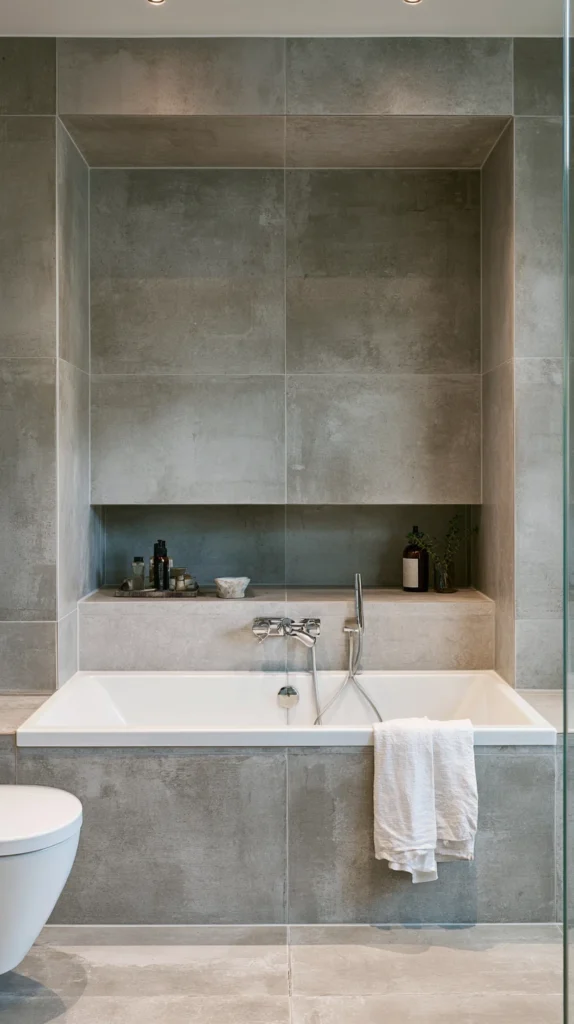
Budget: $1,500 – $6,000
A bath set into a recessed niche — a rectangular alcove of exactly the bath dimensions, fully tiled on the base and three sides, with the open front face providing access from the bathroom floor level — creates the most architecturally permanent and most specifically considered of all the bath positions. The tiled niche bath has no visible bath panel, no access hatch, and no exposed plumbing — the bath is a feature of the room’s architecture rather than a piece of equipment placed within it.
Building a tiled niche alcove for a standard bath costs $800–$3,000 in construction, waterproofing, and tiling. A bath positioned in the niche costs $200–$800 for a quality acrylic version. Full waterproofing of the niche — including the floor of the niche and the full height of the three tiled walls — is the technical requirement that most determines the longevity of the installation. The niche base and walls must be completely waterproofed before any tile is applied.
Style tip: Tile the niche in a different tile to the surrounding bathroom walls — either a different format, a different colour, or a contrasting material — so the niche reads as a defined architectural space rather than as a section of the bathroom that happens to contain a bath. The tile differentiation communicates that the niche was designed as a specific element of the room rather than as a structural convenience.
9. The Compact Shower Bath
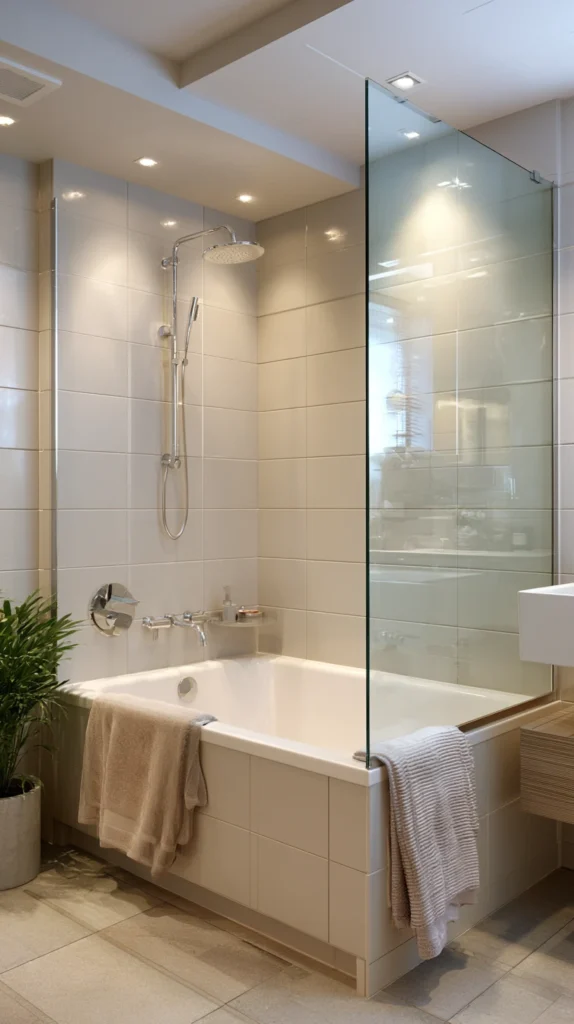
Budget: $400 – $1,500
A shower bath — a standard-length bath with a wider end at the shower position (typically 90 centimetres at the shower end tapering to the standard 70 centimetres at the far end) — provides a more comfortable and more functional shower standing position than a standard-width bath without requiring any additional floor space. The wider shower end accommodates the standing shower position without the confined quality of a standard-width bath used as a shower, and the tapered form maintains the full bathing volume of a standard bath within the same length.
A shower bath in acrylic costs $250–$700. A steel-enamel version runs $400–$1,000. A thermostatic shower system for the shower end costs $150–$400. A full-length bath screen of 150 centimetres costs $200–$500. The shower bath requires a screen that covers the full length of the bath opening — a partial screen fitted only to the shower end allows water to escape from the bath end during showering, which a full-length screen prevents.
Style tip: Position the thermostatic shower valve at the tiled wall at the shower end of the bath at a height of 100–110 centimetres — the height that allows the valve to be operated before stepping into the shower stream. A valve positioned at the shower head height requires the person entering the shower to reach up through the water spray to operate it, which is the standard installation error that a correctly positioned lower valve prevents.
10. The Clawfoot Bath With Rain Curtain
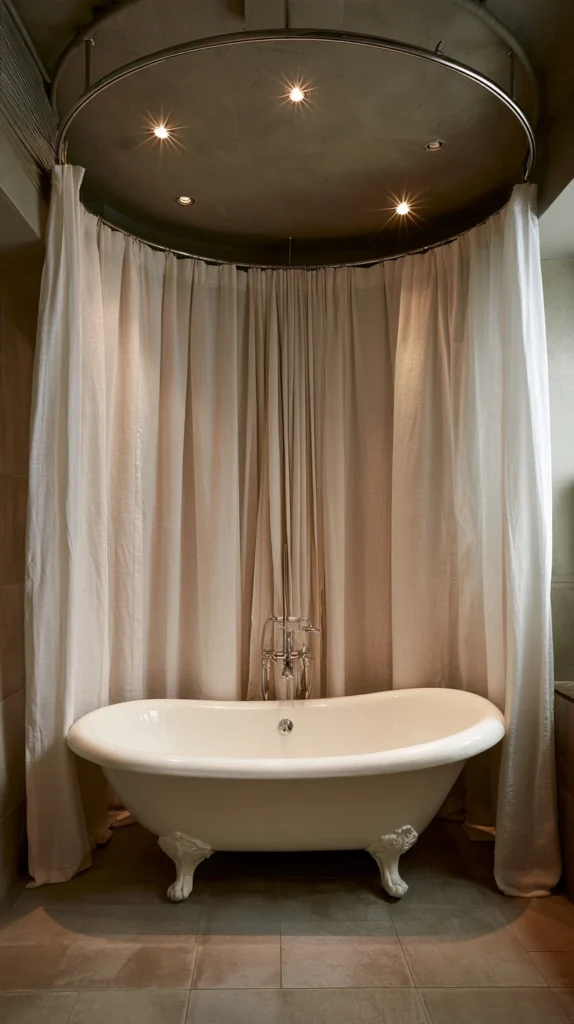
Budget: $600 – $3,000
A clawfoot or freestanding bath with a ceiling-mounted circular shower curtain rail — the rail fixed directly above the bath perimeter, with a full-length shower curtain hanging from the ring that creates a complete curtained shower enclosure around the freestanding bath — creates the most specifically period and most dramatically theatrical of all the tub and shower combinations. The circular curtain rail is both a practical shower containment solution and a decorative element of the bathroom that communicates the design tradition of the Victorian or Edwardian bathroom in the most specific and most materially consistent way.
A clawfoot bath in acrylic costs $600–$1,500. A cast iron version runs $1,500–$4,000. A ceiling-mounted oval shower curtain rail costs $80–$200. A quality shower curtain of 180–200 centimetres in height costs $30–$80. The circular curtain rail requires a ceiling mounting that is fixed into the structural timber above the ceiling rather than into the plasterboard alone — the weight of the wet curtain plus any incidental pulling force requires a fixing into timber rather than plasterboard.
Style tip: Choose a shower curtain in a fabric that relates to the bathroom’s textile palette — a linen-effect curtain in a warm white or natural tone rather than the standard white polyester — so the curtain reads as a designed element of the bathroom rather than a functional shower containment device. The curtain fabric is the most visible textile element of the bathroom when the curtain is deployed and deserves the same consideration as any other visible fabric surface.
11. The Double-Ended Bath With Centre Taps
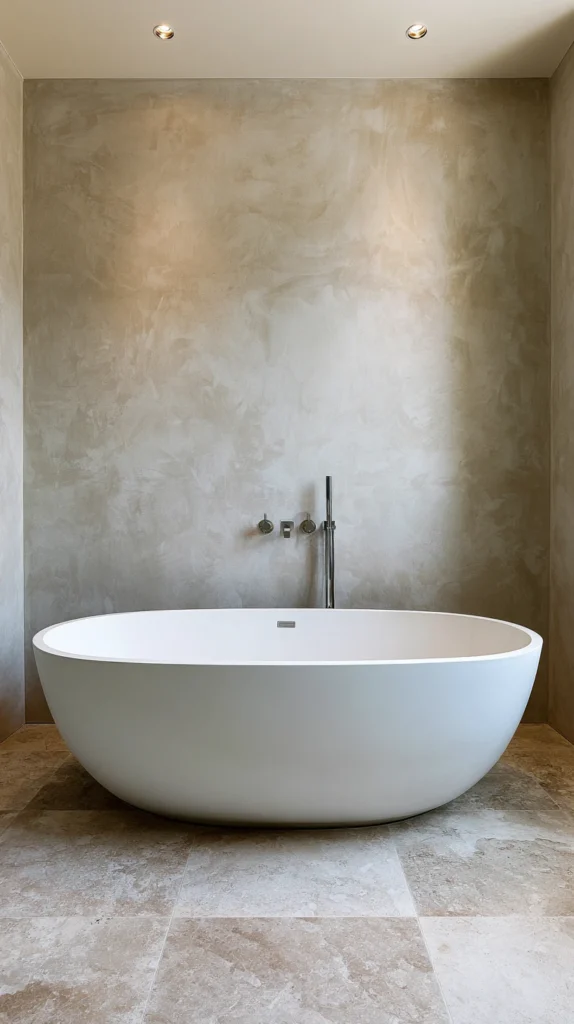
Budget: $800 – $4,000
A double-ended bath — with identical curved ends and centrally positioned taps, allowing two people to bathe with their heads at each end — with a shower provision above the centre tap position creates the most symmetrical and most generous-feeling of all the bath and shower configurations. The centre tap position is also the most practical shower position — a showerhead above the centre taps allows the shower user to stand at the widest part of the bath, with clear space in front and behind, rather than at the narrow end where the shower position is most constricted.
A double-ended acrylic bath in a standard 1700 by 750-millimetre size costs $400–$1,000. A cast iron version runs $1,500–$5,000. A wall-mounted shower arm above the centre tap position costs $60–$150. Centre tap fittings for a double-ended bath cost $150–$400 for a quality set. The shower curtain or screen for a centre-tapped bath must span the full bath length — a half-length screen at the shower end is insufficient because the shower user at the centre position needs containment on both sides.
Style tip: Position the shower rose or handheld shower directly above the waste outlet rather than above the tap position. The waste outlet marks the lowest point of the bath base, and water from the shower drains to the waste most effectively when the shower position is directly above it. The alignment of the shower position and the waste outlet is the plumbing logic that produces the most efficient drainage from the combined tub and shower configuration.
12. The L-Shaped Bath Screen System
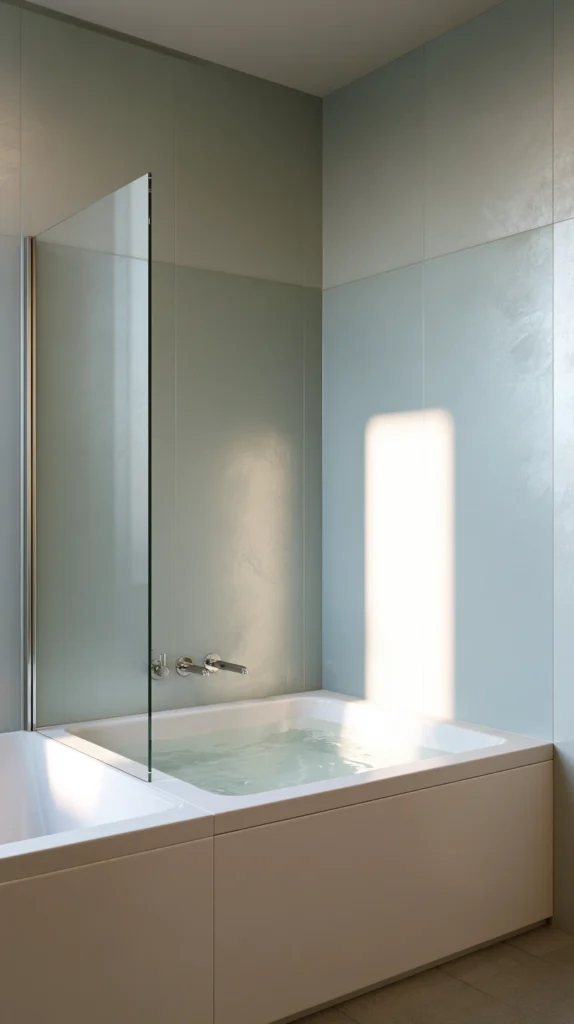
Budget: $300 – $1,200
An L-shaped bath screen — two glass panels at 90 degrees to each other, one fixed at the shower end of the bath and one folding or sliding at the front — provides the maximum water containment of any bath screen configuration while allowing full access to the bath for bathing use. The L-shaped screen is the most functional solution for a bath used seriously for both showering and bathing because it contains the shower water completely while the folding front panel opens fully for the bathing position.
An L-shaped bath screen with one fixed and one folding panel costs $250–$600. A version with one fixed and one sliding panel runs $300–$800. All glass in an L-shaped bath screen must be toughened safety glass of at least 6 millimetres — the panels are in a vulnerable position and must meet the safety glazing standards for bathroom enclosures. Install the fixed panel first to ensure correct plumb and then the moving panel in alignment with it.
Style tip: Choose a chrome or brushed stainless frame finish for the L-shaped screen rather than a matte black or gold finish. The L-shaped screen is a substantial piece of hardware in the small bathroom and the frame finish is highly visible — a neutral chrome or stainless finish reads as clean and recessive; a coloured frame finish reads as a significant design statement that the L-shaped enclosure is not always the right vehicle for.
13. The Shower Niche Bath Surround
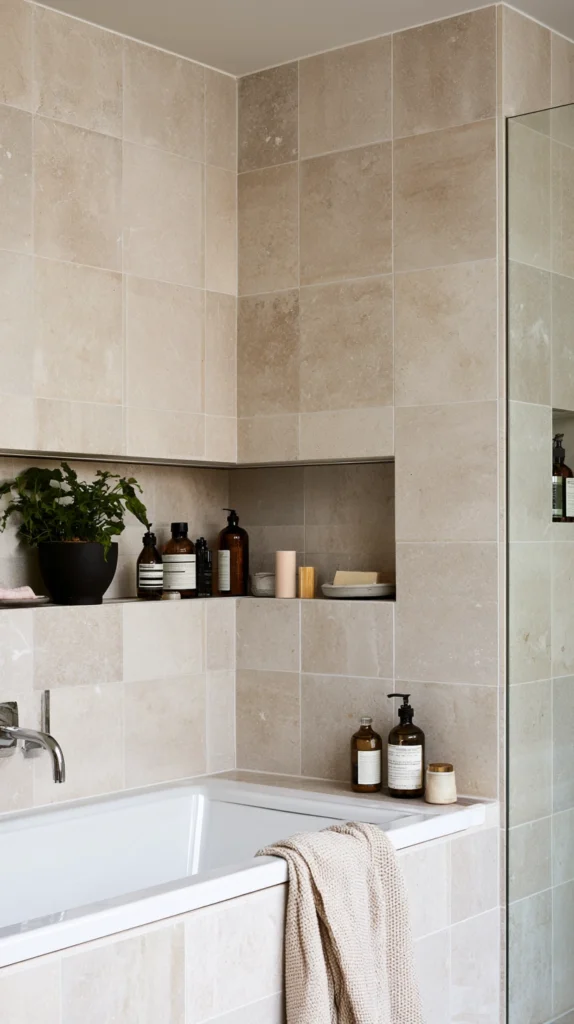
Budget: $200 – $800
A tiled storage niche built into the wall of the bath surround at the shower end — a recessed shelf of 30 by 15 centimetres, flush with the tiled wall surface, providing a waterproof shelf for shampoo, conditioner, and shower products — is the detail that most improves the practical quality of the tub and shower combination without any additional floor space requirement. The tiled niche eliminates the shower caddy, the hanging organiser, and the miscellaneous products balanced on the bath edge that communicate a bathroom that was not designed for the products that daily use requires.
A tiled niche at the shower end of the bath surround costs $100–$300 in additional waterproofing, tile, and construction labour. Two niches at different heights — one for tall bottles, one for smaller products — costs $200–$500. The niche must be waterproofed before tiling, including the base and the two side walls — a niche without waterproofing behind the tile develops moisture ingress within the first season of use that is progressively harder to manage.
Style tip: Tile the niche interior in a contrasting tile to the surrounding surround wall — a mosaic tile, a different format, or a complementary colour — rather than the same tile as the surrounding surface. The contrasting niche interior communicates a designed storage detail rather than a hole in the wall; the same tile throughout reads as a missing tile rather than a feature. The contrasting niche tile is the detail that elevates a practical provision to a designed element of the bathroom.
The tub and shower combination for the small bathroom is at its best when it was designed for the specific bathroom rather than installed as the minimum available solution to the dual-function requirement. The glass screen chosen for its visual lightness rather than its enclosure efficiency. The tile selected for its behaviour across the entire wet zone rather than for its appearance on the bath panel alone. The shower position determined by the plumbing logic and the ergonomic requirement rather than the convenience of the existing pipework.
These are the decisions that produce the tub and shower combination that provides both functions at the quality the bathroom is capable of delivering — not the shower that is compromised by the bath it is installed above, and not the bath that is diminished by the shower enclosure that surrounds it, but the two experiences in a composed relationship that makes the small bathroom feel genuinely generous rather than merely adequate.