13 Balcony Privacy Ideas for Summer Apartments
13 Balcony Privacy Ideas for Summer Apartments
There is a specific kind of discomfort that comes with a balcony that offers no privacy. You step outside with a coffee on a summer morning and immediately feel observed — by the neighbours directly opposite, the floor above looking down, the street below looking up. So you go back inside. The balcony, which should be one of the most valuable parts of the apartment, becomes a space you use only in passing rather than one you actually inhabit.
The good news is that balcony privacy is almost always solvable without structural changes, without permission from a landlord, and without significant expense. The ideas below range from immediate and inexpensive to more considered and lasting, but every one of them works within the constraints of a rented or owned apartment where drilling into concrete and permanent installation are either impossible or undesirable.
Each idea includes what you will need, what it will cost, and a practical tip to make the whole thing work as well as the idea deserves.
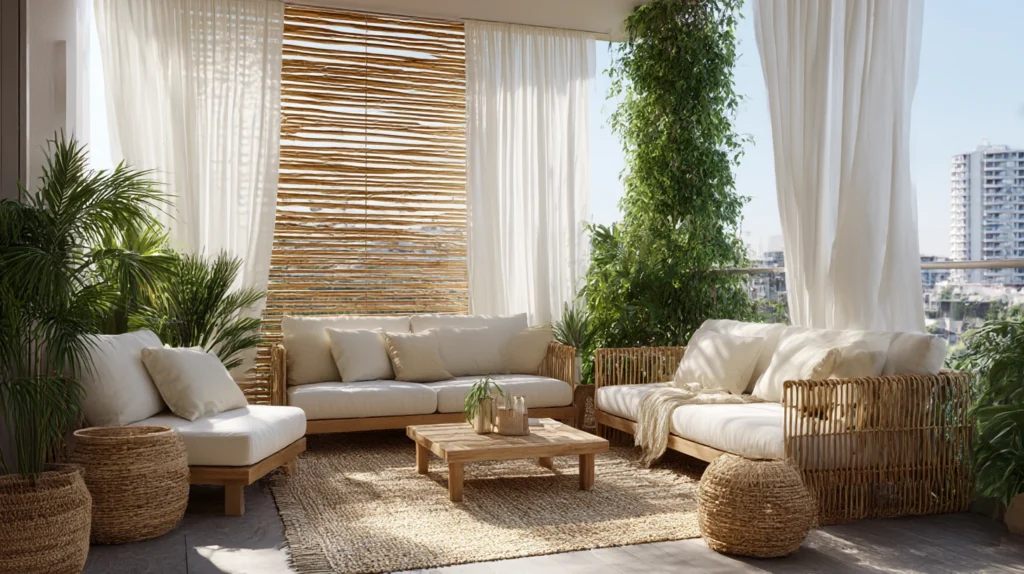
1. The Bamboo Roll Screen

Budget: $20 – $80
A bamboo roll screen — the kind that attaches to a balcony railing with zip ties or cable ties — is the fastest, most affordable privacy solution available for an exposed balcony. It blocks sightlines from the street and from neighbouring balconies at the same level, requires no tools beyond a pair of scissors to trim the ties, and rolls up and stores flat if you move or want to remove it temporarily. For renters especially, it is the default starting point.
A standard bamboo roll screen costs $20–$50 for a 2-metre length. A wider 3-metre version runs $30–$70. Stainless steel cable ties ($5–$8 for a pack) are more durable than plastic zip ties in outdoor conditions and resist UV degradation that causes plastic ties to become brittle and snap within a single season. Attach the screen to the railing at 30-centimetre intervals along both the top and bottom edges to prevent it bowing outward in wind.
Style tip: Mount the screen on the inside face of the railing rather than the outside. An inside-mounted screen sits flush with the railing top and looks integrated; an outside-mounted screen often sits proud of the railing edge and reads as something clipped on rather than installed. The inside position also protects the screen from the most direct wind loading.
2. The Tall Potted Plant Wall
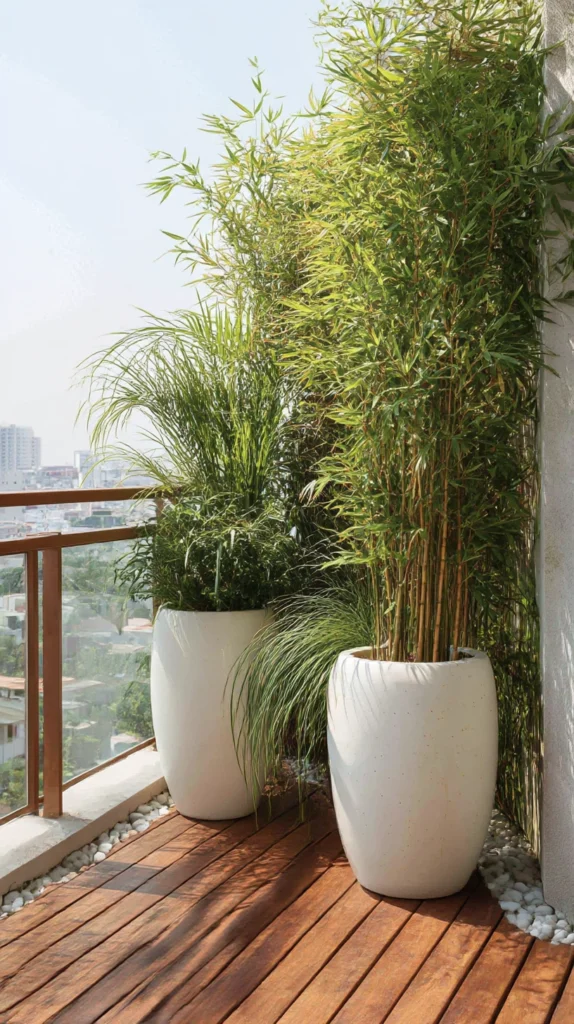
Budget: $40 – $200
A row of tall potted plants positioned along the railing edge — bamboo, tall ornamental grasses, climbing plants trained up a small trellis, or columnar evergreens — creates a living privacy screen that improves with time and provides genuine visual pleasure in a way that no manufactured screen can match. The plants filter rather than block the view, which produces the most pleasant kind of privacy: you can see out through the foliage, but observers cannot see in clearly.
Tall bamboo in a pot costs $20–$50 depending on height and variety. Columnar evergreens like Italian cypress run $15–$40 each. Large pots with drainage holes cost $15–$35 each. A drip irrigation system with a timer ($20–$40) is worth considering if the balcony is exposed and prone to drying out quickly — tall plants in small pots in full sun need watering every day in hot weather and will deteriorate within a week if neglected during a heatwave.
Style tip: Use the largest pots the balcony weight limit allows rather than a greater number of smaller ones. One large pot with a substantial plant provides more privacy, more visual weight, and more root space than three small pots with spindly specimens, and a row of large pots reads as a considered planting decision rather than a collection of containers.
3. The Outdoor Curtain Screen
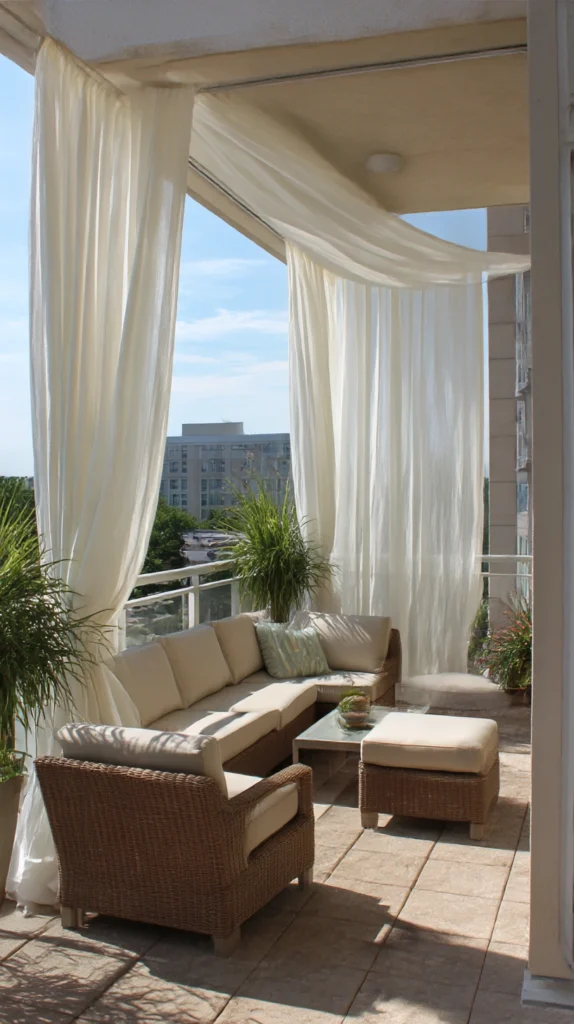
Budget: $25 – $100
Hang one or two panels of outdoor fabric from a tension wire or a simple rod fixed between the wall and an adjacent post, and the balcony gains a soft, moveable privacy screen that can be drawn open when privacy is not needed and closed when it is. Unlike rigid screens, fabric panels introduce movement and texture to the balcony and work with the summer breeze rather than against it. In sheer fabrics they filter light beautifully; in heavier canvas they provide complete seclusion.
Outdoor curtain panels cost $15–$35 each. A stainless steel tension wire with end fixings runs $10–$20. Rust-proof curtain clip rings cost $5–$10 for a pack. The critical measurement is the distance between your fixing points — measure twice before purchasing the rod or wire, since a tension wire cut 5 centimetres short of the required span cannot be extended and a rod cut too long cannot easily be shortened without tools.
Style tip: Choose a fabric colour that relates to something already on the balcony — the cushion covers, the pot colours, the wall paint of the room visible through the door. A curtain that shares a tone with the existing palette reads as part of the space; one chosen in isolation reads as a screen that was added rather than designed in.
4. The Privacy Planter Trellis
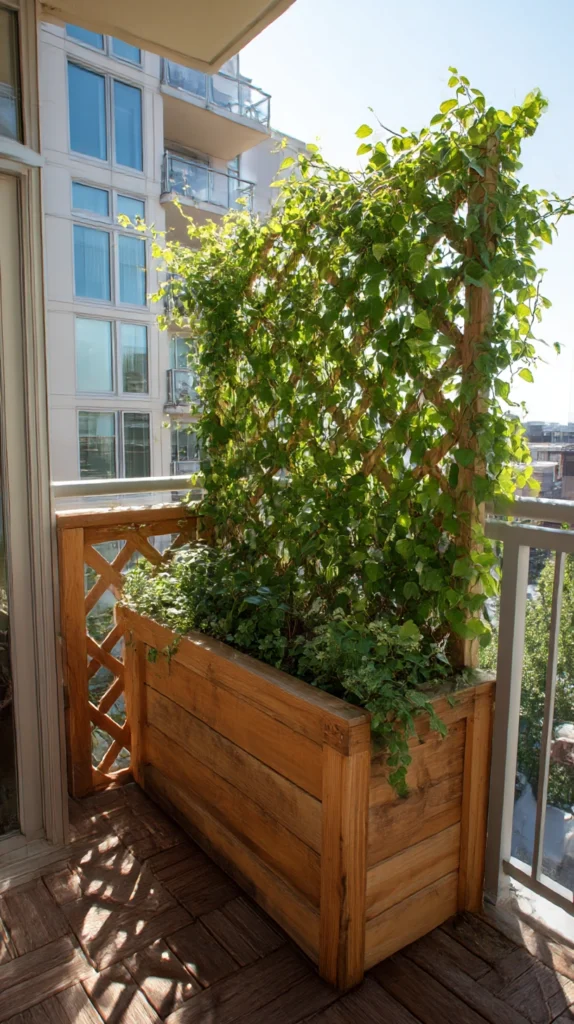
Budget: $40 – $150
A trellis panel fixed to the top of a deep planter box creates a combined planting and privacy structure that sits within the balcony railing without requiring any wall fixings. Plant the box with a fast-growing climber — jasmine, black-eyed Susan vine, morning glory — and within a single season the trellis is covered with foliage that provides both privacy and, in the case of jasmine, a scent that transforms summer evenings on the balcony entirely.
A deep rectangular planter box (at least 30 centimetres deep for root space) costs $20–$50. A timber trellis panel to fix to the back of the planter runs $15–$35. A fast-growing annual climber costs $3–$8 per plant. Weight is a consideration on balconies — fill the bottom quarter of the planter with lightweight perlite or broken polystyrene packaging before adding compost to reduce the overall load without compromising drainage.
Style tip: Fix the trellis panel to the planter before filling it with soil — the combined weight of a filled planter makes repositioning difficult and risks damaging both the trellis fixings and the floor surface. Assemble the structure in its final position rather than moving it once complete.
5. The Woven Willow or Hazel Screen
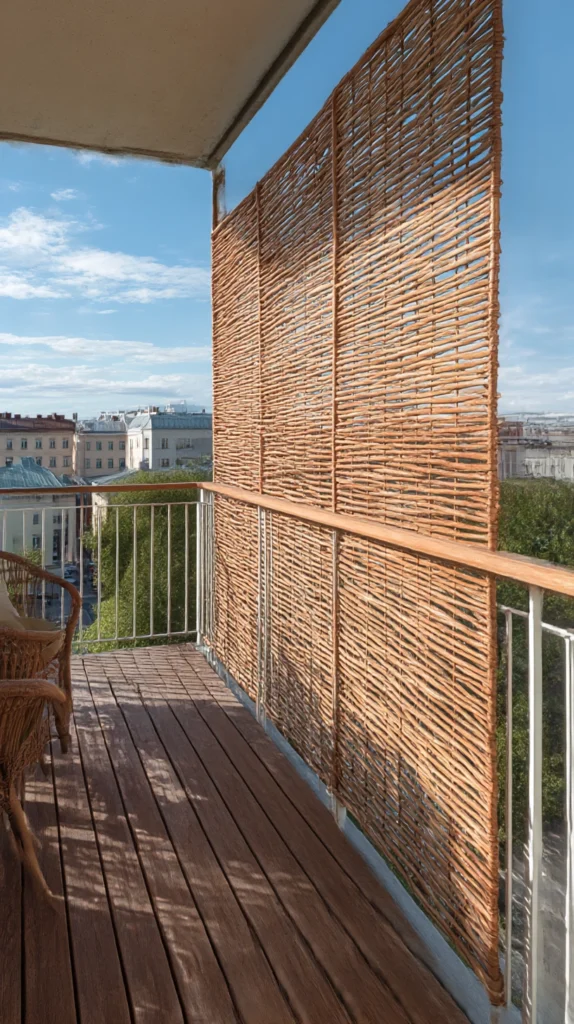
Budget: $30 – $120
Woven willow or hazel hurdle panels — traditional agricultural fencing material that has found an unlikely second life in urban garden design — provide excellent privacy, allow air movement through the weave, and look genuinely beautiful in a way that bamboo roll screens, for all their practicality, do not. The irregular weave of natural willow has a warmth and texture that manufactured screens never achieve, and the panels age gracefully, darkening from pale gold to warm grey over two to three seasons.
A 90 by 180 centimetre willow hurdle panel costs $25–$60. Attaching them to balcony railings uses the same cable tie method as bamboo screens. Two or three panels positioned along the most exposed side of the balcony provide full coverage for a standard apartment balcony railing length. Unlike bamboo, willow and hazel panels can be cut to width with garden shears without fraying or splitting.
Style tip: Lean the panel very slightly outward at the top — a 5-degree angle away from the balcony interior — when attaching it to the railing. The slight lean gives the screen a more deliberate, architectural quality and visually separates it from the railing rather than making it look like something rested against it.
6. The Frosted Window Film
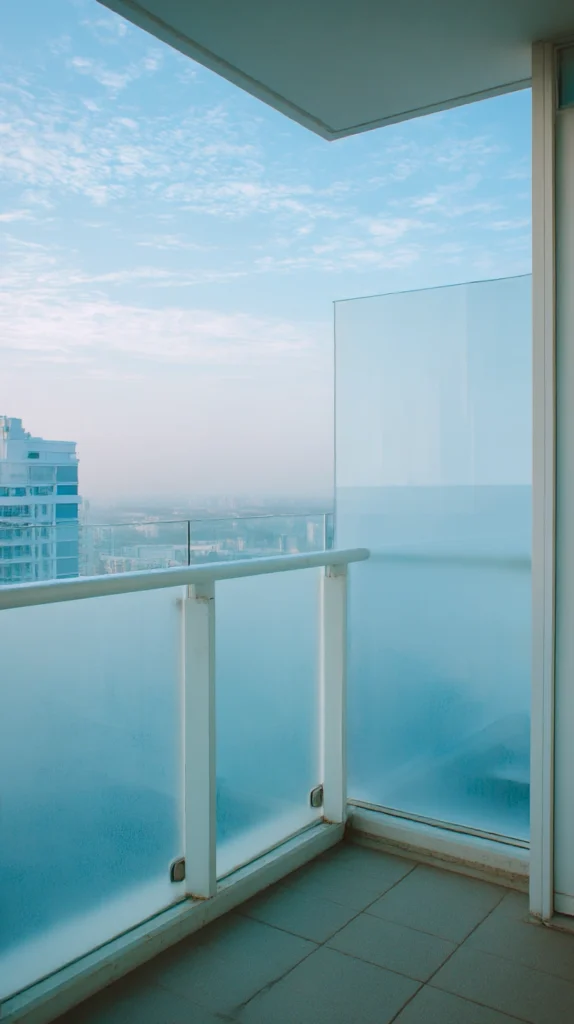
Budget: $10 – $40
Applied to glass balcony balustrades or sliding glass doors adjacent to the balcony, frosted or etched-effect window film blocks the view from outside while allowing light to pass through and maintaining a bright, open feel from the inside. It is the right solution for glass-railed balconies where other screen types would look inappropriate or where the building management restricts external additions, and it is entirely removable with a hairdryer and a plastic scraper when no longer required.
Frosted window film costs $10–$30 for a standard 45 by 200 centimetre roll. A squeegee ($3–$8) and a spray bottle of soapy water ($2–$4) are the only tools required for a clean, bubble-free application. Apply on a cool, overcast day rather than in direct sunlight — the adhesive on window film sets too quickly in high temperatures, leaving bubbles and misaligned edges that are difficult to correct once dry.
Style tip: Apply the film to two-thirds of the glass height from the bottom rather than the full pane. Full frosting eliminates the view entirely and makes the balcony feel enclosed; a frosted lower section blocks sightlines from outside at seated and standing height while preserving the open sky view above — the most pleasant balance between privacy and openness.
7. The Outdoor Blind
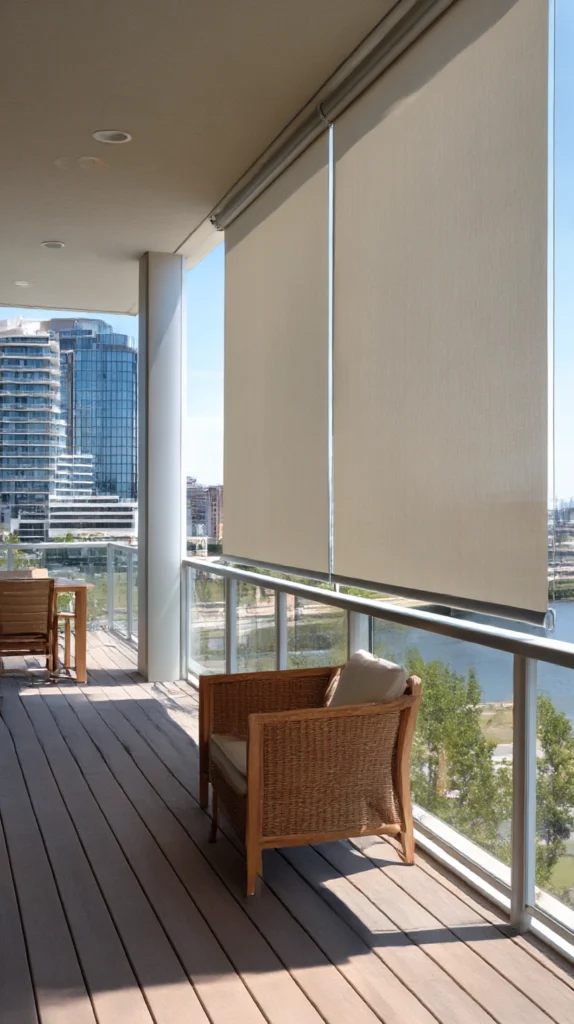
Budget: $40 – $200
A roller blind or Roman blind in outdoor fabric — mounted to the ceiling of a covered balcony or to a simple timber batten fixed above the railing of an open one — rolls down to provide full privacy and shade when needed and disappears completely when raised. It is the most space-efficient privacy solution available for covered balconies, takes up no floor space, and provides better wind resistance than loose curtain panels when made from a heavier outdoor fabric.
An outdoor roller blind in UV-resistant polyester costs $40–$100 for a standard 120-centimetre width. A wider custom blind runs $80–$200. The mounting batten — a length of 50 by 25 millimetre timber screwed to the ceiling or wall above the railing — costs $5–$10 in materials and requires only a drill and two screws. Fix the bottom of the blind to the railing with a simple hook-and-eye fixing ($3–$5) to prevent it lifting in wind when fully lowered.
Style tip: Choose an outdoor blind in a colour one shade lighter than you think is correct for the space. Outdoor blinds read darker when lowered against a bright sky than they appear on a sample card or in a showroom, and a blind chosen to match the furniture exactly often reads as heavier and more dominant than intended once installed.
8. The Artificial Hedge Panel
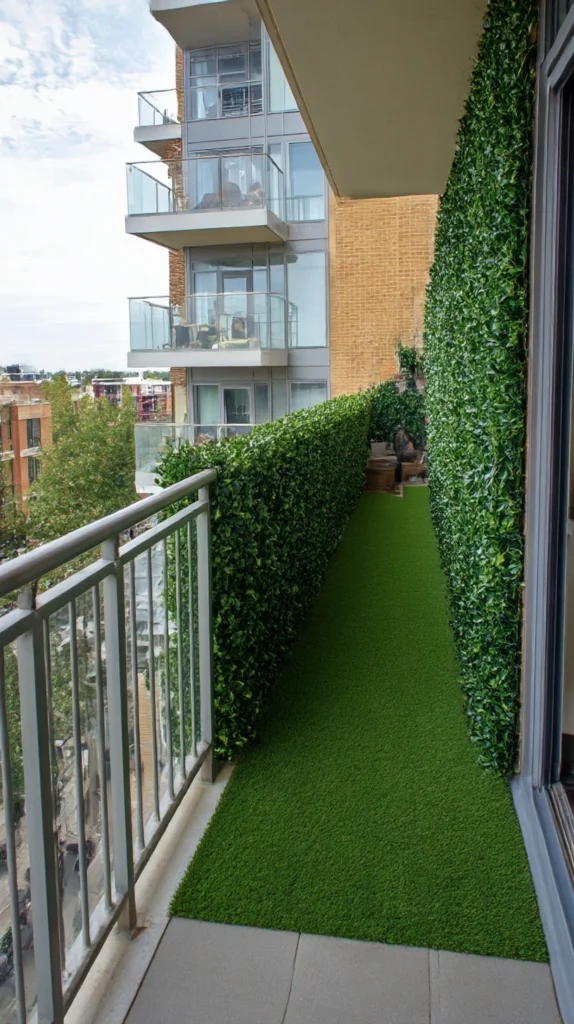
Budget: $30 – $150
Artificial boxwood or mixed-foliage hedge panels — the kind used in restaurant and retail displays — attach to balcony railings with cable ties and provide immediate, year-round privacy without watering, pruning, or seasonal deterioration. They look best from a modest distance and in the right context — a contemporary apartment with clean lines — read as a polished, considered choice rather than a fake-plant compromise. Quality has improved considerably in recent years and the best versions are difficult to distinguish from real hedging at conversational distance.
A 100 by 100 centimetre artificial hedge panel costs $15–$40. A set of four covering a standard balcony railing runs $60–$160. UV-stabilised versions ($5–$10 more per panel) are essential for south-facing balconies where direct sunlight causes non-stabilised artificial foliage to yellow and fade within a single summer. Attach at six points per panel — four corners and two mid-edge points — to prevent the panel from bowing and creating gaps at the joints between sections.
Style tip: Mix two or three different panel varieties — a standard green boxwood, a mixed leaf variety, perhaps one with small white artificial flowers — rather than using identical panels throughout. A uniform hedge of a single artificial variety reads as a product; a mixed planting reads as a garden.
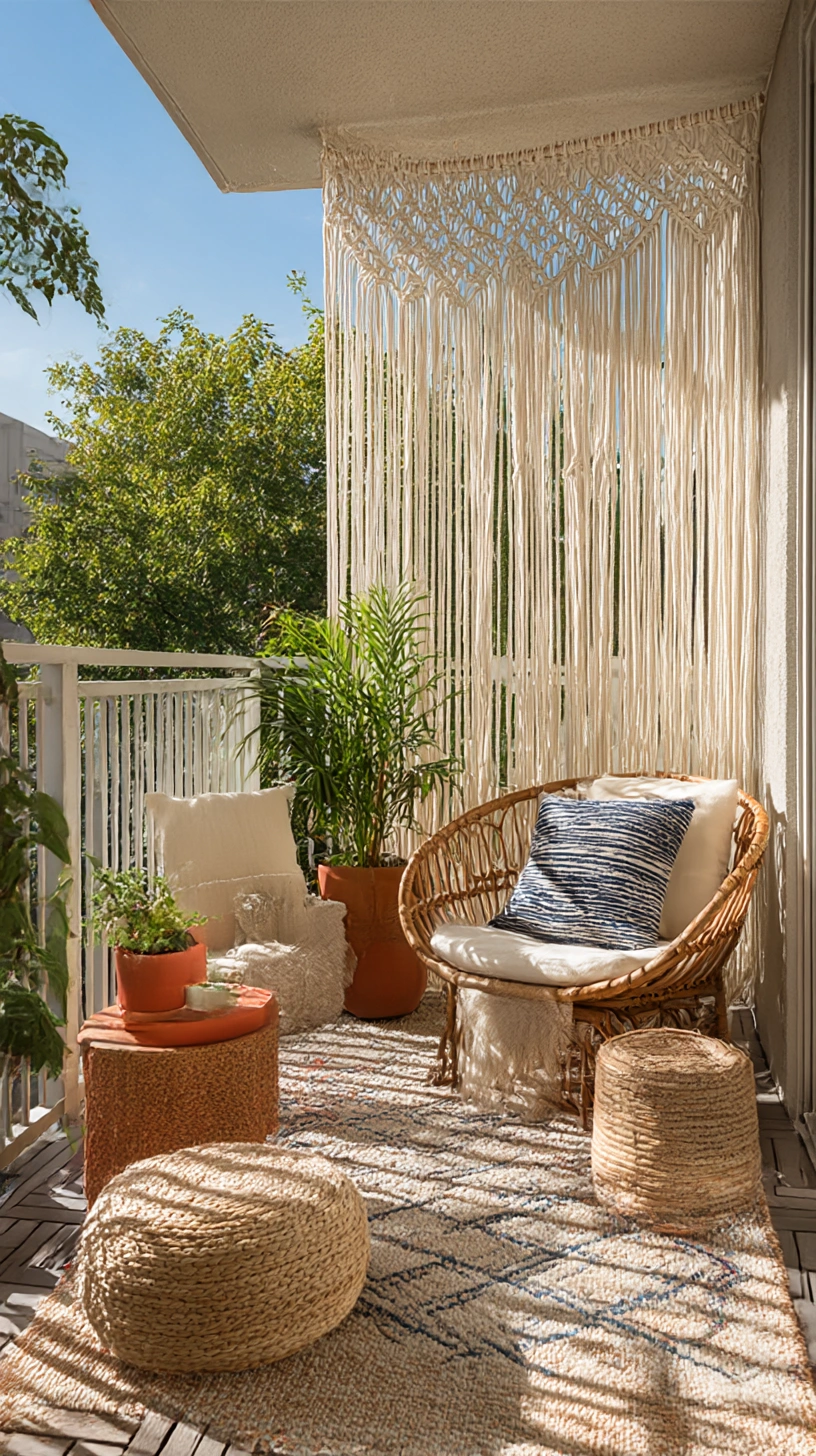
9. The Hanging Macramé Screen

Budget: $30 – $120
A large macramé panel hung from the balcony ceiling or from a horizontal rod creates a decorative privacy screen with open weave that filters the view without eliminating light or air. It is the most visually distinctive option on this list — suited to bohemian, natural, or eclectic apartment styles — and one of the few privacy solutions that doubles as unambiguous decoration. Visitors to the balcony will comment on it in a way that they will never comment on a bamboo roll screen.
A large macramé panel (120 by 150 centimetres or larger) costs $40–$100. Making one at home from 3mm cotton rope ($15–$25 per 100-metre reel) takes a weekend for a beginner following a free online pattern. Hang from a bamboo dowel or a stainless steel rod ($5–$12) using two ceiling hooks rated for the weight ($5–$8 each). Keep macramé on covered or semi-covered balconies — sustained heavy rain causes natural cotton fibre to stretch, shrink unevenly, and lose its shape over a single wet season.
Style tip: Hang the macramé panel at a slight angle to the railing rather than parallel to it — a 15-degree rotation creates a more dynamic, three-dimensional quality and prevents the panel from lying flat against the railing in still air, which reduces its visual depth and makes it look pressed rather than hanging freely.
10. The Repurposed Wooden Pallet Screen
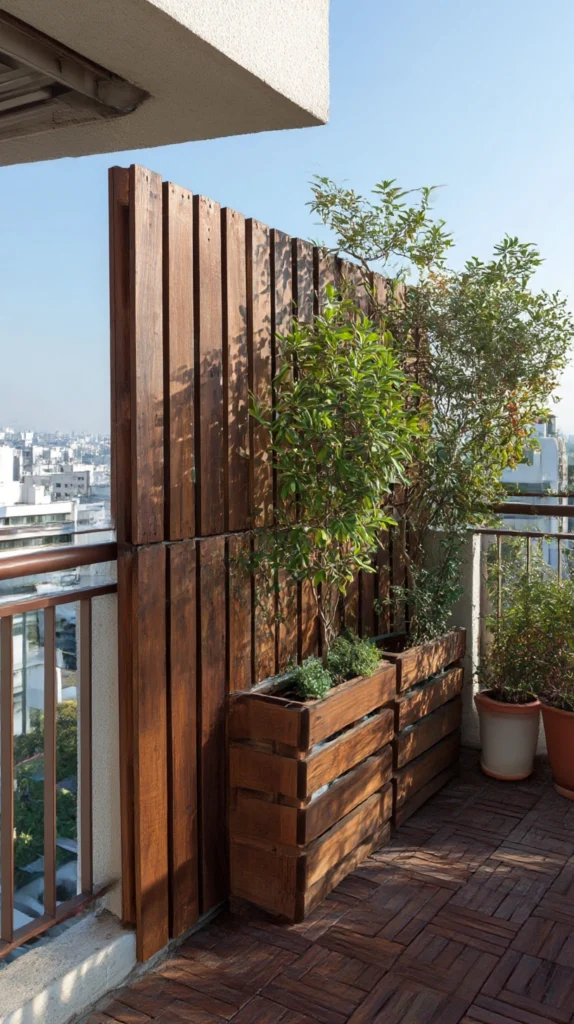
Budget: $10 – $50
A heat-treated wooden pallet stood upright and fixed to the balcony railing creates an immediate privacy screen that costs almost nothing and, painted or stained in a dark exterior finish, looks considerably more deliberate than its origin suggests. The slat spacing of a standard pallet provides privacy from direct sightlines while allowing air to move through freely — better ventilation than a solid panel and more screening than a trellis alone.
Heat-treated pallets (marked HT) cost $0–$10 from builders merchants or online. Exterior wood stain in charcoal, dark oak, or forest green runs $8–$15 for a small tin. Stainless steel cable ties to fix the pallet to the railing cost $5–$8 for a pack. Sand any rough edges and splinters before installing — a pallet that catches clothing or skin every time someone brushes past it quickly becomes the most irritating thing on the balcony.
Style tip: Paint or stain all faces of the pallet before installing rather than only the visible face. The interior slats and the face that sits against the railing will be partially visible from certain angles and on certain days, and an unfinished interior against a finished exterior creates a jarring contrast that undermines the otherwise considered look of a stained pallet screen.
11. The Canopy and Side Panel Combination
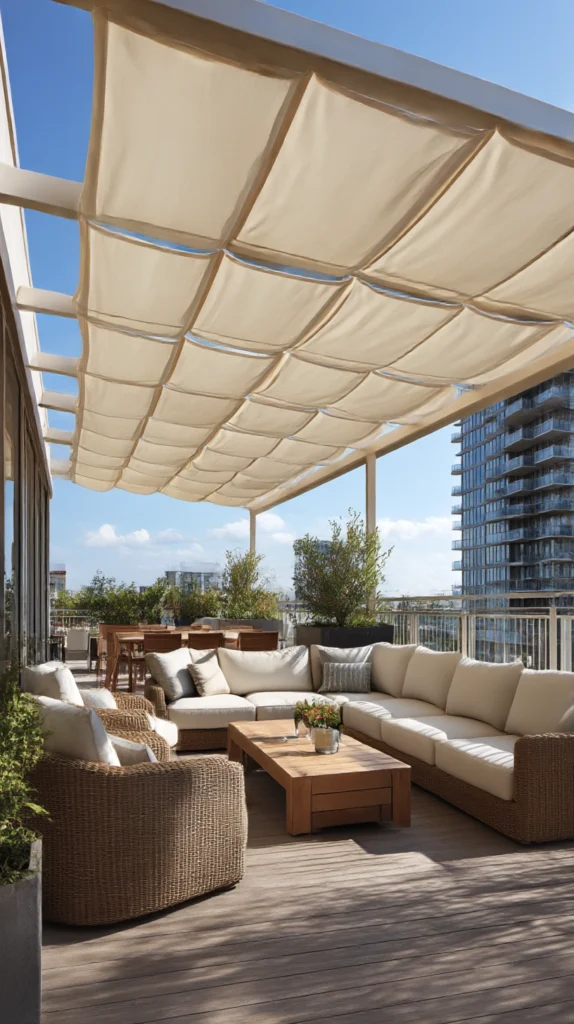
Budget: $60 – $250
A retractable canopy across the top of the balcony combined with a single fixed side panel creates privacy from above and from one lateral direction simultaneously — the two angles from which balcony privacy is most commonly needed in apartment buildings where neighbours are on the floor above and to one side. The canopy and panel work independently and together, and the combination costs less than two separate installed systems.
A retractable balcony canopy costs $50–$150 for a basic manual version. A fixed side panel in matching fabric runs $20–$60. Attaching both to the same wall bracket system ($15–$25) reduces the number of fixings required and gives the installation a unified look. Choose the same fabric for both elements — a canopy and side panel in matching material read as a designed system; mismatched fabrics read as two separate purchases that happened to arrive on the same balcony.
Style tip: Position the side panel on the side that receives afternoon sun as well as the direction from which privacy is most needed. A panel that provides privacy and shade simultaneously earns its place twice over; one that provides privacy in a direction that is already screened by a building wall earns it only once.
12. The Climbing Plant Tower
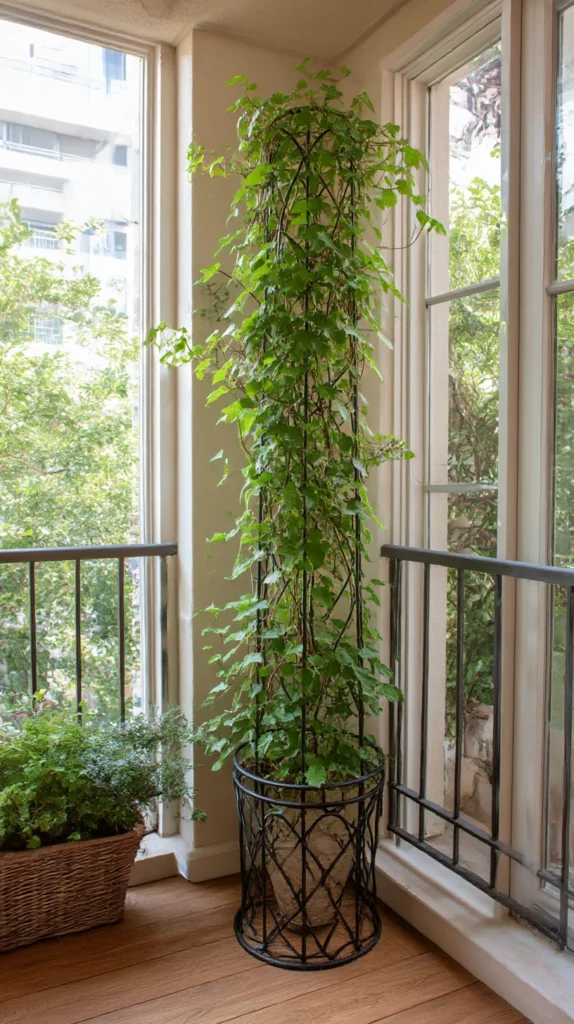
Budget: $25 – $80
A tall, narrow obelisk or tower planter — a single vertical structure with a climber trained up it — positioned at the corner of the balcony where two sightlines meet provides targeted privacy at the most exposed point without covering the entire railing. A corner climber tower is the most space-efficient living privacy solution available and looks like a piece of garden design rather than a screening solution, which is the most desirable quality any privacy addition can have.
A metal or timber obelisk costs $15–$40. A deep pot for the base runs $15–$30. A fast-growing climber such as a black-eyed Susan vine or a compact clematis costs $5–$12. Water the pot daily in hot weather — a climber in a small pot at the exposed corner of a balcony in full sun is in the most challenging growing position in the apartment, and consistent moisture is what separates a thriving screening plant from a rapidly deteriorating one.
Style tip: Choose a climber with small leaves rather than large ones for a balcony tower. Small-leaved climbers move in the breeze in a way that softens the entire corner visually; large-leaved climbers sit still and heavy and read more like a potted houseplant than a garden feature.
13. The Evening Light Privacy Screen
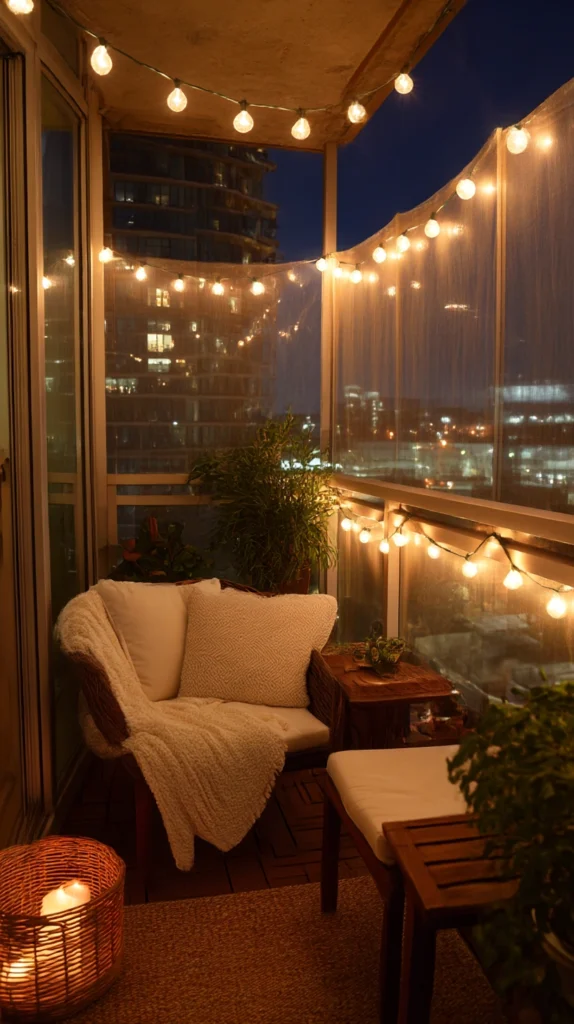
Budget: $30 – $100
For balconies where privacy is less of a daytime concern and more of an evening one — where the issue is being visible when the interior lights are on behind you rather than being overlooked during the day — a screen of outdoor fairy lights, paper lanterns, or LED festoon lights hung along the railing edge creates a curtain of warm light that makes the balcony interior difficult to see into from the street or from neighbouring windows. It solves the evening privacy problem while simultaneously making the balcony the most pleasant place to be after dark.
Outdoor festoon lights with globe bulbs cost $20–$50 for a 5-metre string. Paper lanterns on a string run $10–$25. A weatherproof power connection or a long outdoor extension lead ($10–$20) completes the setup. The light itself creates privacy by reducing the contrast between the lit interior and the dark exterior — observers looking toward a bright light source cannot easily see past it.
Style tip: Hang the lights at railing height rather than overhead to maximise the privacy effect. A screen of light at eye level from the street creates a visual barrier that overhead lights do not — the principle is the same as a stage spotlight making the audience invisible from the stage, scaled to a balcony railing.
The best balcony privacy solution is the one that gives you back the balcony entirely — not a compromise that makes you feel slightly less observed while still making you reluctant to sit outside, but a genuine resolution that lets you forget the sightlines exist. A cup of coffee in the morning without the feeling of being watched. A glass of something cold in the evening without performing for the street. That is what the balcony is for, and it should not take more than an afternoon and a modest budget to get there.
Start with the side that bothers you most, put something up this weekend rather than next month, and adjust from there. Summer is already here.