13 Fall Camper Renovation Ideas on a Budget
13 Fall Camper Renovation Ideas on a Budget
Most camper renovations shown online involve gutting the whole interior — new subfloor, custom cabinetry, a full electrical rebuild. Impressive to watch, and entirely out of reach for anyone who just wants their camper to feel less dated before the next trip.
That all-or-nothing approach skips over what actually changes how a camper feels day to day. A full renovation takes months and a serious budget. A handful of smart, low-cost updates, chosen well and done in a weekend or two, can change the entire feel of the same space for a few hundred dollars.

A budget camper renovation isn’t a smaller version of a full gut renovation. It’s a different project entirely — one built around surface-level changes that have an outsized visual impact, rather than structural changes that take real time and money to execute. Done well, a budget renovation can make a tired, dated camper interior look genuinely refreshed, just in time for the season when it’s about to get used the most.
Here are 13 ideas for renovating a camper on a real budget, with fall’s colder, longer-stay use in mind.
Why Fall Renovation Priorities Differ From a Spring Refresh
The rules are not the same for every season of camper work:
Spring Refresh Advantages:
- Mild weather makes any exterior project, from washing to resealing, easier and faster
- A full season of trips ahead means more time to enjoy whatever gets updated
- Cosmetic projects can wait, since the camper is about to get used heavily either way
The spring refresh comparison: cosmetic-first, with time on your side
Fall Renovation Advantages and Realities:
- The camper is about to sit closed up more, making sealing, insulation, and moisture control more urgent
- Shorter daylight and colder evenings mean interior comfort upgrades matter more than exterior cosmetics
- Many campers head into storage after fall, making this the last real window to fix anything before a long off-season
The key insight:
- A spring refresh rewards cosmetic, exterior-facing projects
- A fall renovation rewards comfort, sealing, and interior-facing projects
- These are different renovation priorities, not the same project list simply done at a different time of year
The Budget Allocation Reality
The most important number in a budget camper renovation:
The dollar-per-visible-impact ratio:
- Some $50 projects change how an entire room feels; some $500 projects barely register
- Surface area matters more than material cost — a large, visible surface updated cheaply beats a small, expensive upgrade tucked in a corner
- Know this — it governs which projects make the list before budget does
The “cosmetic before structural” calculation:
- Paint, hardware, and textiles cost little and change a huge percentage of what’s actually seen
- Structural changes — subfloor, plumbing, electrical — cost far more and are often invisible once finished
- A budget renovation spends almost entirely in the first category, leaving structural work for a future, better-funded project
Most budget renovations happen in passes, not all at once:
- The surface pass comes first — paint, hardware, textiles — since it’s the cheapest and most visually rewarding
- The comfort pass comes next — sealing, insulation touch-ups, soft furnishings — particularly relevant heading into fall
- The smallest finishing touches come last, added once the bigger surface changes are already in place to react to
1. The Cabinet Paint Refresh (The Single Biggest Visual Change for the Least Money)
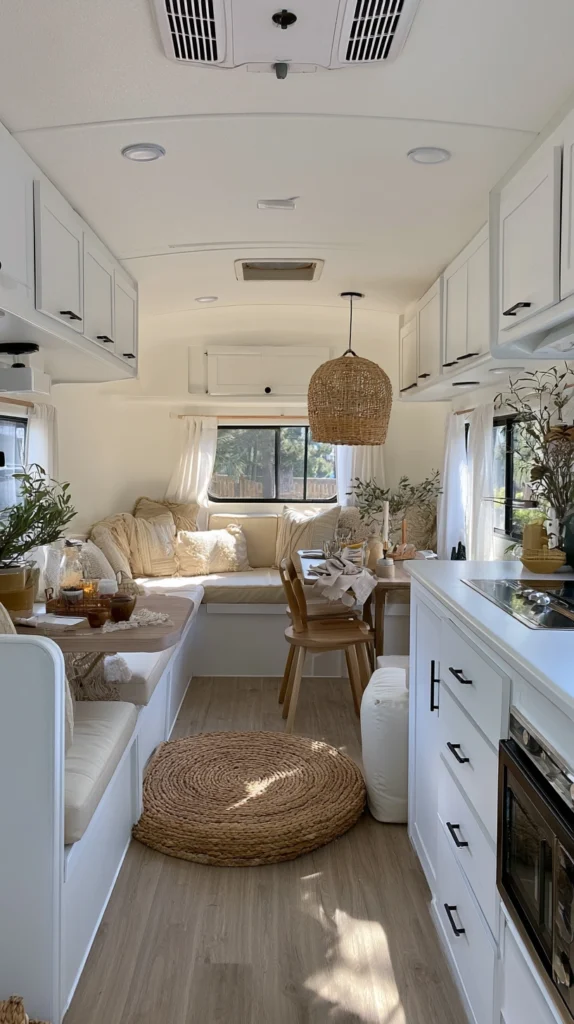
Repainting the camper’s existing wood-toned or dated cabinet fronts in a fresh, lighter or more current color — the single project most likely to change the entire feel of the interior for the lowest cost on this list.
Why cabinets carry more visual weight than almost anything else inside
- The surface-area advantage: cabinets cover more visible square footage in most campers than any other single surface, which means painting them changes more of what’s seen than almost any other project
- The dated-finish problem it solves directly: most factory camper cabinets ship in an orange-toned or heavily varnished wood finish that reads as instantly dated; paint solves that in a weekend
- The light-reflecting bonus: a lighter cabinet color also brightens the whole interior, which matters more once fall’s shorter days mean less natural light coming in
The options
- A bonding primer plus cabinet-grade paint, in white, cream, or a soft sage or blue for a more current look
- A two-tone approach, painting upper cabinets one color and lower cabinets a slightly deeper shade
- Chalk or mineral paint, requiring less sanding prep than standard cabinet paint, useful for a faster weekend project
- New cabinet pulls added after painting, completing the refresh with Idea #2
The practical execution
- Clean and lightly sand every surface before priming, since camper cabinets often have a factory finish that paint won’t adhere to without prep
- Use a bonding primer specifically rated for laminate or varnished wood, not a standard wall primer
- Paint doors and drawer fronts separately from the cabinet boxes themselves, removing hardware first for a cleaner finish
Cost breakdown
- Bonding primer and cabinet paint, enough for a full camper: $50–100
- Sandpaper, brushes, and prep supplies: $15–30
- Total: $65–130
The cabinets repainted on a Saturday: the one project on this list most likely to make a guest ask if the whole camper got redone.
2. The Hardware Swap (Small Parts, Disproportionate Impact)
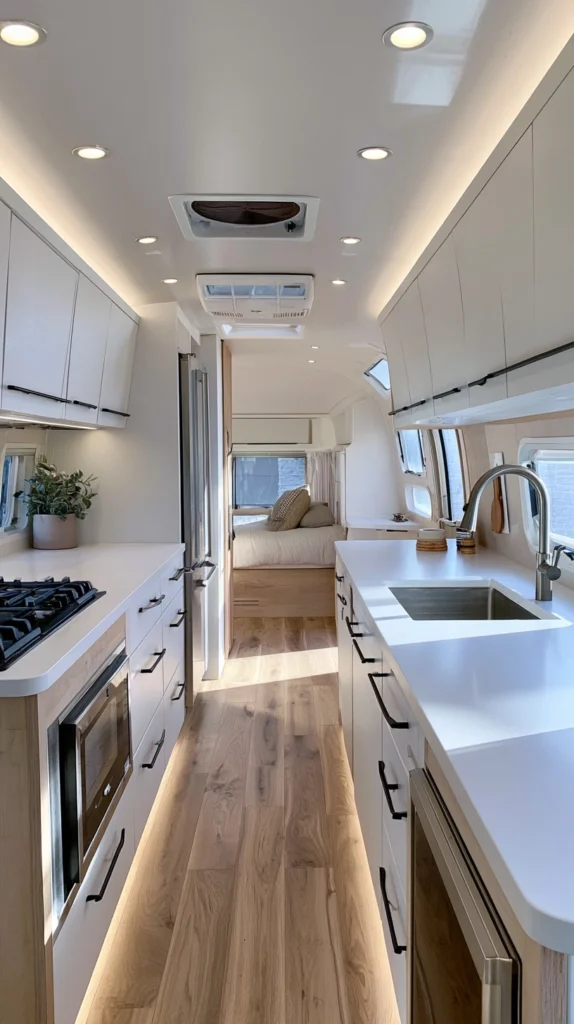
Replacing dated cabinet pulls, drawer knobs, and faucet fixtures with simple, current hardware — the lowest-cost project on this entire list, and one of the fastest to complete.
Why swapping small parts changes more than its size suggests
- The detail-recognition effect: hardware is one of the first things an eye registers on a cabinet front, and dated brass or plastic pulls can undercut even a freshly painted surface
- The fastest project on the list: most hardware swaps require only a screwdriver and an afternoon, with no drying time or prep work involved
- The pairing value: this project does the most when combined with Idea #1, since fresh paint paired with old hardware looks unfinished
The options
- Matte black or brushed nickel pulls, a current, widely available finish for cabinet doors and drawers
- Simple round knobs, a lower-cost option than bar pulls, suited to a more cottage or traditional look
- A new faucet, swapped for the factory original if it’s dated or showing wear
- New cabinet hinges, if the existing ones are visibly worn or squeaking, alongside the pull replacement
The practical execution
- Measure the existing hole spacing before ordering new pulls, since mismatched spacing means drilling new holes or patching old ones
- Choose a single consistent finish throughout the camper, rather than mixing metals across different cabinets
- Fill and touch up any old screw holes with wood filler and matching paint if hole spacing changes
Cost breakdown
- Cabinet pulls or knobs, a full set (15–20 pieces): $30–70
- New faucet, if replacing: $40–100
- Total: $30–170
3. The Peel-and-Stick Flooring Update (A New Floor Without Removing the Old One)
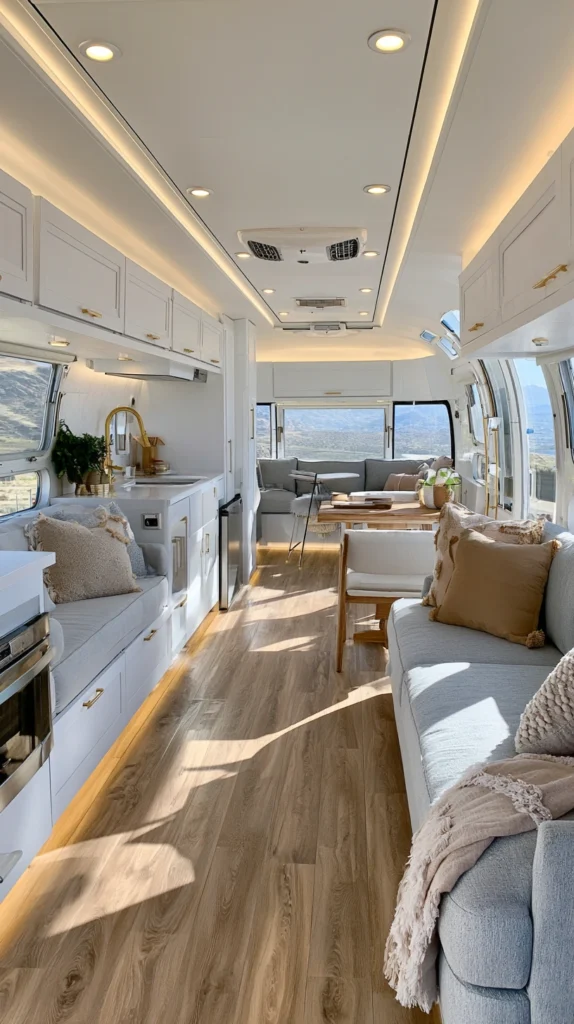
Peel-and-stick vinyl planks or tiles applied directly over the camper’s existing flooring — the project that changes one of the largest surfaces in the camper without the cost or labor of a full subfloor replacement.
Why this solves the flooring problem without a full tear-out
- The largest-surface logic: floors cover more square footage than almost any other surface in a camper, and a worn or dated floor drags down the look of an otherwise updated interior
- The no-demolition approach: peel-and-stick flooring installs directly over most existing surfaces, avoiding the time, mess, and cost of removing old flooring and subfloor
- The lightweight material advantage: this type of flooring adds minimal weight to the camper, an important consideration given towing capacity limits most renovation projects have to respect
The options
- Peel-and-stick luxury vinyl planks, mimicking wood grain, the most popular current camper flooring choice
- Peel-and-stick vinyl tile, for a more traditional or patterned look
- Interlocking click-vinyl flooring, slightly more involved to install but not adhered directly to the existing surface, useful if the old floor isn’t a stable enough base for adhesive
- A patterned or checkered vinyl, for a bolder, more distinctive look than a standard wood-look plank
The practical execution
- Clean and thoroughly dry the existing floor before installation, since adhesive flooring won’t bond well to a dirty or damp surface
- Address any soft spots or damage in the underlying subfloor before covering it, since new flooring on top of a compromised base will fail the same way the old one did
- Trim pieces carefully around fixed cabinetry and fixtures, since camper interiors rarely have perfectly square corners
Cost breakdown
- Peel-and-stick vinyl flooring, materials for a full camper: $80–200
- Underlayment or floor prep materials, if needed: $20–50
- Total: $80–250
4. The Reupholstered or Slipcovered Cushions (Fixing the Most-Touched Surface in the Camper)
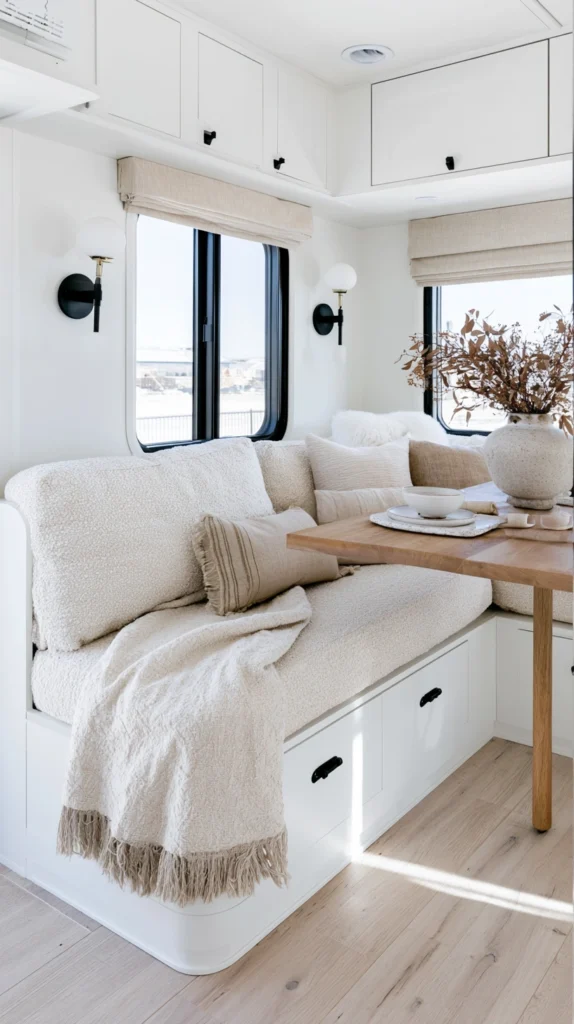
New fabric covers or a full reupholstery for the dinette and seating cushions — the project that addresses the surface guests and family actually sit on, touch, and notice most directly.
Why cushions matter more than their size on the to-do list suggests
- The direct-contact factor: unlike a wall or a cabinet, cushions are touched and sat on constantly, and worn or dated fabric is felt as much as it’s seen
- The color and pattern opportunity: cushion fabric is one of the largest opportunities in the whole camper to introduce a deliberate color palette, especially in a space with otherwise neutral surfaces
- The budget flexibility it offers: this project scales easily from a no-sew slipcover to a full custom reupholstery, depending on what the budget allows
The options
- No-sew fitted slipcovers, the fastest and lowest-cost option, pulled over existing cushions without altering them
- New zippered cushion covers, sewn to the exact dimensions of the existing foam for a more tailored look
- A full reupholstery, replacing both the fabric and the foam if the existing cushions have lost their shape
- A patterned fabric mixed with a solid, for visual interest across multiple cushions without overwhelming the space
The practical execution
- Choose an outdoor-rated or heavily stain-resistant fabric, given how much more use camper cushions see relative to indoor furniture
- Measure existing cushions carefully before ordering fabric or a slipcover, since camper dinette cushions are often nonstandard shapes
- Wash and dry fabric before sewing or fitting, since most materials shrink slightly on their first wash
Cost breakdown
- No-sew slipcovers, a full dinette set: $60–150
- Custom-sewn covers, fabric and labor: $150–400
- Full reupholstery with new foam: $300–700
- Total: $60–700, depending on the route taken
5. The Removable Wallpaper Accent (Pattern and Color Without Painting a Single Wall)
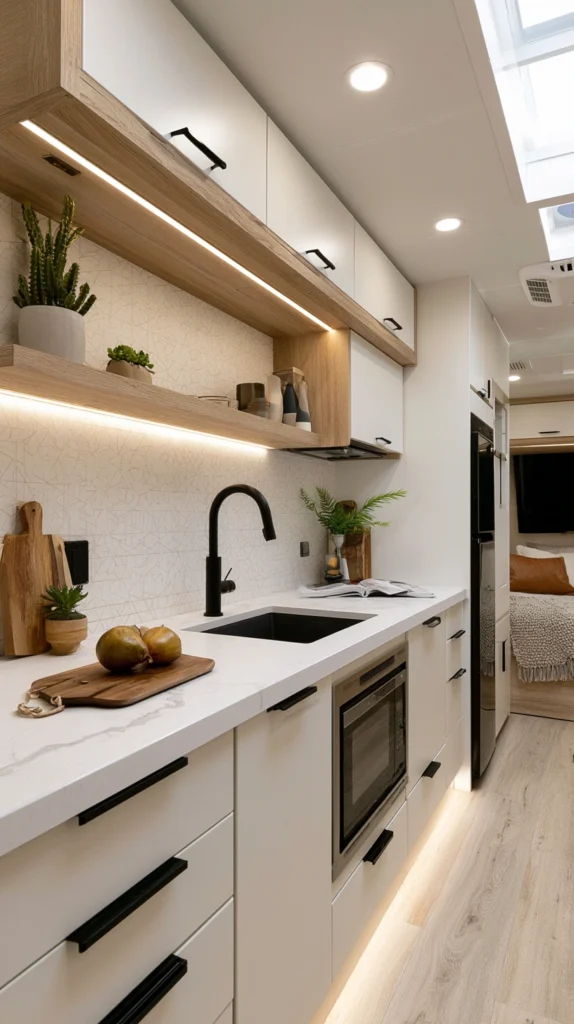
Peel-and-stick wallpaper applied to one wall, a backsplash, or the inside of cabinet doors — the project that introduces real pattern and personality to a camper’s interior with no paint, no mess, and no permanence required.
Why wallpaper works especially well in a rented or resale-conscious space
- The reversibility advantage: peel-and-stick wallpaper removes cleanly, which matters in a camper that might get sold, traded, or rented out, unlike a painted wall that requires repainting to undo
- The pattern opportunity paint can’t match: wallpaper introduces texture and pattern in a way flat paint simply can’t, and a single accent application goes a long way in a small space
- The quick-installation value: a single wall or backsplash can be papered in an afternoon, with no drying time required before the space is usable again
The options
- A botanical or leaf-pattern paper, suited to a fall-leaning, nature-inspired interior refresh
- A small geometric or check pattern, for a more classic camper look
- A solid textured paper, adding visual interest without introducing a bold pattern
- A backsplash-only application, behind the galley sink or stove, as a lower-commitment starting point
The practical execution
- Clean and dry the wall surface thoroughly before applying, since dust or grease significantly weakens the adhesive bond
- Apply in a single, large piece where possible rather than many small strips, for a more seamless look
- Test a small section in an inconspicuous spot first, since some camper wall surfaces are more textured or curved than a typical flat wall
Cost breakdown
- Peel-and-stick wallpaper, one roll: $15–35
- A full accent wall or backsplash, 2–3 rolls: $45–100
- Total: $15–100
6. The Window Seal and Weatherstrip Refresh (Comfort and Cost Savings Heading Into Cold Weather)
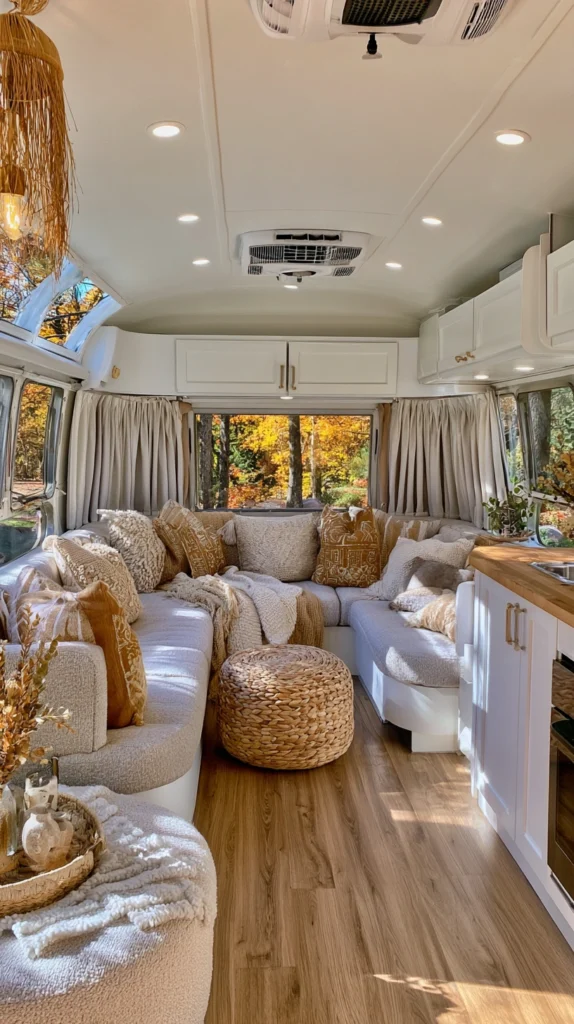
Replacing worn weatherstripping around windows and doors, and resealing any gaps with fresh caulk — the unglamorous project that does more for fall and winter comfort than almost anything else on this list.
Why this project matters more in fall than any other season
- The seasonal timing case: a camper about to see colder nights or sit closed up in storage needs its seals in good shape before that happens, not after a problem’s already developed
- The function-first logic: unlike most projects on this list, this one is barely visible when done well, but its absence is felt immediately in draft, condensation, and heating cost
- The low cost relative to what it prevents: a $40 weatherstripping project can prevent far more expensive water damage or mold issues from a poorly sealed window over a damp season
The options
- Adhesive-backed foam weatherstripping, the simplest and least expensive option for most window and door gaps
- Rubber bulb-style weatherstripping, more durable and better suited to doors that see frequent use
- A fresh bead of exterior-rated caulk, applied around window frames and any visible exterior seams
- A clear silicone sealant, for any small gaps that caulk alone won’t fully close
The practical execution
- Remove all old, cracked, or peeling weatherstripping completely before applying new material, rather than layering new strips over failing old ones
- Clean and dry every surface thoroughly before applying adhesive-backed products, since moisture or dust prevents proper bonding
- Inspect every window and door on the camper, not just the ones that feel drafty, since some leaks aren’t obvious until they cause a problem
Cost breakdown
- Weatherstripping, enough for a full camper: $20–40
- Exterior-rated caulk, several tubes: $15–30
- Total: $35–70
7. The Open Shelf Conversion (Removing a Dated Upper Cabinet for a More Open Feel)
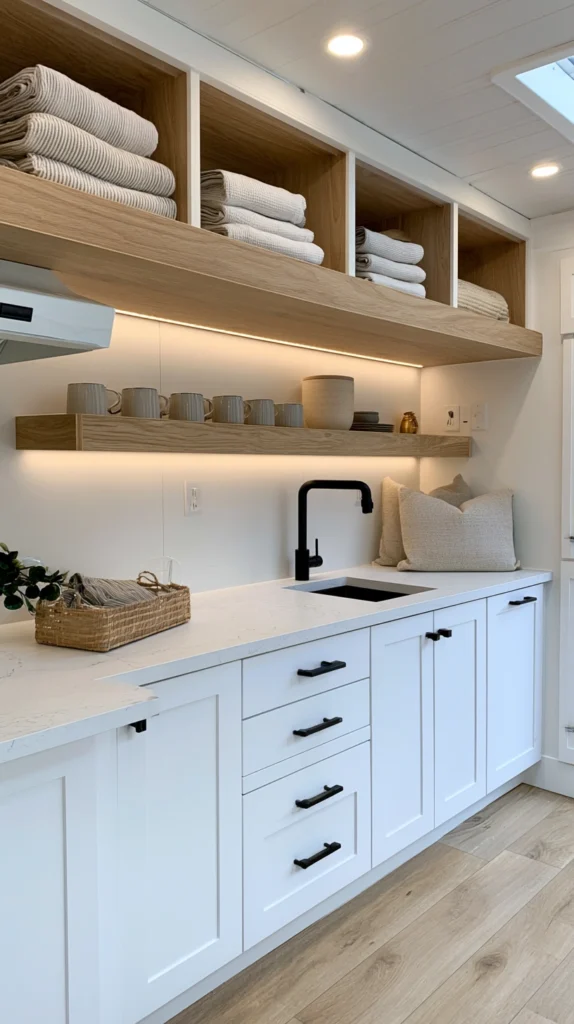
Removing one or two upper cabinet doors, or the cabinet box itself, to create open shelving — the project that makes a small camper feel less boxed-in without adding a single new material.
Why removing something can be as effective as adding something
- The visual-weight reduction: solid upper cabinets, especially in a dated wood tone, can make a small camper feel more closed-in than the square footage actually requires
- The near-zero material cost: this is one of the few projects on the list where the renovation is largely subtractive, requiring tools more than materials
- The styling opportunity it creates: once open, the shelving becomes a spot for the kind of curated display covered in dedicated camper organization projects, adding personality where a closed door used to be
The options
- Removing cabinet doors only, leaving the box and shelves intact as open storage
- Removing the doors and adding a simple trim edge, for a more finished look than a bare cut edge
- Removing one full upper cabinet, for a more dramatic open effect above a counter or sink
- Replacing solid doors with a glass-front or wire-mesh insert, a middle option between fully open and fully closed
The practical execution
- Remove hinges carefully and patch any resulting holes with wood filler before repainting the surrounding cabinet (see Idea #1)
- Sand and finish any newly exposed edges, since factory cabinet interiors aren’t always finished to be seen
- Reinforce shelving if it wasn’t originally designed to be load-bearing without a door for structural support
Cost breakdown
- Wood filler, sandpaper, and finishing materials: $15–30
- Trim materials, if adding an edge: $10–25
- Total: $15–55
8. The Curtain and Soft Furnishing Refresh (Textiles as the Fastest Color Change Available)
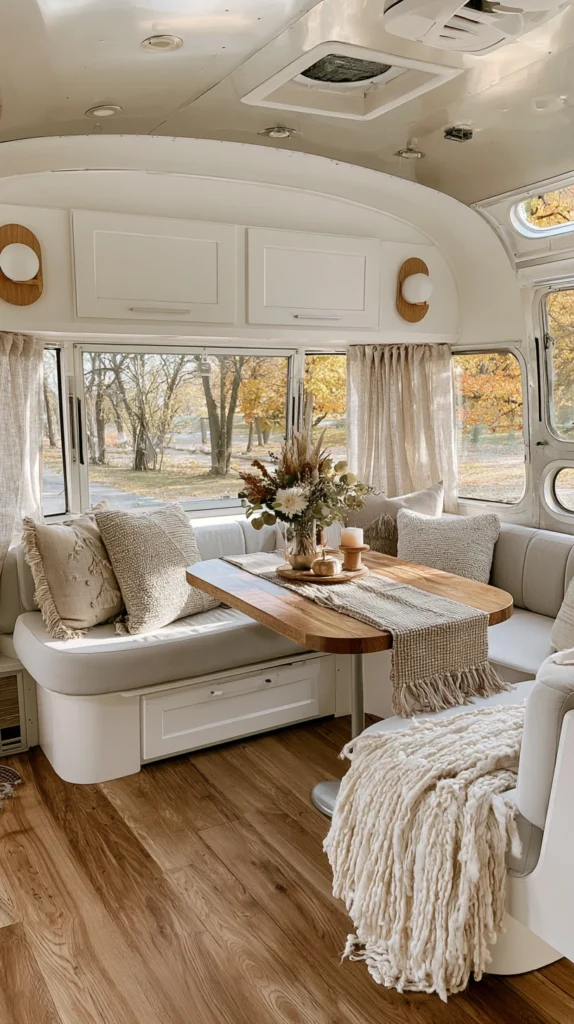
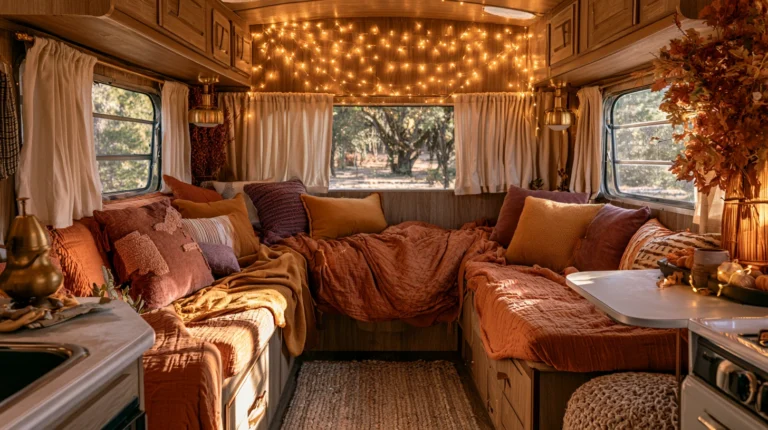
New curtains, a table runner, and a few throw pillows, replacing whatever dated or sun-faded textiles came with the camper originally — the project that changes the interior’s color story faster than almost anything else on the list.
Why textiles deserve their own dedicated budget line
- The fast-turnaround advantage: textiles require no drying time, no tools beyond a curtain rod, and can transform a room’s color palette in under an hour
- The fade and wear problem most campers have: factory curtains and cushion covers are often some of the most sun-damaged and dated elements in the entire interior, simply from years of window exposure
- The low individual cost, high cumulative effect: no single textile item costs much, but a full coordinated refresh changes more of the visible interior than its total price suggests
The options
- New curtain panels, in a current color or pattern, replacing factory originals
- A table runner and placemats, refreshing the dinette without touching the cushions themselves
- A handful of throw pillows, in a coordinated but not identical palette
- A new shower curtain or bath mat, if the bathroom has fallen behind the rest of the refresh
The practical execution
- Measure window dimensions carefully before ordering curtains, since camper windows are frequently narrower or shorter than standard home sizes
- Choose a consistent color family across all the new textiles, even while mixing a few different patterns
- Wash new fabric items before installing or displaying them, both to remove sizing chemicals and to preshrink anything that might shrink later
Cost breakdown
- Curtain panels, a full set: $30–80
- Table runner and placemats: $20–40
- Throw pillows, 2–3: $25–60
- Total: $75–180
9. The Mattress Topper and Bedding Upgrade (Comfort for the Longer Nights Fall Brings)
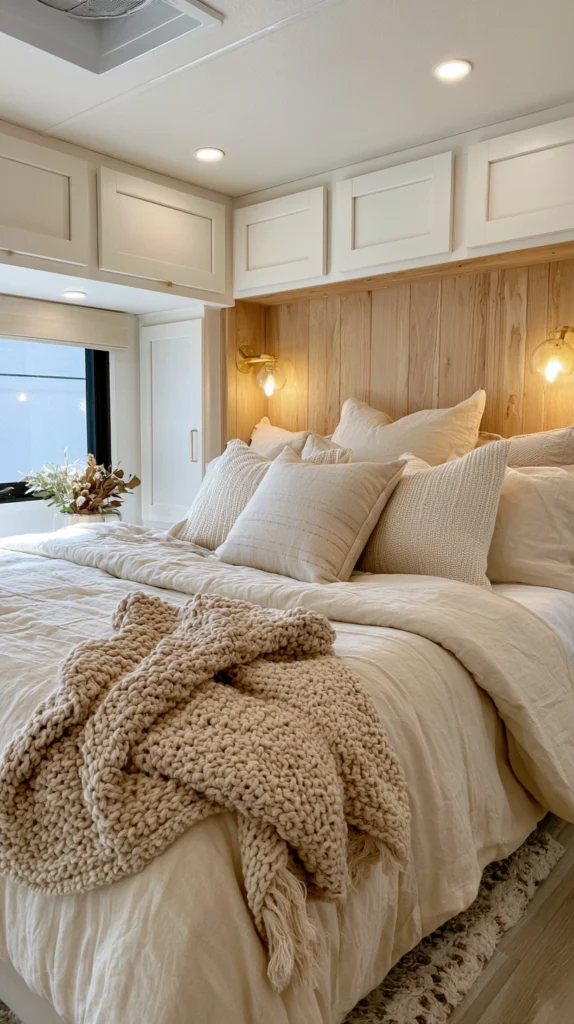
A new mattress topper paired with updated bedding — the comfort upgrade that matters more once fall brings colder nights and longer hours actually spent in bed.
Why this project earns a spot on a cosmetic-focused list
- The function-first exception: unlike most projects here, this one is about comfort more than appearance, but a tired factory mattress is one of the most consistently complained-about features in an unrenovated camper
- The fall-specific timing: colder nights mean more hours spent under the covers, and a thin, worn mattress becomes a bigger problem the longer those nights get
- The visible bonus it still provides: new bedding, even on an unreplaced mattress, is one of the most immediately visible changes in the entire sleeping area
The options
- A memory foam or gel mattress topper, sized to the camper’s specific mattress dimensions, which are often nonstandard
- A wool or down-alternative topper, for added warmth heading into colder weather specifically
- New flannel or heavier-weight sheets, swapped in seasonally for the colder months
- A duvet or quilted bedspread, replacing a thin factory comforter with something better suited to fall and winter temperatures
The practical execution
- Measure the camper’s mattress carefully before ordering a topper, since RV and camper mattress sizes frequently don’t match standard home bed sizes
- Choose breathable materials for the topper itself, since trapped moisture in a sealed camper bed can become a mildew issue over a damp season
- Layer bedding for adjustability, since temperatures inside a camper can swing more than inside a house over a single night
Cost breakdown
- Mattress topper, sized to camper dimensions: $50–120
- New sheets and a duvet or comforter: $50–100
- Total: $100–220
10. The Exterior Touch-Up Paint and Decal Removal (Curb Appeal Without a Full Repaint)
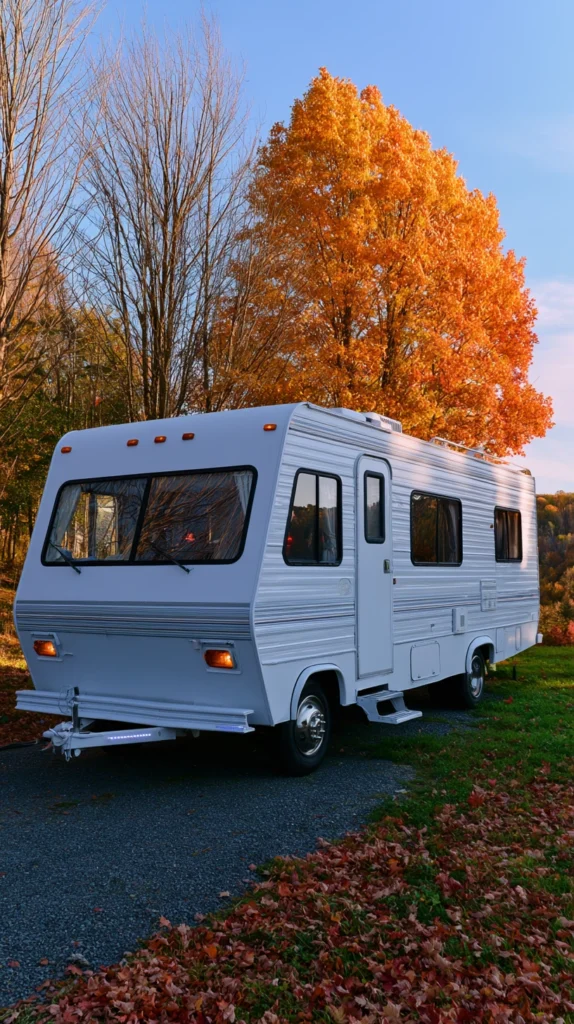
Removing dated factory decals and touching up chipped exterior paint or gel coat — the lowest-cost project on this list aimed specifically at how the camper looks from the outside.
Why the exterior deserves a budget line of its own
- The first-impression factor: the exterior is what’s seen before anyone steps inside, whether that’s at a campground, in a driveway, or in resale photos down the line
- The decal-aging problem most older campers share: factory graphics from a decade or more ago often look dated faster than the camper’s actual structure does, and removing them is one of the cheapest visual upgrades available
- The targeted-repair logic: this project isn’t a full repaint, just addressing the most visible chips, scratches, and peeling graphics, which keeps the cost far below a full exterior refinish
The options
- Heat-gun or adhesive-remover decal removal, stripping dated factory graphics down to a clean painted or gel-coat surface
- Touch-up paint matched to the camper’s existing color, addressing chips and scratches without a full panel repaint
- New, simpler vinyl graphics, applied after old decals are removed, for a refreshed but still budget-conscious exterior look
- A gel coat polish or restoration product, for fiberglass exteriors that have dulled or oxidized over time
The practical execution
- Test decal removal methods on a small, inconspicuous section first, since some methods can damage certain paint or gel coat finishes
- Clean and wax the exterior after any decal removal, both to protect the now-exposed surface and to even out the finish
- Address chips and scratches before they spread, since small exterior damage tends to worsen over a season of weather exposure if left alone
Cost breakdown
- Decal removal supplies (adhesive remover, heat gun rental or purchase): $20–50
- Touch-up paint, matched to the camper: $20–50
- Gel coat polish, if applicable: $25–60
- Total: $20–160
11. The Backsplash Tile Sticker Update (A Kitchen Refresh Without Demolition)
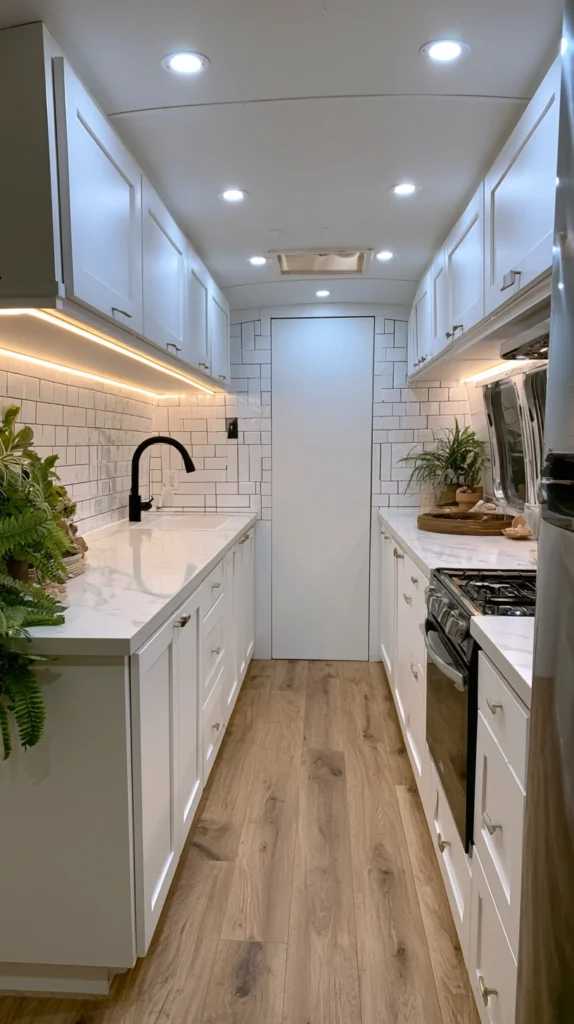
Peel-and-stick tile stickers applied over the existing galley backsplash — the smallest-footprint project on this list, but one that directly addresses one of the most visually dated surfaces in most camper kitchens.
Why the backsplash deserves its own focused project
- The concentrated-impact zone: a galley backsplash is a small surface, but it sits directly in the sightline of anyone using the kitchen, making it disproportionately visible relative to its size
- The grease and grime factor most factory backsplashes show: years of cooking leave visible wear on a factory laminate or tile backsplash faster than almost any other kitchen surface
- The no-demolition advantage shared with Idea #3: like the flooring update, this project applies directly over the existing surface rather than requiring removal of what’s there
The options
- Peel-and-stick subway tile stickers, mimicking a classic tiled look without grout or installation labor
- A patterned tile sticker, for a bolder, more distinctive galley look
- Metallic or textured tile stickers, adding a slightly more elevated finish than a flat printed pattern
- A partial application, covering only the area directly behind the stove or sink rather than the full backsplash run
The practical execution
- Clean and degrease the existing backsplash thoroughly before applying, since kitchen surfaces accumulate grease that weakens adhesive bonds more than almost any other surface in the camper
- Trim carefully around outlets, switches, and any trim pieces for a finished look
- Choose a heat-resistant product specifically rated for use near a stovetop, rather than a general-purpose decorative sticker
Cost breakdown
- Peel-and-stick tile stickers, enough for a full backsplash: $20–45
- Total: $20–45
12. The Roof Vent and Skylight Cover Inspection and Reseal (The Project Nobody Sees Until It Fails)
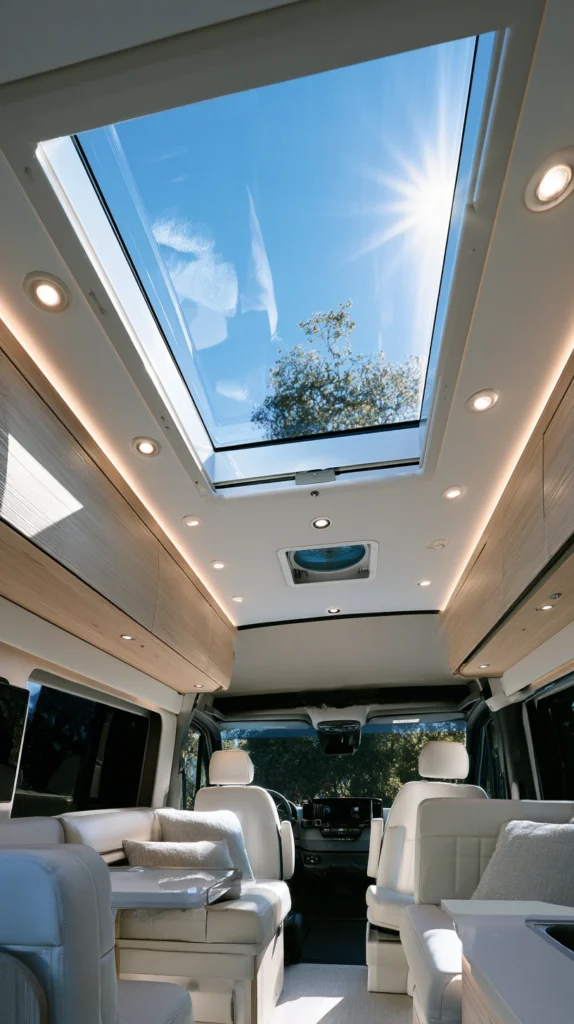
Inspecting and resealing the roof vents, skylights, and any roof penetrations — the least glamorous project on this entire list, and arguably the most important one to address before a camper heads into fall storage or colder use.
Why this unglamorous project belongs on a renovation list at all
- The catastrophic-failure prevention it offers: a failed roof seal is one of the most common sources of serious, expensive water damage in an aging camper, and it’s also one of the cheapest problems to prevent
- The fall-specific urgency: a camper sitting in storage through fall and winter, exposed to rain and freeze-thaw cycles, is exactly when a small unsealed crack turns into a major interior problem
- The low cost relative to the alternative: resealing a roof now costs a fraction of repairing water-damaged interior walls, flooring, or insulation later
The options
- Self-leveling lap sealant, applied around vents, antennas, and other roof penetrations
- A roof-specific sealant tape, for covering larger cracked or aging seams
- A full roof coating product, for an older camper roof showing widespread wear rather than isolated trouble spots
- A professional roof inspection, recommended at least once if the camper’s roof history and current condition are unknown
The practical execution
- Inspect the full roof visually, and ideally by hand, checking for soft spots, cracking sealant, or any place water could be pooling
- Clean old, cracked sealant away completely before applying new material, rather than layering new sealant directly over failing old sealant
- Reapply sealant on a dry day, since most products need a clear weather window to cure properly before any rain
Cost breakdown
- Self-leveling lap sealant, a few tubes: $20–40
- Sealant tape, if needed: $15–30
- Total: $20–70, with a full roof coating running $150–400 if the roof needs more extensive attention
13. The Faux Beam or Trim Accent (A Small Architectural Detail for a Big Perceived Upgrade)
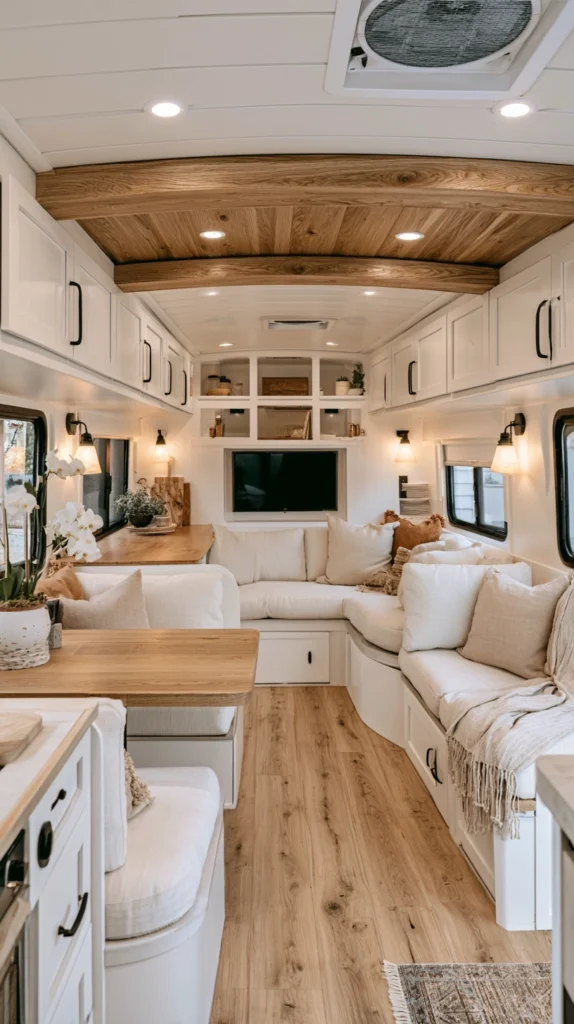
Lightweight faux wood beams or trim molding added along the ceiling or above the dinette — the smallest structural-feeling addition on this list, giving a flat camper ceiling a sense of architectural detail it didn’t have from the factory.
Why a small trim addition reads as a much bigger renovation
- The factory-flatness problem it solves: most camper ceilings are uniformly flat and featureless, and even a single faux beam introduces a sense of structure and intention that’s otherwise missing
- The lightweight material advantage: foam or hollow faux beams add almost no weight, an important consideration in a space where towing capacity limits what can reasonably be added
- The disproportionate perceived value: a small trim or beam project, done cleanly, often reads to a guest as a far more expensive renovation than its actual cost reflects
The options
- A single faux beam, run across the width of the ceiling above the dinette or main living area
- Trim molding, added along the edge where the ceiling meets the wall, for a more subtle architectural detail
- A painted accent strip, mimicking a beam’s visual presence with paint alone rather than added material
- Small corbels or brackets, added beneath a shelf or the edge of a cabinet for a similar small-detail effect
The practical execution
- Choose lightweight foam or hollow polyurethane beams specifically rated for low-weight applications, rather than solid wood, given towing weight limits
- Stain or paint the beam a tone that complements the freshly painted cabinets from Idea #1, tying the two projects together visually
- Secure with construction adhesive rated for the ceiling material, supplemented with a few screws into structural points if accessible, rather than adhesive alone
Cost breakdown
- Lightweight faux beam, single piece: $30–70
- Trim molding, per camper: $20–50
- Total: $20–70, depending on the option chosen
The single faux beam above the dinette table: the smallest material addition on this entire list, and often the one detail a guest can’t quite place but notices anyway.
The Budget Camper Renovation Roadmap
The work, sequenced:
Phase One (the surface pass, biggest visual return):
- The cabinet paint refresh (#1)
- The hardware swap (#2)
- The peel-and-stick flooring update (#3)
- The removable wallpaper accent (#5)
Phase Two (the comfort and sealing pass, fall-specific priority):
- The window seal and weatherstrip refresh (#6)
- The roof vent and skylight cover inspection and reseal (#12)
- The mattress topper and bedding upgrade (#9)
Phase Three (the smaller surface details):
- The reupholstered or slipcovered cushions (#4)
- The curtain and soft furnishing refresh (#8)
- The backsplash tile sticker update (#11)
- The open shelf conversion (#7)
Phase Four (the finishing touches):
- The exterior touch-up paint and decal removal (#10)
- The faux beam or trim accent (#13)
Getting Started This Weekend
The immediate-impact renovation refresh:
One weekend, three changes:
- Swap the cabinet hardware (Idea #2)
- Refresh the curtains and add a couple of throw pillows (Idea #8)
- Apply backsplash tile stickers in the galley (Idea #11)
Total cost: $115–265. Time: an afternoon and an evening. The interior will feel meaningfully refreshed by the time the work is done, without a single drop of paint or a single tool beyond a screwdriver.
The structural investment (the next big project):
The cabinet paint refresh (Idea #1) is the single highest-impact project on this list relative to its cost. Once the cabinets are painted, the hardware swap, the open shelf conversion, and even the faux beam all have a freshened backdrop to work against, rather than competing with dated factory wood tone.
What a budget fall renovation provides that waiting for a full remodel can’t:
The visual impact that doesn’t require a structural budget:
- Cabinets and hardware that change the whole interior’s tone for under $200 combined
- A floor and backsplash that look new without a single piece of old material removed
- Textiles that shift the entire color story in an afternoon
The comfort and protection that matters specifically heading into fall:
- Weatherstripping and roof seals addressed before a season of rain and cold exposes any weakness
- A mattress topper and bedding ready for the longer, colder nights ahead
- A camper sealed and ready for storage, rather than discovered to have a problem next spring
The small details that make the whole space feel considered:
- A faux beam or trim accent that reads as a bigger renovation than its actual cost
- An open shelf that turns a removed cabinet door into a styling opportunity
- Exterior touch-ups that mean the camper looks as cared-for as the inside now feels
A budget camper renovation was never about matching what a full gut renovation accomplishes. It’s about understanding exactly where a dollar does the most visible work, and spending almost all of it there. The cabinets painted on a single weekend are still the first thing every guest notices a year later. The roof sealed before the first hard freeze is the project nobody sees, and the only reason none of the other projects on this list end up undone by a leak no one caught in time.