15 Outdoor Planter Ideas to Elevate Your Garden, Patio, and Entryway
15 Outdoor Planter Ideas to Elevate Your Garden, Patio, and Entryway
There is a specific quality that a well-chosen outdoor planter brings to a space that the same plant in the ground never quite achieves. Not better growth — the ground almost always provides better growth — but better composition.
The planter positions the plant as an object in the space rather than as a constituent of the landscape, gives it a base and a frame and a deliberate placement that communicates intention rather than simply presence. The right plant in the right planter at the right position in the right space is a composed element of the outdoor environment rather than a planted area.

Planters also provide what the ground cannot: the ability to place a garden wherever the garden is needed. On the patio with no beds. On the balcony with no soil. At the front door with no border. On the steps with no earth.
In the corner where the light is wrong for the plant but the architecture is right for the composition. The planter is the gardener’s tool for placing planting with the precision that a furniture arranger places furniture — not where the ground allows but where the design requires.
Each idea below is a specific approach to one type of outdoor planter or one specific planting application. Each includes what you will need, what it will cost, and a practical tip to make it work as well as the garden, patio, or entryway it is designed to elevate.
1. The Oversized Ceramic Statement Planter
Budget: $40 – $300
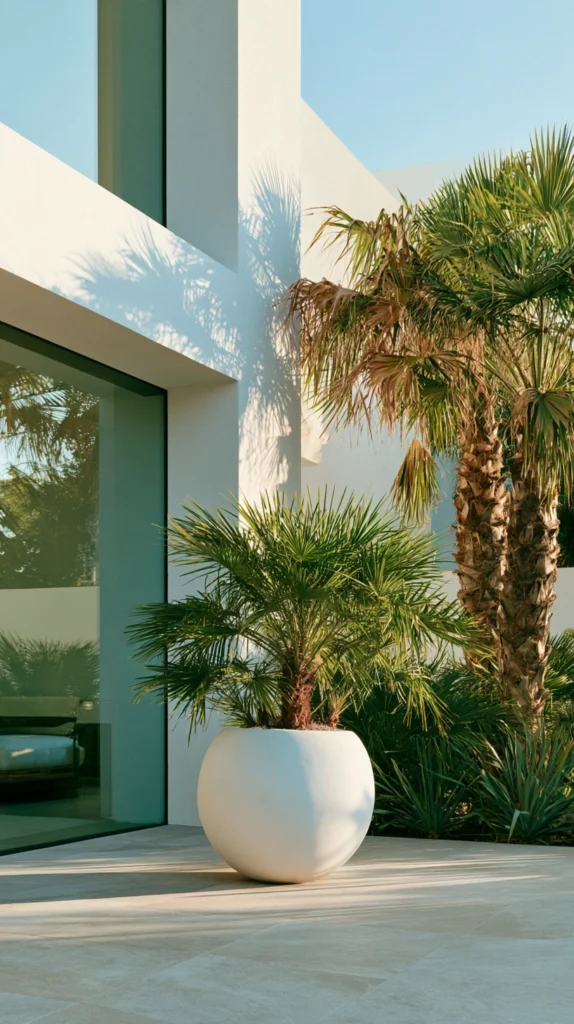
A single large ceramic planter — genuinely large, 40–60 centimetres in diameter, in a considered glaze or a quality matte finish — positioned at the point of the garden, patio, or entryway where a single significant object is required creates the planted equivalent of a sculpture. The oversized ceramic planter communicates quality and intention from across the space, provides a vessel of sufficient depth for a genuinely architectural plant, and communicates the specific quality of an outdoor space where the objects were chosen rather than accumulated.
Glazed ceramic planters of 40 centimetres diameter cost $30–$80. A 60-centimetre version runs $60–$200. A hand-thrown ceramic planter from a specialist maker costs $80–$300. The planter requires drainage holes — a planter without drainage holds water that drowns roots — and a pot foot or a small gravel layer beneath it to prevent the drainage holes from becoming blocked against a solid surface.
Style tip: Choose one planter colour and use it consistently across the outdoor space rather than combining multiple glazes and finishes. A patio with three ceramic planters in the same glaze reads as a considered material decision; the same patio with three planters in different colours and finishes reads as purchases made at different times without a unifying principle. The colour consistency of the planter collection is the detail that elevates a collection of pots to a composed material palette.
2. The Zinc and Galvanised Metal Trough
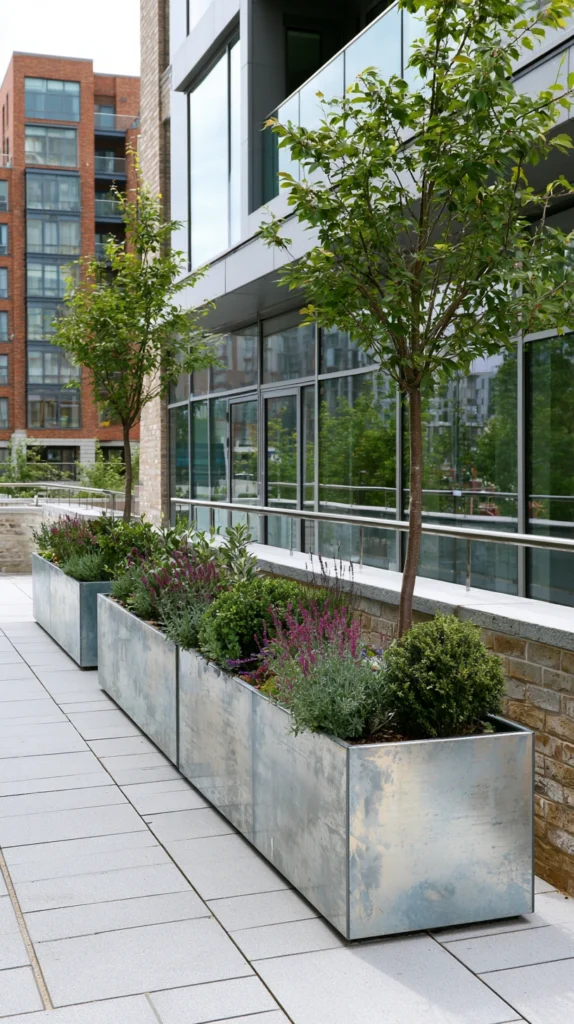
Budget: $20 – $150
A zinc or galvanised steel trough — long and narrow, suitable for a row of herbs, a line of lavender, or a single dramatic ornamental grass — creates the most industrial-garden and most specifically contemporary of all the planter aesthetics. The galvanised metal relates to the metalwork of a modern house, to the corrugated iron of an agricultural building, and to the zinc guttering of a period house with equal confidence, and a row of identical galvanised troughs on a patio communicates a material sensibility that ceramic pots, for all their beauty, cannot replicate.
A galvanised steel trough of 60 by 20 centimetres costs $15–$35. A larger 100 by 30-centimetre version runs $25–$60. A set of three in graduating sizes costs $50–$120. Drill drainage holes in the base before filling — a galvanised metal trough without drainage retains water in the base, which rusts the metal from the inside and waterloggs the root zone simultaneously.
Style tip: Allow galvanised planters to develop their natural patina rather than polishing or painting them to maintain the bright zinc finish. Galvanised metal darkens and dulls over the first season of outdoor exposure to a warm, slightly muted silver-grey that suits the garden context considerably better than the bright metallic of the new surface. The aged galvanised planter is the more beautiful version of itself.
3. The Terracotta Collection
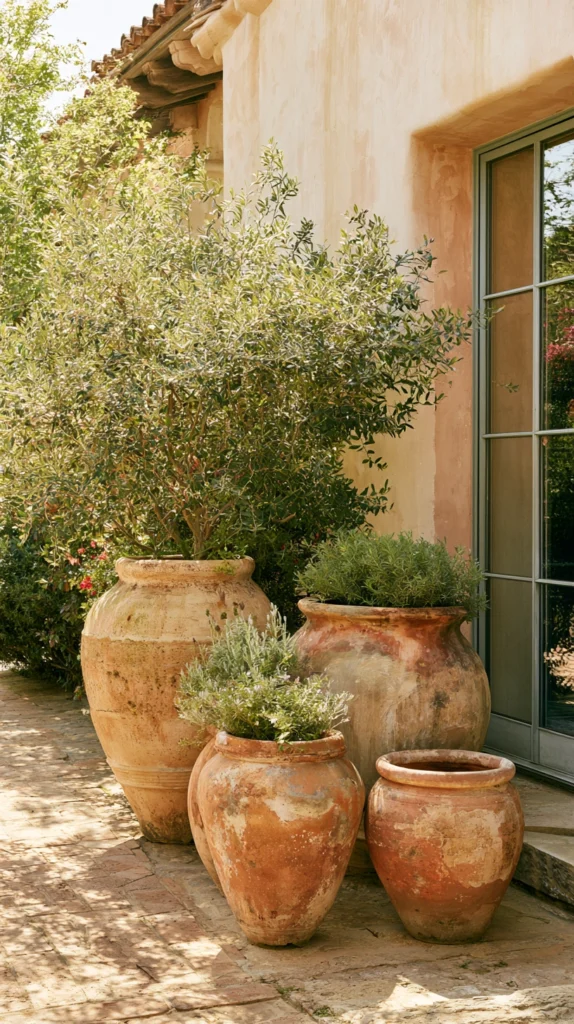
Budget: $20 – $200
A collection of terracotta pots — in varying diameters but consistent proportions, grouped at the garden entrance, the patio corner, or the steps — is the planter format most associated with the Mediterranean garden tradition and the one that relates most naturally to the tones of stone, gravel, and dried botanical material that the garden produces in every season. Terracotta is the material that makes every plant look better — the warm orange-brown of the fired clay is the backdrop colour that flatters foliage most consistently.
Individual terracotta pots of standard proportions cost $5–$20 each depending on size. A collection of five in three different sizes runs $30–$80. Hand-thrown terracotta from a specialist supplier costs $20–$60 per pot. In climates with freezing winters, choose terracotta rated for frost resistance — standard terracotta absorbs moisture and shatters when that moisture freezes, while frost-rated terracotta is fired to a higher temperature that reduces its porosity.
Style tip: Group terracotta pots in odd-numbered clusters — three, five, or seven — rather than in symmetrical pairs or even-numbered rows. An odd-numbered cluster reads as gathered and organic; an even-numbered pair reads as designed and formal. The odd number communicates the relaxed, accumulated quality of the Mediterranean garden tradition from which terracotta planting derives its specific beauty.
4. The Versailles Box Planter
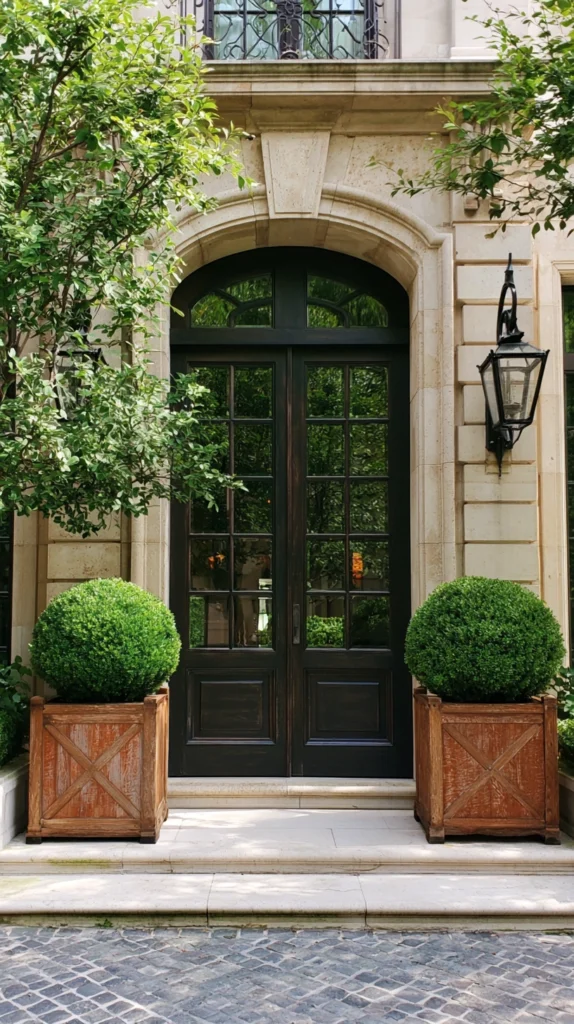
Budget: $80 – $600
A Versailles box — the square, hardwood planter with decorative finial posts at each corner, traditionally associated with the formal garden tradition of clipped topiary and standard-trained citrus — creates the most architectural and most specifically formal of all the outdoor planter formats. The Versailles box communicates a design tradition and a material quality that the standard square planter, for all its functional equivalence, cannot approach, and a pair flanking a front door or a garden entrance produces an effect of considerable architectural distinction.
A painted hardwood Versailles box of 40 by 40 centimetres costs $80–$200. A 60 by 60-centimetre version runs $150–$400. A custom-made version in a hardwood with a stainless steel interior liner costs $200–$600. The Versailles box suits clipped topiary — box balls, bay standards, clipped Laurus — and citrus standards rather than free-growing herbaceous plants, and the quality of the planter is most fully realised when the plant within it has been chosen for its formal compatibility with the box’s specific character.
Style tip: Paint Versailles boxes in the colour of the house joinery — window frames, front door, exterior woodwork — rather than in a standard white or a contrasting garden colour. A planter in the house joinery colour reads as an architectural element of the building rather than a garden accessory placed beside it, and the colour continuity between the planter and the house communicates a designed relationship between the two.
5. The Corten Steel Planter
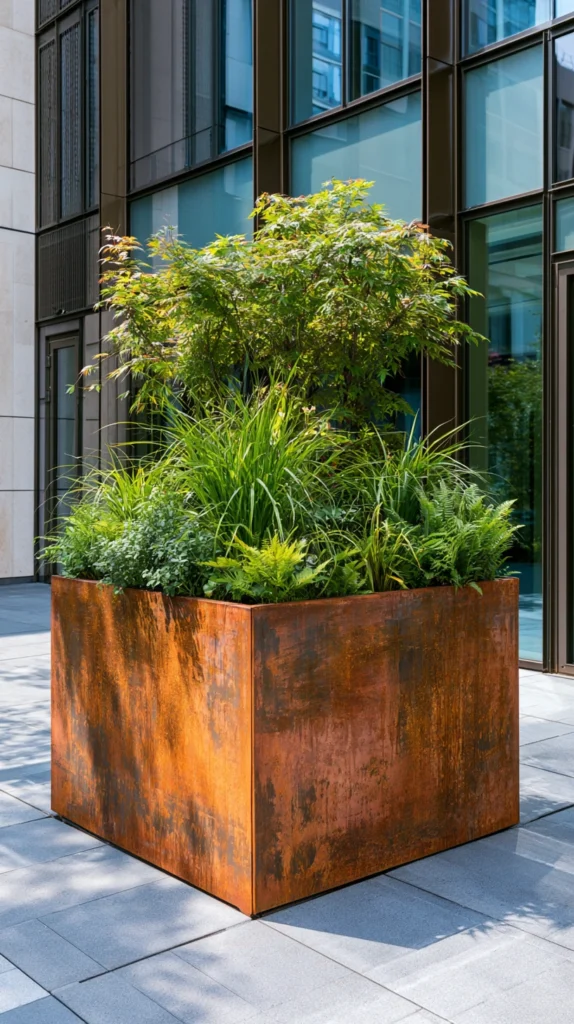
Budget: $100 – $800
A corten steel planter — rectangular, high-sided, with the characteristic warm amber-brown patina of weathering steel — creates the most dramatically contemporary and most materially serious of all the outdoor planter formats. Corten’s specific quality of controlled deterioration — the surface that rusts to a stable patina rather than continuing to corrode — communicates a design sensibility that values the beauty of industrial material used with precision, and in a garden or patio context it produces a planter of extraordinary visual presence.
A corten steel planter of 60 by 30 by 30 centimetres costs $80–$200. A large 120 by 40 by 40-centimetre version runs $200–$500. A custom-fabricated corten planter in a specific size costs $300–$800. The corten planter must be positioned away from stone or light-coloured paving during the initial patination phase — the rust run-off from the first weeks of weathering stains adjacent light surfaces permanently if not managed.
Style tip: Plant the corten planter with species whose foliage colour contrasts with the warm amber of the metal — the blue-green of ornamental grasses, the deep green of rosemary, the silvery grey of lavender. The contrast between the warm orange-brown of weathered corten and the cool green or grey of the plant foliage is the specific material combination that gives the corten planter its visual quality. Warm-toned plants in a warm corten planter produce a combination of less contrast and less impact.
6. The Window Box
Budget: $15 – $100
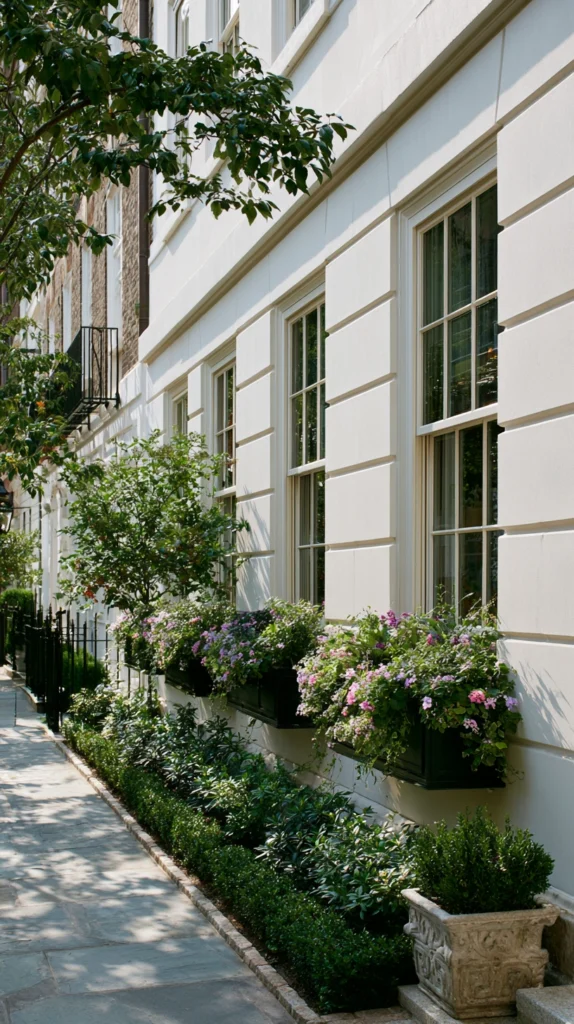
Window boxes — long, narrow planters fixed below windows, overflowing with seasonal planting — are the planter format that most directly communicates the continental European street and the English cottage, and the one that transforms the exterior of a house at the scale of the street view rather than at the scale of the garden. A window box is the planted element most visible to approaching visitors, most continuously present in the daily view from inside the house, and most specifically associated with the quality of a house that is tended with care.
Timber window boxes of 60 by 15 centimetres cost $15–$30. Metal versions run $20–$50. A custom-made timber version in a hardwood with a galvanised steel liner costs $40–$100. Fix the window box to the wall or the windowsill with brackets rated for the weight of the filled box — a standard window box of 60 centimetres filled with damp compost weighs 8–12 kilograms, and the fixing must be adequate for this weight plus the leverage of the extending box.
Style tip: Plant window boxes with a consistent formula rather than mixing different plant types across different windows. A formula of one thriller (a tall, structural plant), two fillers (bushy seasonal plants), and two spillers (trailing plants over the front edge) — applied to every window box in the same colour palette — creates a visual consistency across the house façade that communicates deliberate planting rather than individual choices at each window.
7. The Hypertufa Rock Garden Planter
Budget: $10 – $50
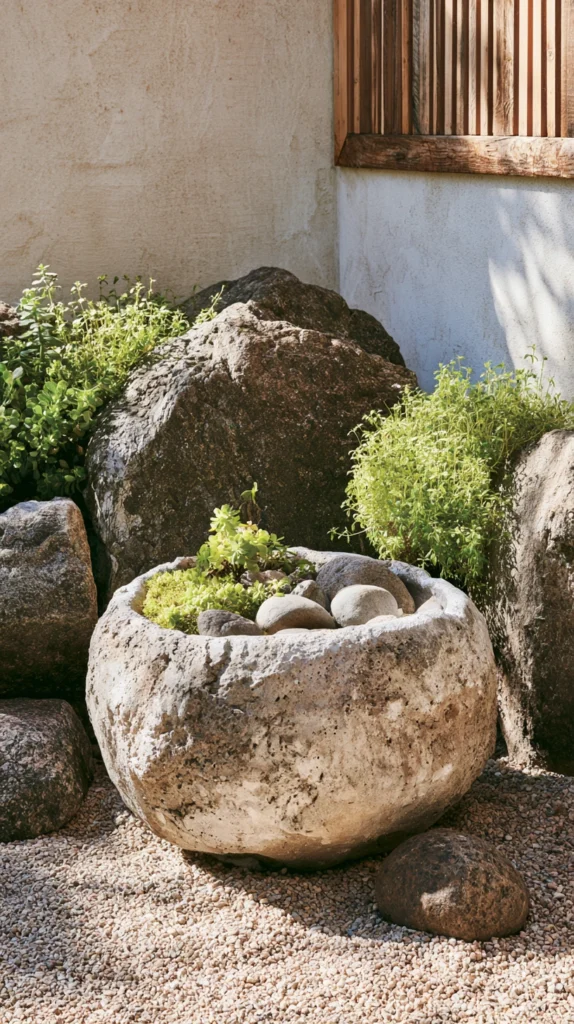
Hypertufa — a DIY casting material made from peat moss, perlite, and Portland cement — allows the creation of lightweight faux-stone planters in any shape and size, with a surface texture that genuinely resembles aged rock and that develops moss and lichen colonisation in a way that no manufactured planter can replicate. A hypertufa trough is the planter format most suited to alpine and rock garden plants — the flat, wide form accommodates the spreading growth habit of alpine species, and the porous surface of the hypertufa provides the free-draining conditions that mountain plants require.
Portland cement costs $8–$15 per bag. Peat moss runs $10–$20 per bag. Perlite costs $8–$15 per bag. Materials for a standard hypertufa trough of 40 by 25 centimetres cost $10–$25. Cure the hypertufa trough for six weeks before planting — freshly made hypertufa has a high pH from the Portland cement that is toxic to most plants. Wetting and drying the trough repeatedly through the curing period accelerates the pH reduction.
Style tip: Texture the hypertufa surface with a stiff brush while the mixture is still workable — within the first 24 hours of casting — to create the irregular, rocky surface quality that imitates natural stone. A smooth hypertufa surface reads as concrete; a textured one reads as stone. The brush texturing takes five minutes and produces a surface of genuinely different quality from the untextured version.
8. The Wooden Barrel Half Planter
Budget: $20 – $80
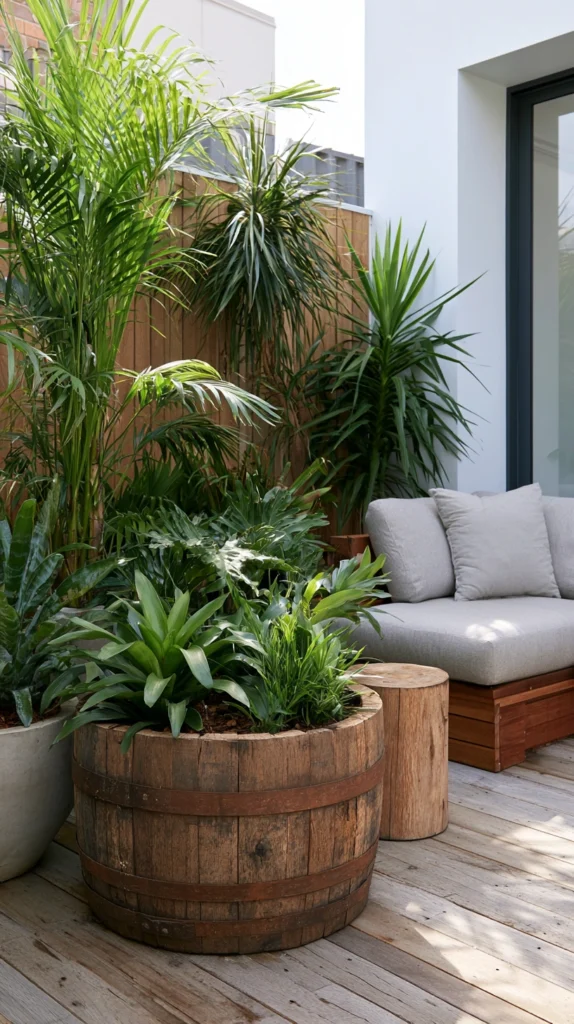
A half oak barrel — the traditional wine or whisky cask cut in half to form a generous, deep planting vessel — provides the largest planting volume of any container planter in the standard accessible range, and the depth of the barrel suits the plants that require the most root space: roses, fruit trees on dwarfing rootstocks, large perennials, and small shrubs. The barrel also communicates a specific rustic quality that relates to the kitchen garden tradition and to the productive garden aesthetic.
A half oak barrel of 55 centimetres in diameter and 35 centimetres in depth costs $20–$50. A new version with metal bands costs $25–$60. The barrel requires drainage holes drilled in the base before filling — the original barrel has no drainage, and an undrilled barrel retains water that waterloggs the root zone and eventually rots the barrel from the inside.
Style tip: Line the interior of the barrel with a layer of gravel before adding compost — the gravel layer improves the drainage of the barrel beyond what the drainage holes alone provide, which is particularly important for the large barrel volumes that take longer to dry out than smaller containers. A single 5-centimetre layer of coarse gravel at the base of the barrel improves the drainage and extends the useful life of the barrel by reducing the sustained moisture that rots the timber from inside.
9. The Fibreclay Lightweight Planter
Budget: $30 – $200
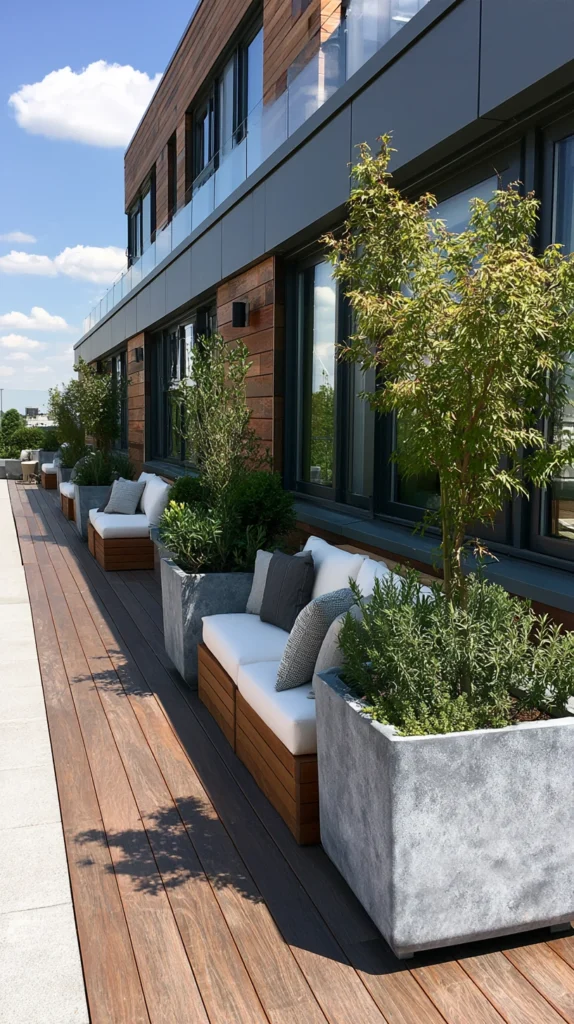
Fibreclay — a composite of clay, cement, and natural fibres — produces planters with the visual quality of heavy ceramic or natural stone at a fraction of the weight. A large fibreclay planter of 60 centimetres in diameter weighs 3–5 kilograms empty compared to the 15–25 kilograms of an equivalent ceramic planter — a difference that is irrelevant at garden level and critical on a balcony, a rooftop, or a first-floor terrace where structural load limits exist.
Fibreclay planters in a stone or ceramic effect finish cost $30–$100 for standard sizes. A large 60-centimetre version runs $60–$200. The fibreclay surface is slightly more porous than fired ceramic and benefits from a penetrating masonry sealer applied before the first filling — the sealer reduces moisture absorption that otherwise leads to surface staining and frost damage in climates with freezing winters.
Style tip: Choose fibreclay planters in a matte or slightly textured finish rather than a high-gloss version. The matte finish reads as natural stone or unglazed ceramic and suits the garden context specifically; the high gloss reads as manufactured surface and loses the specific quality of material weight and permanence that makes fibreclay planters worth the additional cost over plastic.
10. The Stacked Planter Tower
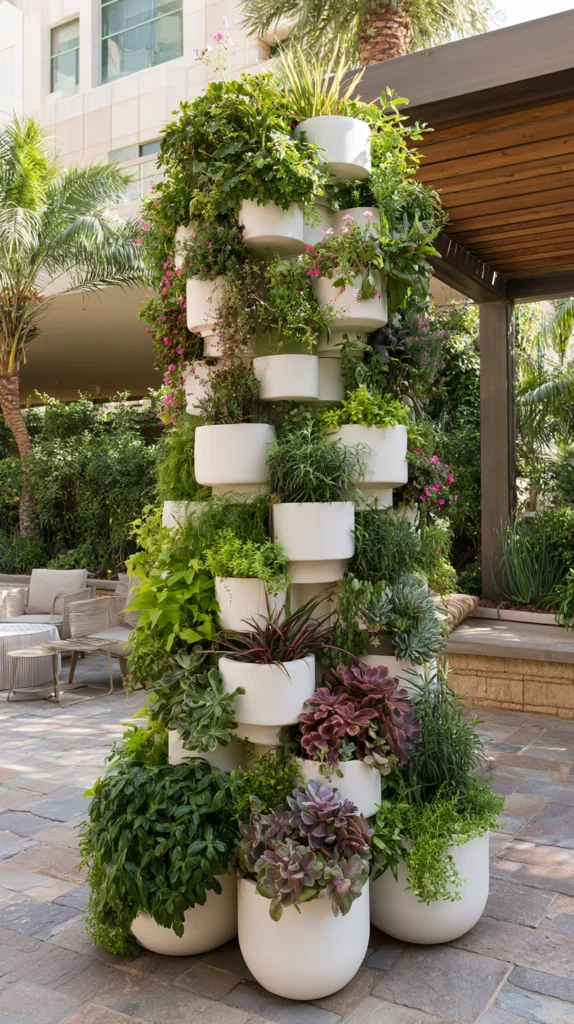
Budget: $30 – $150
A stacked planter tower — multiple planting tiers of decreasing diameter stacked vertically on a central structure — creates the most vertical and the most space-efficient of all the container planting formats. The planting tower produces more growing surface per floor footprint than any horizontal planting arrangement, and in the compact patio, the narrow balcony, or the constricted entryway, it provides the visual height and the planting density of a much larger installation in the minimum floor area.
A commercial stacked planter tower of five tiers costs $30–$80. A DIY version using standard pots of decreasing diameter on a central stake costs $20–$60 in materials. A strawberry tower specifically designed for the culture of strawberries costs $25–$60. Position the tower in the sunniest available position — the stacked format places the lower tiers in the partial shade of the tiers above, and the maximum available sun ensures that even the lowest tier receives adequate light.
Style tip: Plant the tower with a single species throughout rather than mixing different plants at each tier. A tower of all strawberries, all herbs, or all one flower variety reads as a designed planting decision; a tower with a different plant at each tier reads as an assortment. The single-species tower communicates the abundance of one thing rather than the miscellany of several.
11. The Hanging Basket Reimagined
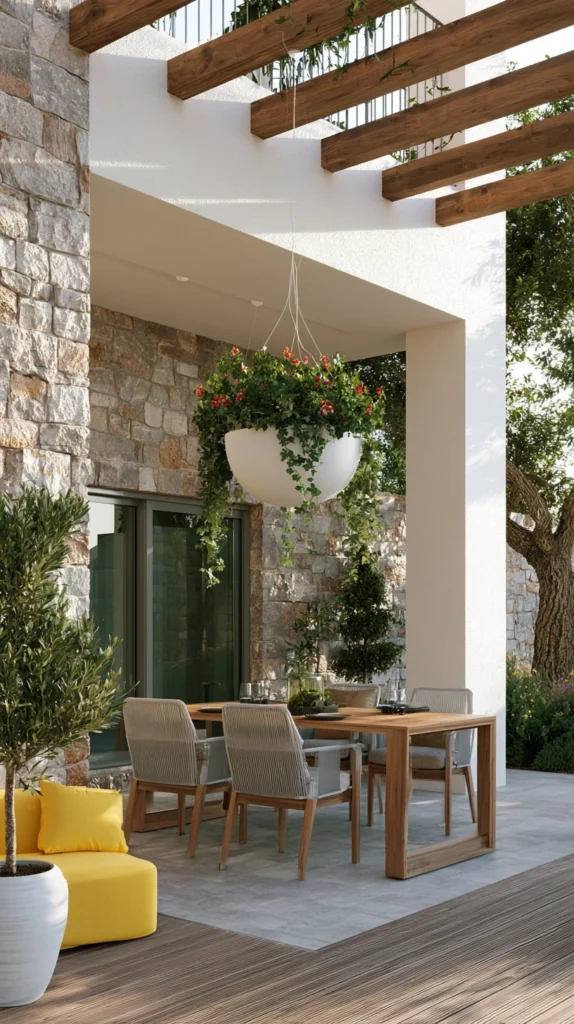
Budget: $15 – $80
The hanging basket at its most considered — not the round wire frame overflowing with mixed bedding that communicates a specific approach to planting that has not evolved since the 1980s, but a genuine reimagining of the suspended planter format using quality materials and a considered single-species planting — creates the vertical garden element that is most immediately transformative of the space it occupies. A hanging planter in a quality material, planted with a single trailing species or a single architectural form, communicates a design intelligence that the traditional mixed hanging basket does not.
A woven seagrass hanging planter of 25 centimetres costs $8–$20. A concrete or ceramic hanging planter of the same size runs $15–$40. A macramé hanging planter costs $12–$35. A single plant — a trailing string of pearls, a single Fuchsia standard, a small orchid — communicates more quality than a mixed assortment of seasonal bedding in the equivalent format.
Style tip: Hang outdoor planters at eye level rather than at the overhead height that most hanging basket installations default to. A planter at eye level — 150–170 centimetres from the ground — can be observed closely, smelled if fragrant, and experienced as a specific material and planting decision rather than as an overhead display that is seen from below. The hanging planter at eye level is a composed object; at overhead height it is a hanging decoration.
12. The Long Rectangular Planter
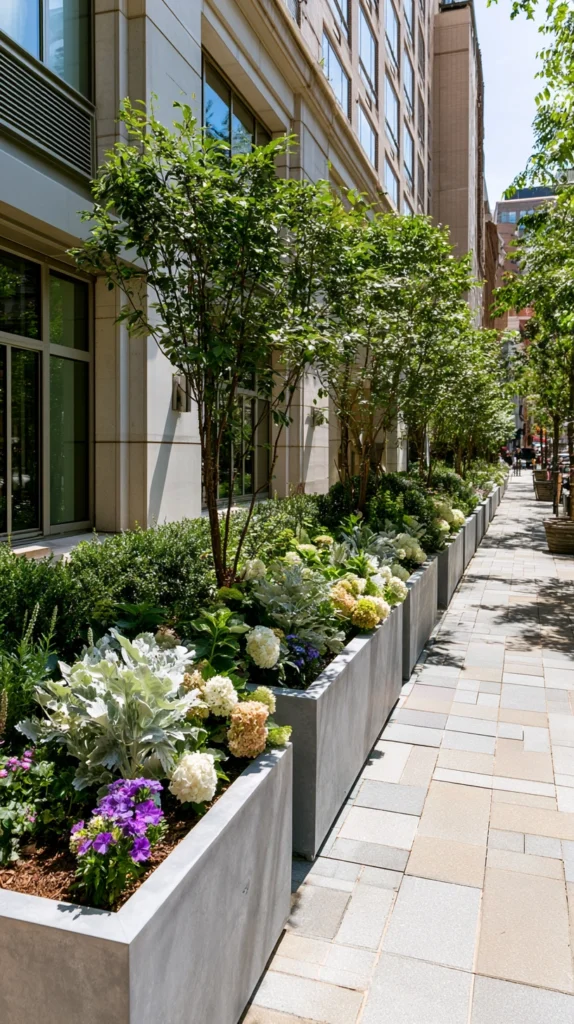
Budget: $40 – $300
A long rectangular planter — 80–150 centimetres in length, 25–30 centimetres in depth, in timber, metal, or composite — placed along the primary edge of a patio, along the top of a low wall, or beside the path creates the planting equivalent of an architectural element rather than a pot. The long planter provides a continuous line of planted material that defines edges, separates zones, and creates the specific quality of a built planting structure rather than a container placed in a position.
A timber rectangular planter of 100 by 25 by 25 centimetres costs $40–$100. A powder-coated aluminium version of the same size runs $60–$180. A corten steel rectangular planter costs $100–$300. Position the long planter at the edge of the patio where it creates the boundary between the hard surface and the garden — the planted line that communicates the edge of the outdoor room without the visual finality of a wall or a fence.
Style tip: Plant the long rectangular planter with a single species running its full length — a continuous line of lavender, a single row of ornamental grass, an unbroken mass of low herbs — rather than with different plants in sections along the length. The single species running the full length reads as an architectural planted line; sectioned plantings read as multiple individual pots placed in a single long container.
13. The Raised Planter Bed
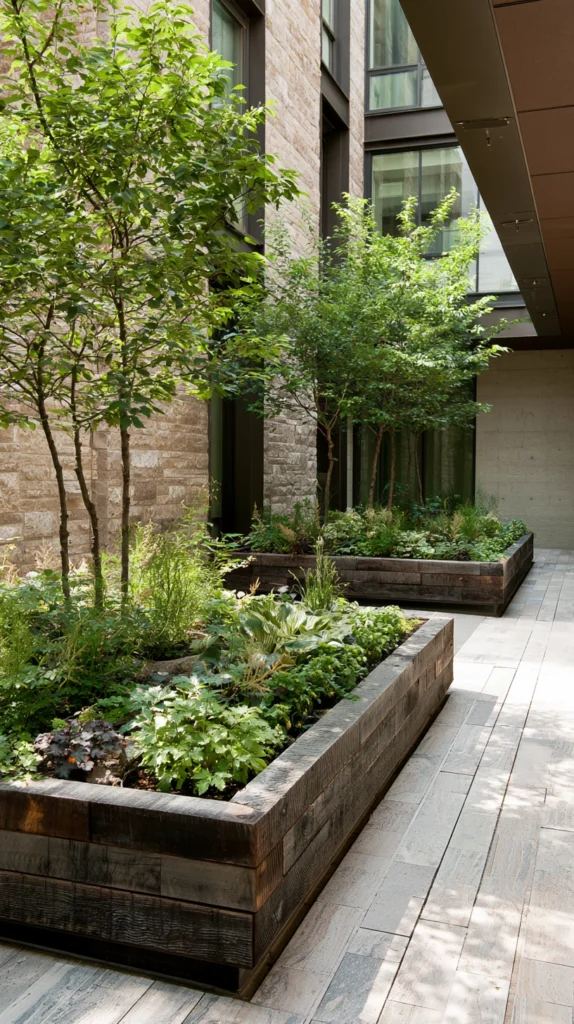
Budget: $150 – $800
A raised planter bed — a permanent structure of timber, brick, stone, or corten steel, built to a height of 40–60 centimetres and a width of 60–90 centimetres, forming a defined planting zone that is elevated above the patio or garden level — combines the function of a garden border with the flexibility of a container planting. The raised planter bed is the permanent outdoor planter in the most complete sense — it cannot be moved but it can be replanted, it defines the garden’s spatial structure as firmly as a wall, and it provides the depth of growing medium that only the largest containers approach.
A timber raised planter bed of 2 by 0.6 metres costs $80–$200 in materials. A stone or brick version of the same size runs $200–$600. A corten steel raised planter bed costs $200–$800. The raised planter height of 40–60 centimetres makes the planting accessible for maintenance without bending, and the coping edge at that height creates a built-in seating surface along the planter wall.
Style tip: Build the raised planter bed with a drainage layer of 10–15 centimetres of gravel at the base before filling with compost — the drainage layer prevents the waterlogging that permanent planters are susceptible to in heavy rainfall, and the quality of the drainage layer is more important for plant health in a permanent raised bed than in any other container format.
14. The Vintage and Repurposed Planter
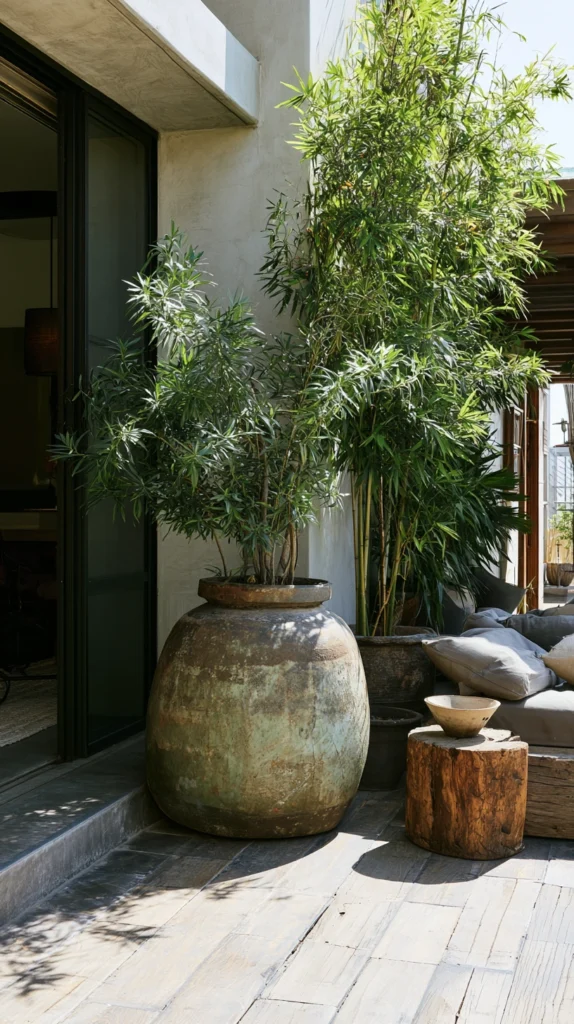
Budget: $0 – $60
A repurposed object used as a planter — an old zinc bath, a wooden crate, a vintage tin, a discarded stone sink, an old cast iron urn — creates the garden element with the most specific character and the most genuinely personal quality available in any planting format. The repurposed planter communicates a relationship to material that goes beyond the purchasing decision and into the realm of the found, the salvaged, and the transformed — qualities that no new planter, however well-designed, can produce.
A vintage stone butler’s sink costs $30–$100 from architectural salvage. An old zinc bath costs $20–$60 from salvage or online markets. A wooden wine crate costs $0–$15. An old cast iron urn runs $40–$150. The repurposed planter requires drainage holes drilled or punched in the base — most repurposed objects have no drainage provision, and without drainage the planting fails regardless of the quality of the object.
Style tip: Pair repurposed planters with the specific plants that suit their material and their historical context — herbs in an old kitchen colander, alpines in a stone sink that references rock garden tradition, a standard-trained rose in a cast iron urn. The relationship between the repurposed object and the plant it contains is the composed quality that elevates the repurposed planter from a quirky garden feature to a genuinely considered planting decision.
15. The Entryway Planter Pair
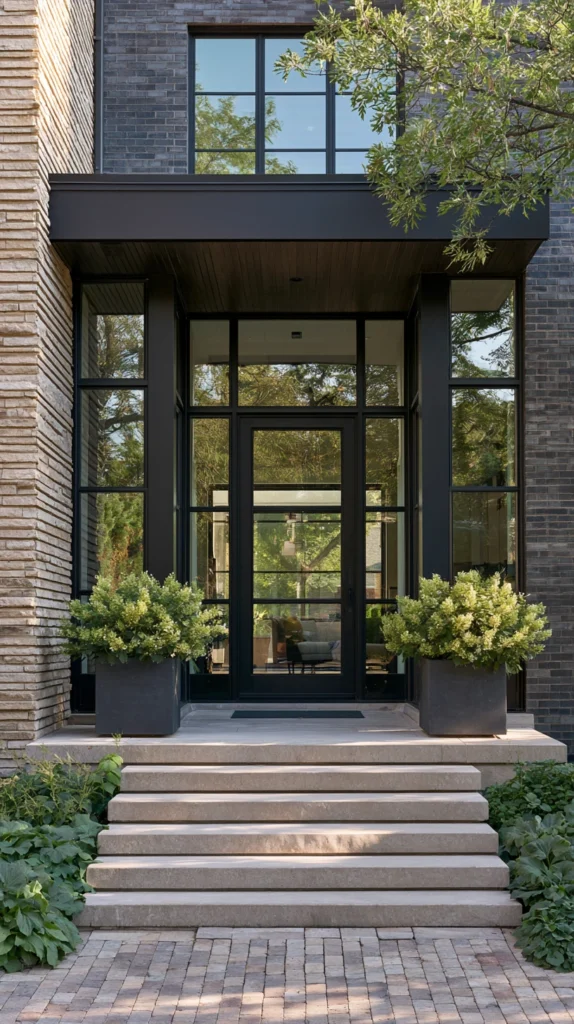
Budget: $60 – $500
A matching pair of planters — in a quality material, at the correct scale for the door they flank, planted with a consistent and architecturally appropriate plant — creates the entryway quality that communicates a house that was considered from the outside with the same attention given to the inside. The entryway planter pair is the garden element most visible to approaching visitors and most continuously present in the daily experience of the house from the street, and its quality communicates the quality of the house and the household it represents.
A matching pair of ceramic planters of 30–40 centimetres costs $60–$150. Versailles boxes run $150–$400 per pair. Fibreclay stone-effect planters cost $80–$200 per pair. The plants for the entryway pair should be formal or architectural — a standard-trained bay or box, a clipped topiary ball, a single architectural grass — rather than loose or seasonal. The entryway planter plant should retain its quality through the full year and should be appropriate to the architectural style of the house it flanks.
Style tip: Size the entryway planters in proportion to the door they flank rather than in proportion to the general scale of the exterior space. A planter that is 20–25 percent of the door height reads as architecturally scaled to the entrance; one that is very much smaller reads as undersized for the entry, and one that is very much larger reads as a garden feature that happens to be placed beside the door. The proportional relationship between the planter and the door is the sizing decision that makes the entryway planting read as designed.
The outdoor planter that elevates the space it occupies is not the most expensive or the most elaborately planted. It is the one that was chosen with specific knowledge of the space it would occupy — the correct scale, the correct material, the correct colour in relation to the surfaces around it, the correct plant for the vessel — and placed with the precision of a composed element rather than the convenience of available floor space.
Choose the planter as seriously as the plant it will contain. Consider the material in relation to the garden’s existing palette. Size it for the space it must hold as a visual object, not merely as a container for compost. And plant it with the discipline of a single species or a considered combination rather than the variety of whatever is available. The result is the planter that elevates rather than occupies, that composes rather than accumulates, and that makes the outdoor space genuinely better rather than simply more planted