14 Statement Bedroom Ideas That Instantly Upgrade Your Space
14 Statement Bedroom Ideas That Instantly Upgrade Your Space
There is a specific quality that a statement bedroom possesses and that most bedrooms consistently lack. It is not extravagance or decoration or the application of a trend. It is the quality of commitment — the sense that someone made a deliberate, confident decision about what this room was going to be and then carried that decision through completely rather than hedging it at every turn with neutral furniture and cautious choices.
The bedroom that hedges — that has an interesting piece here and a safe piece there, that approaches colour tentatively and texture modestly — is a bedroom that never quite becomes itself. The bedroom that commits is entirely different. It knows what it is from the moment you enter, and that knowledge produces a quality of presence that careful accumulation of pleasant elements never achieves.
A statement bedroom is not necessarily a maximalist bedroom or an expensive bedroom. It is a bedroom where one decision was made boldly and everything else was arranged in service of that decision. The bold decision might be the wall colour, the headboard, the ceiling treatment, the textile, or the lighting — but it is always one decision taken seriously rather than ten decisions taken cautiously.
Each idea below is a specific bold decision that instantly upgrades the bedroom it is made in. Each includes what you will need, what it will cost, and a practical tip to make it work as well as the room it is capable of creating.
1. The Floor-to-Ceiling Dramatic Wallpaper
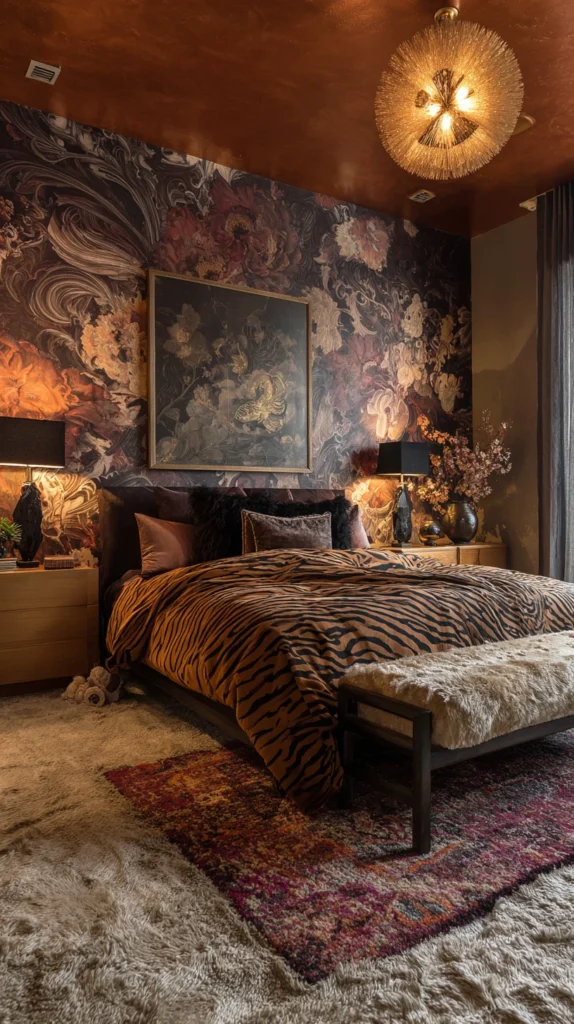
Budget: $150 – $800
A single wall — the bed wall, fully visible on entering — papered floor-to-ceiling in a bold, large-scale pattern creates the most immediately transformative statement available to a bedroom at this price point. The wallpaper statement works because it resolves the entire design register of the room in a single decision: the colour palette, the pattern language, the decorative vocabulary all follow from the wall, and every other element in the room becomes a response to it rather than an independent choice.
A large-scale botanical or geometric wallpaper in a bold colourway costs $60–$200 per roll. A standard double-bed wall requires two to three rolls — $120–$600 in wallpaper plus $30–$80 for professional hanging of a single feature wall. The remaining three walls in a colour drawn from the wallpaper background create the immersive quality that a feature wall against white cannot produce. Choose a pattern at the scale the wall deserves — a large wall demands a large-scale pattern.
Style tip: Choose the wallpaper before specifying any other element in the room and build every subsequent decision — the bedding colour, the furniture finish, the curtain fabric — from the wallpaper palette. A wallpaper chosen first and everything else derived from it produces a room of genuine coherence; a wallpaper chosen last and fitted into an existing scheme always reads as added rather than designed.
2. The Jewel-Toned Velvet Bed
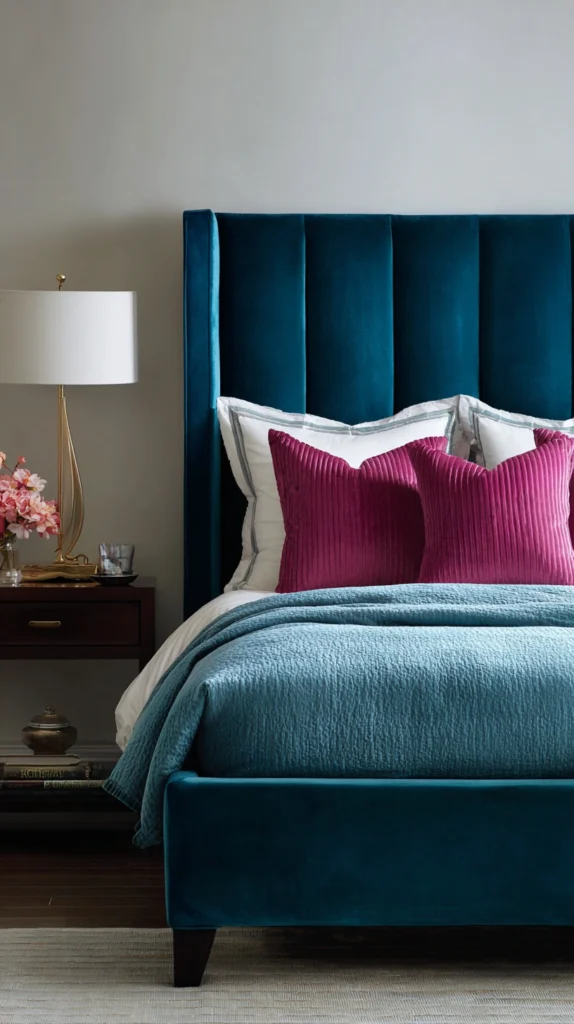
Budget: $400 – $2,500
A bed frame upholstered in a deep, saturated jewel tone — emerald green, sapphire blue, burgundy, deep teal, or rich amethyst — is the statement furniture piece that most completely transforms the bedroom from a room containing a bed to a room built around a bed. The jewel-toned velvet bed communicates that the room was designed from the sleeping surface outward, which is the correct design logic for a bedroom and the logic that the expensive-looking bedroom always follows.
A velvet bed frame in a jewel tone costs $400–$1,500. A custom upholstered version in a specific fabric runs $800–$2,500. A DIY version — an existing bed frame re-upholstered in a quality velvet — costs $60–$200 in fabric plus $100–$300 in professional upholstery labour. The jewel-toned velvet bed requires the surrounding materials — the bedding, the curtains, the furniture — to be either much lighter or much darker than the bed itself. A jewel-toned bed surrounded by materials of similar intensity creates visual competition; one surrounded by clear contrast reads as the room’s intended focal point.
Style tip: Choose a velvet with a pile that photographs well — a mid-pile velvet that shows the characteristic light-and-shadow quality of the fabric from across the room rather than a very short pile that reads as a flat colour at a distance. The velvet is doing the decorative work of the entire room and its ability to be seen as velvet rather than simply as colour is the material specification that justifies the choice.
3. The Painted Ceiling Statement
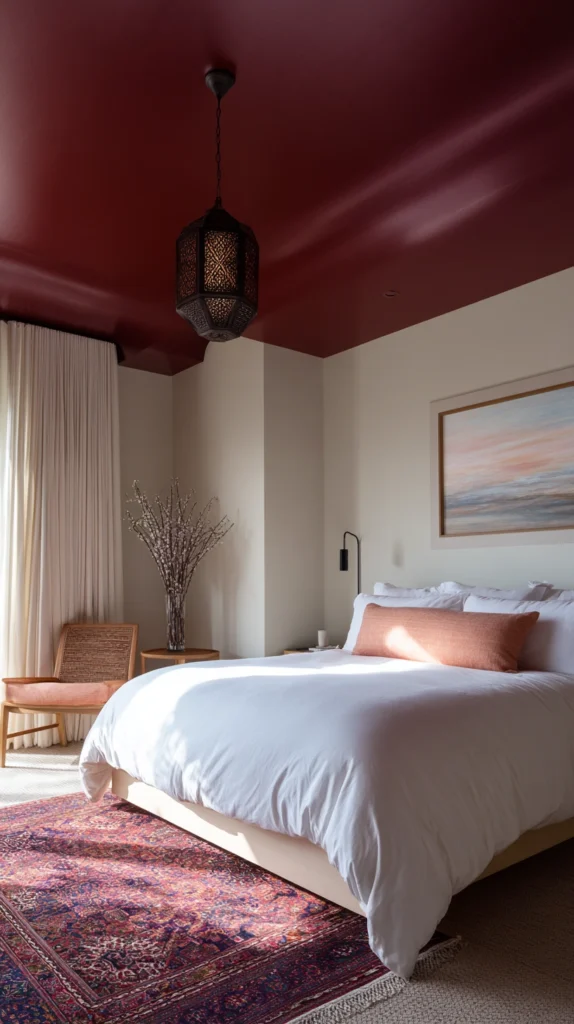
Budget: $30 – $150
Painting the ceiling in a bold colour — a deep forest green, a rich terracotta, a warm navy, or a saturated blush — while keeping the walls lighter creates one of the most unexpected and most dramatically effective bedroom statements available. The ceiling is the surface looked at most from the bed and the surface most consistently defaulted to white regardless of the room’s design intentions. A painted ceiling instantly communicates that the room was considered in three dimensions rather than only two.
A quality ceiling paint in a bold colour costs $25–$60 per 2.5-litre tin. A standard bedroom ceiling requires one to one and a half tins for two coats. The bold ceiling works most effectively when the walls are in a complementary lighter tone — a deep green ceiling over pale sage walls creates the immersive quality of being under a forest canopy; the same deep green ceiling over white walls creates a more graphic, more contrasting effect. Both work; the choice depends on the desired atmosphere.
Style tip: Paint the ceiling before the walls rather than after. Cutting in at the ceiling-wall junction is easier when the ceiling paint is already dry and the wall paint has not yet been applied. The reverse order — walls first, then ceiling — requires extremely careful masking at the ceiling line and produces a less clean junction. The ceiling-first sequence is the technical decision that makes a two-colour ceiling and wall approach manageable for a competent DIY painter.
4. The Dramatic Headboard Wall
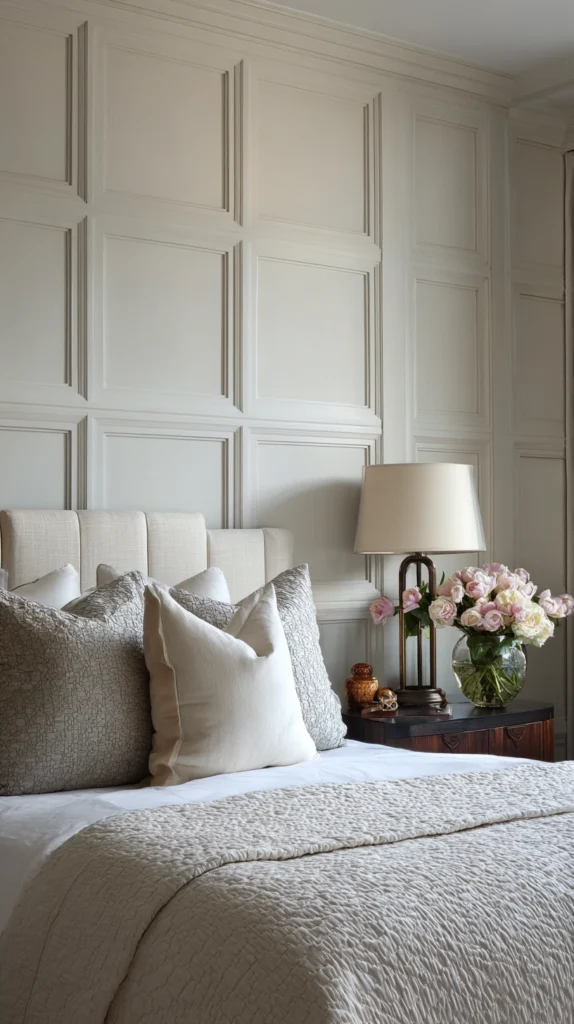
Budget: $100 – $600
A headboard wall that extends beyond the headboard itself — either with panelling, with a painted arch, with a contrasting colour section, or with a combination of all three that creates a defined architectural backdrop to the bed — transforms the bed wall from a surface behind the bed to an architectural feature that the bed sits within. The headboard wall treats the sleeping position as a designed destination rather than as a furniture placement decision.
A painted arch above the bed — using a large compass or a string-and-pin method to achieve a perfect semicircle — costs the price of a tin of paint and an afternoon. A panelled headboard wall in MDF with a simple profile costs $80–$300 in materials and basic carpentry. A coloured section of wall exactly the width of the bed — creating a coloured panel behind the headboard — costs the price of the paint. The headboard wall creates the impression of a custom-designed alcove at the cost of careful painting.
Style tip: Scale the painted arch or the coloured section to the actual width of the bed plus the bedside tables rather than to the bed width alone. A headboard treatment that encompasses the full width of the sleeping zone — bed and nightstands — reads as an architectural element designed for the furniture arrangement; one that covers only the bed width reads as a decorative feature applied behind the headboard independently of the furniture.
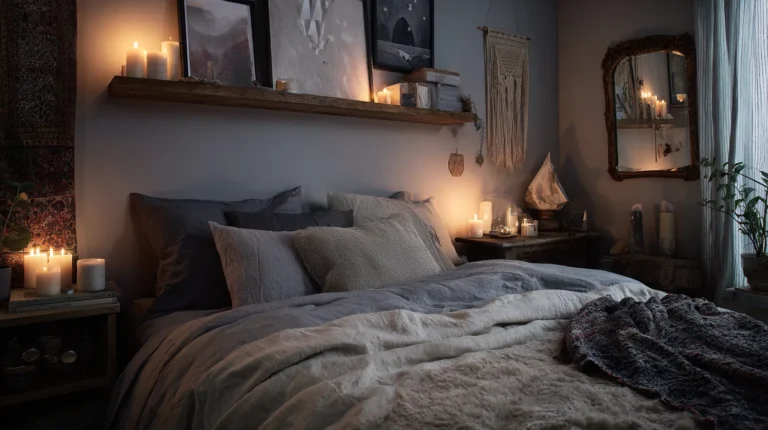
5. The Maximalist Gallery Ceiling
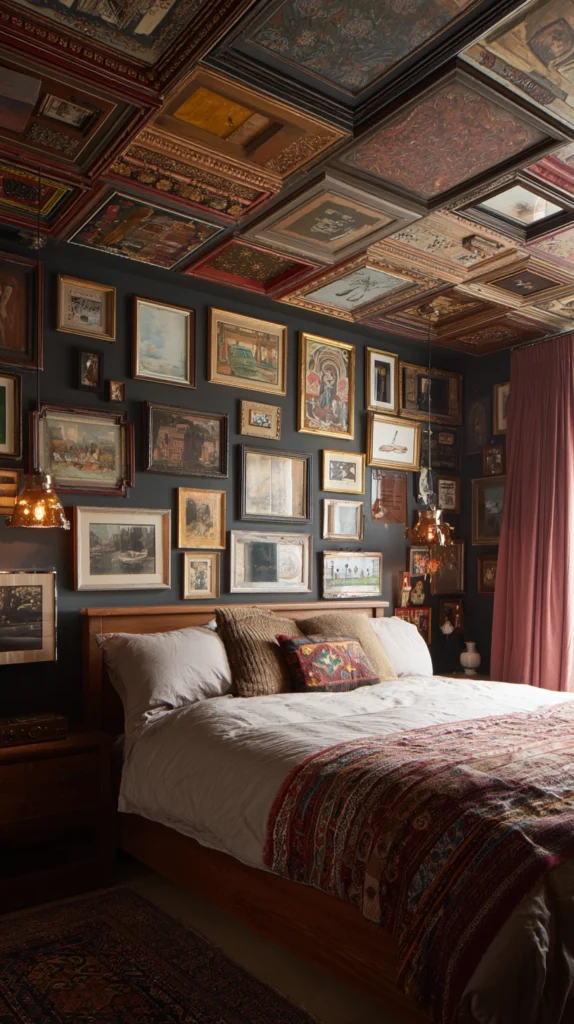
Budget: $50 – $300
A gallery of framed artwork and mirrors arranged on the ceiling above the bed — the surface seen most directly from the sleeping position — creates the most unexpected and most specifically bedroom-appropriate gallery treatment available. A ceiling gallery treats the experience of lying in bed as the primary design consideration rather than the experience of walking through the door, and the result is a room that is genuinely designed for its occupant rather than for its observer.
Lightweight frames at A4 and A5 sizes cost $5–$15 each. Command strips rated for ceiling use run $8–$15 per pack. A mix of ten to twelve frames in complementary finishes costs $60–$180. Small mirrors of 20–30 centimetres in diameter cost $10–$25 each and reflect the room’s light back toward the ceiling gallery. The ceiling gallery requires lightweight frames only — heavy frames on ceiling adhesive strips are a safety risk regardless of the adhesive rating.
Style tip: Photograph the proposed ceiling gallery arrangement on the floor before transferring it to the ceiling — lay all frames on the floor in the approximate position they will occupy on the ceiling, photograph from above, adjust the composition until it is resolved, and then transfer the positions. The floor planning step produces a better composition than attempting to resolve the arrangement while standing on a ladder looking directly upward.
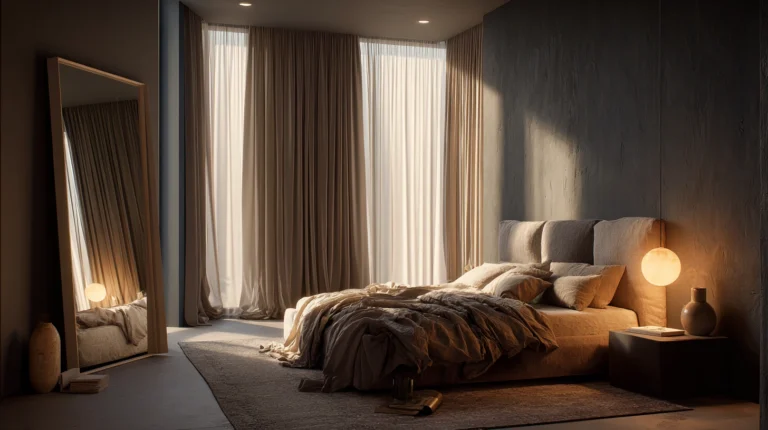
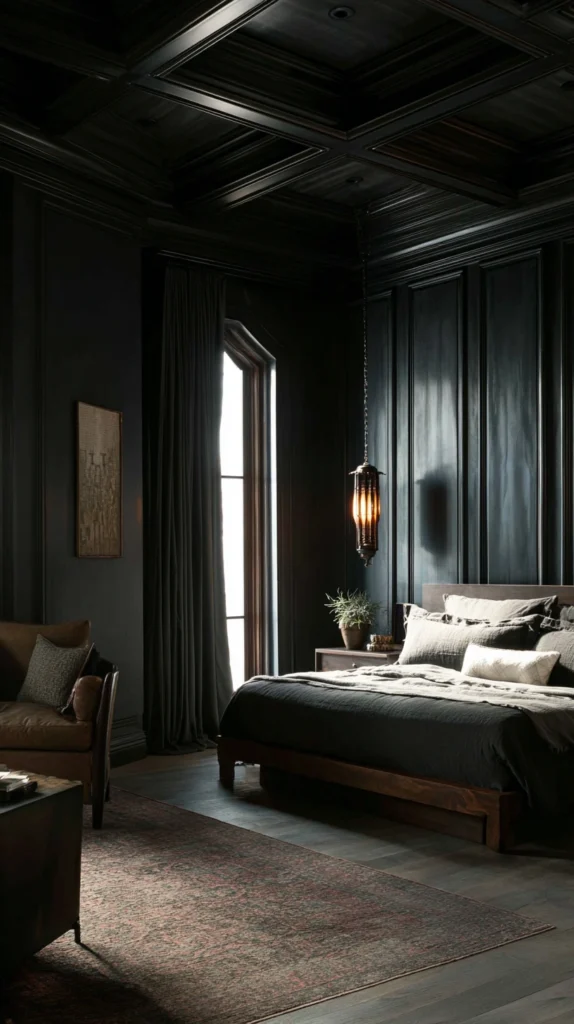
6. The Moody All-Dark Room
Budget: $60 – $300
A bedroom where every surface — walls, ceiling, woodwork, and furniture — is in the same deep, absorptive dark tone creates the most immersive and most dramatically atmospheric statement available to any bedroom at any budget. The all-dark room is not a depressing room or a small-seeming room — it is a room that has committed entirely to enclosure and warmth, and the experience of sleeping in it is categorically different from the experience of sleeping in any pale-toned room regardless of its quality.
A quality dark emulsion in a tone the room is committed to — charcoal, deep green, inky navy, warm plum — costs $25–$60 per 2.5-litre tin. The full room requires three to four tins. Painting the woodwork — skirting boards, door frames, window frames — in the same colour as the walls is the decision that most transforms the dark room from a room with dark walls to a genuinely dark room. The painted woodwork eliminates the visual grid of white lines that structures a conventional room and allows the dark colour to read as an environment rather than a paint application.
Style tip: Use warm artificial light sources throughout the all-dark room rather than cool white — warm amber light in a dark room creates the specific quality of warmth and enclosure that the all-dark bedroom is designed for. Cool light in a dark room creates a quality of cold severity rather than warm intimacy, and the bulb temperature is the specification that determines which of the two the all-dark room produces.
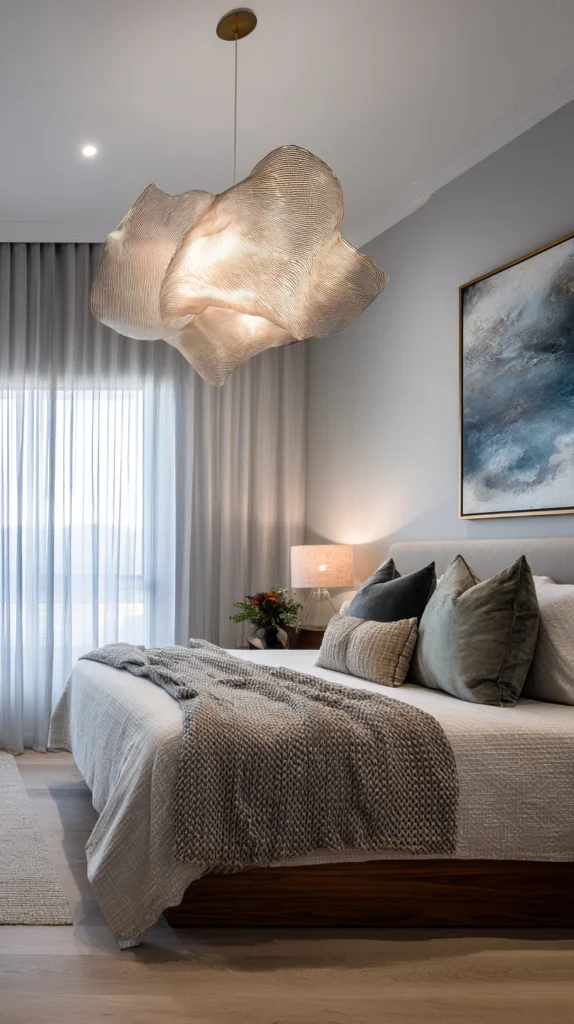
7. The Statement Pendant Above the Bed
Budget: $80 – $500
A pendant light hung directly above the bed — at the height where it is seen from the sleeping position as part of the room’s composition rather than simply as a ceiling fixture — creates the lighting statement that distinguishes the designed bedroom from the functional one. A statement pendant above the bed communicates that the sleeping position was considered as the room’s primary design viewpoint, which is the design logic that all genuinely considered bedroom interiors follow.
A large rattan or paper pendant of 50–80 centimetres in diameter costs $40–$150. A sculptural ceramic or glass pendant runs $100–$350. A cluster of three smaller pendants hung at different heights costs $80–$250 for the cluster. Hang the pendant so its lowest point sits at approximately 180–200 centimetres from the floor — high enough not to interfere with anyone sitting up in bed, low enough to read as a designed element rather than a ceiling fixture at a distance.
Style tip: Specify the pendant on a dimmer — $10–$20 for a smart bulb alternative or $15–$30 for a dimmer switch — so it can be adjusted from the bedroom’s daytime to its evening function. A statement pendant at full brightness creates task light; the same pendant at thirty percent creates atmosphere. The dimmer is the control that allows the statement pendant to perform at both functions rather than compromising between them.
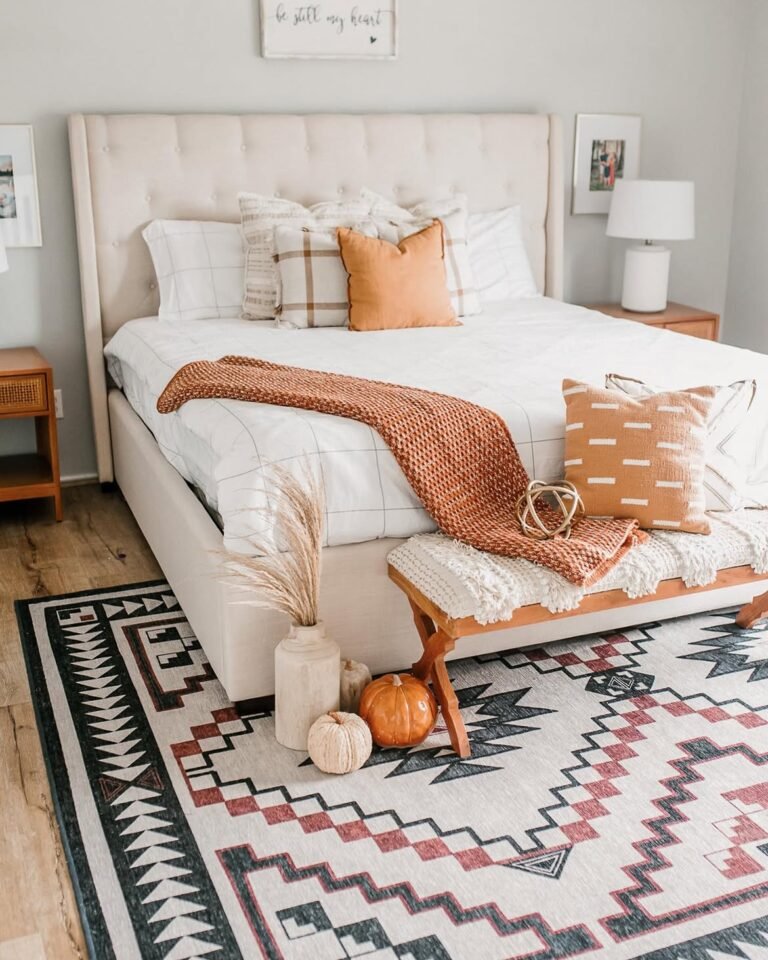
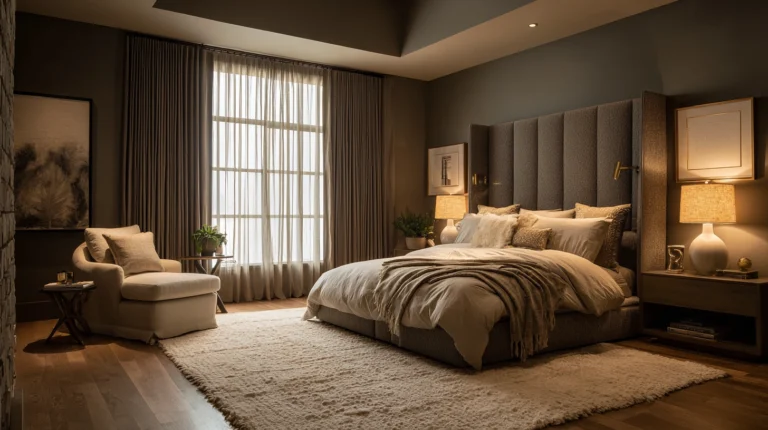
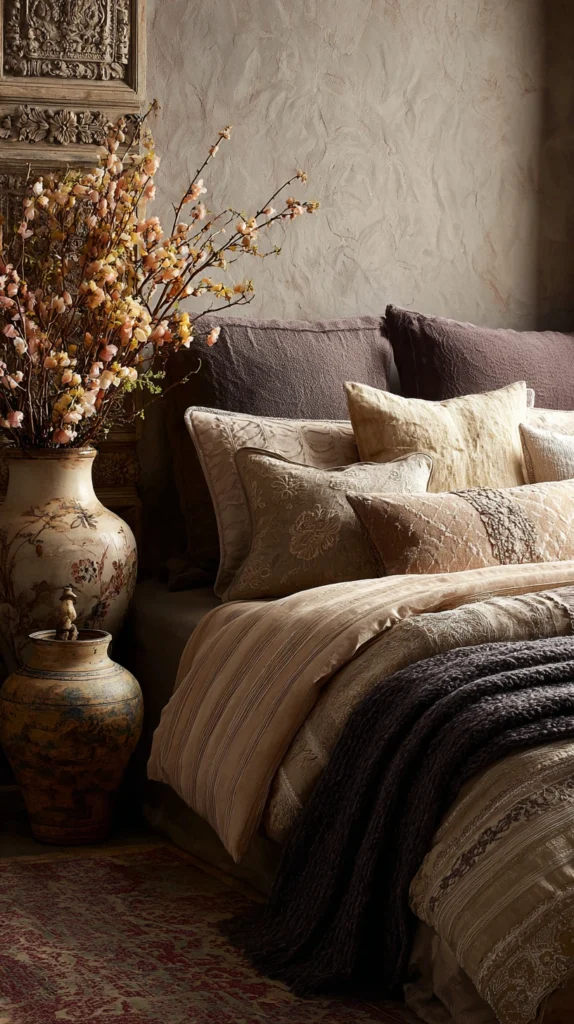
8. The Layered Textile Maximalism
Budget: $150 – $800
A bed dressed with an abundance of textiles — four distinct layers of different materials, weights, and textures in a considered colour palette — creates the maximalist textile statement that makes a bedroom feel genuinely opulent without requiring expensive furniture or architectural investment. The textile maximalist bed communicates generosity and warmth in a way that a minimal bed, however high-quality its individual pieces, cannot produce.
A quality duvet set costs $60–$200. A quilted bedspread in a complementary tone runs $40–$120. A woven or knitted throw folded at the foot costs $30–$80. A faux fur or velvet accent cushion collection costs $20–$50 per piece. The maximalist textile bed requires a consistent colour palette across all layers — the textiles should vary in texture and weight but remain within two or three related tones so the abundance reads as composed rather than accumulated.
Style tip: Layer the textiles in order of weight — the lightest, most delicate layer closest to the body and the heaviest, most dramatic layer at the foot or the top of the arrangement. Weight graduation from intimate to dramatic is the layering principle that gives the maximalist bed its specific quality of generous comfort rather than the quality of a surface covered in textiles for decorative purposes.
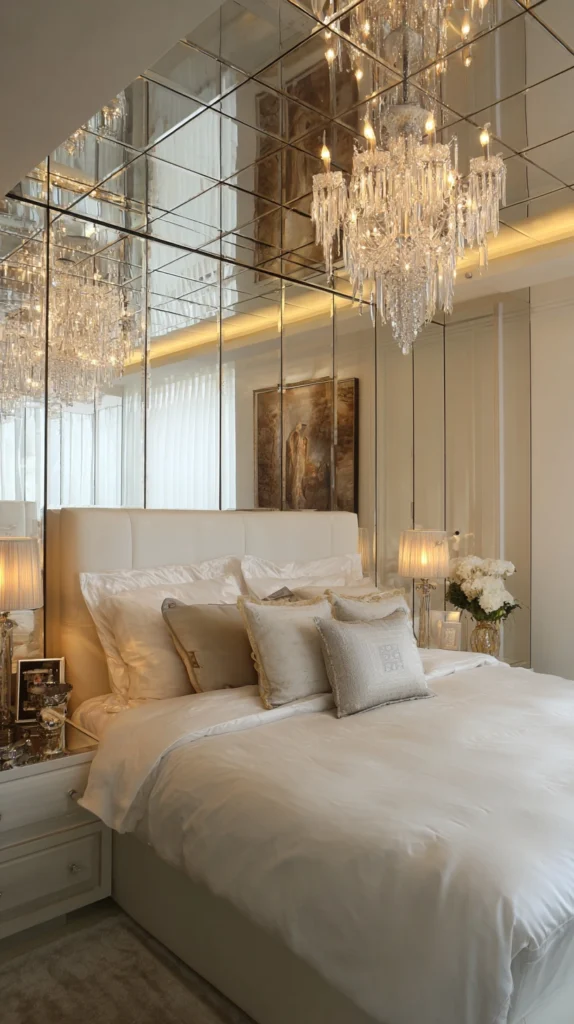
9. The Mirrored Statement Wall
Budget: $200 – $1,000
A wall of mirrors — either a single large floor-to-ceiling mirror, or a composition of multiple mirrors of different sizes and shapes arranged as a gallery — creates a statement bedroom wall that doubles the perceived size of the room, reflects the best light the room receives, and communicates a visual confidence that no other wall treatment at equivalent cost can match. A mirrored wall is the statement for small bedrooms in particular — it is the upgrade that addresses the room’s primary limitation as part of its design rather than despite it.
A single large floor-length mirror of 60 by 180 centimetres costs $40–$120. A composition of five mirrors in varying sizes and shapes runs $100–$400. A full-width wardrobe mirror fitted across the bed-facing wall costs $200–$600 installed. Lean large mirrors rather than hanging them — the leaned position is safer for heavy mirrors, easier to position, and reads as more casually confident than the hung position.
Style tip: Position at least one mirror in the bedroom composition to reflect an outdoor view — the garden, the sky, the light from a window — rather than reflecting only the interior of the room. A mirror that reflects the outside world brings the exterior into the interior and creates the impression of additional windows; a mirror that reflects only the room doubles the room rather than extending it, which is a different and less effective visual outcome.
10. The Botanical Mural or Wallscape
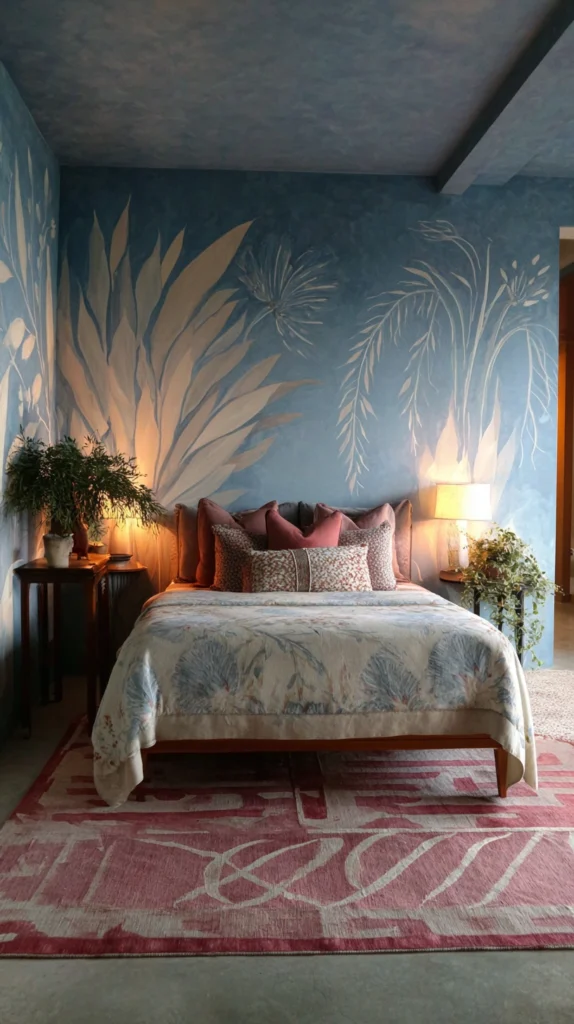
Budget: $80 – $1,500
A hand-painted mural — either a botanical scene, an abstract colour field, or a graphic geometric pattern painted directly on the bed wall — creates the most personalised and most specifically unique of all bedroom statements. A painted mural cannot be replicated and cannot be purchased ready-made; it is the statement that is entirely specific to the room it occupies and the person who specified it, and that specificity is a quality that no manufactured product can match at any price.
A self-painted botanical mural using chalk paint or emulsion costs $30–$80 in paint materials and an afternoon to several days depending on the complexity. A professional mural artist charges $100–$500 per square metre. A large stencil-based mural using repeated stencil applications costs $20–$60 in stencil and paint materials. The mural statement requires no artistic expertise for the simplest approaches — large, loose botanical branch paintings on a contrasting wall are achievable for a careful beginner and produce a result that reads as designed.
Style tip: Paint the mural in a tone one or two shades deeper than the wall colour rather than in a completely contrasting colour for the most sophisticated botanical mural result. A mural painted in a deeper version of the wall paint creates a tonal botanical effect — the branches and leaves emerge from the wall rather than being applied to it — that reads as architectural rather than decorative.
11. The Canopy and Drapery Statement
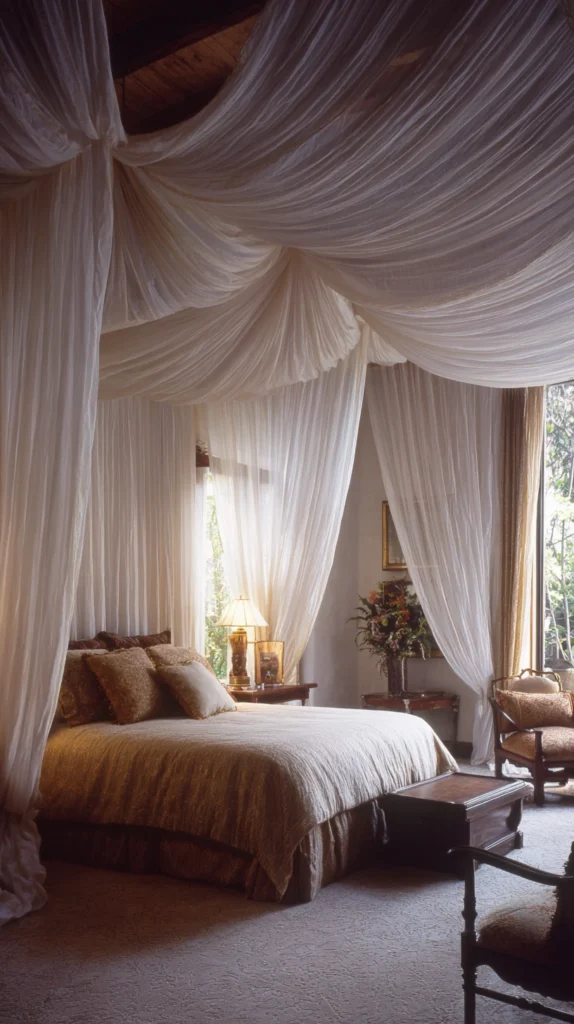
Budget: $60 – $400
Fabric draped from the ceiling above the bed — sheer panels falling from a ceiling-mounted ring or track, creating a soft canopy that frames the sleeping space without enclosing it — creates the most romantic and most specifically bedroom-appropriate of all the statement treatments. The fabric canopy transforms the sleeping position from a furniture placement into an architectural enclosure, and the movement of the sheer fabric in the air from an open window creates the specific quality of a room that is genuinely alive rather than simply decorated.
Sheer voile fabric in white, cream, or a soft tonal colour costs $3–$8 per metre — 8–10 metres creates a generous canopy. A ceiling-mounted curtain ring or track for the canopy fixing costs $8–$25. A circular ceiling canopy frame of 40 centimetres in diameter runs $15–$40. Fairy lights woven into the canopy fabric cost $10–$25 and give the enclosed sleeping space the quality of sleeping within a warm light source.
Style tip: Use more fabric than seems necessary — at least twice the diameter of the canopy ring in width per panel — so the draped fabric pools generously on the floor rather than hanging in thin columns. The generosity of the fabric is the quality that makes the canopy statement look genuinely luxurious rather than like a mosquito net, and the pooling on the floor is the specific detail that communicates abundance rather than economy.
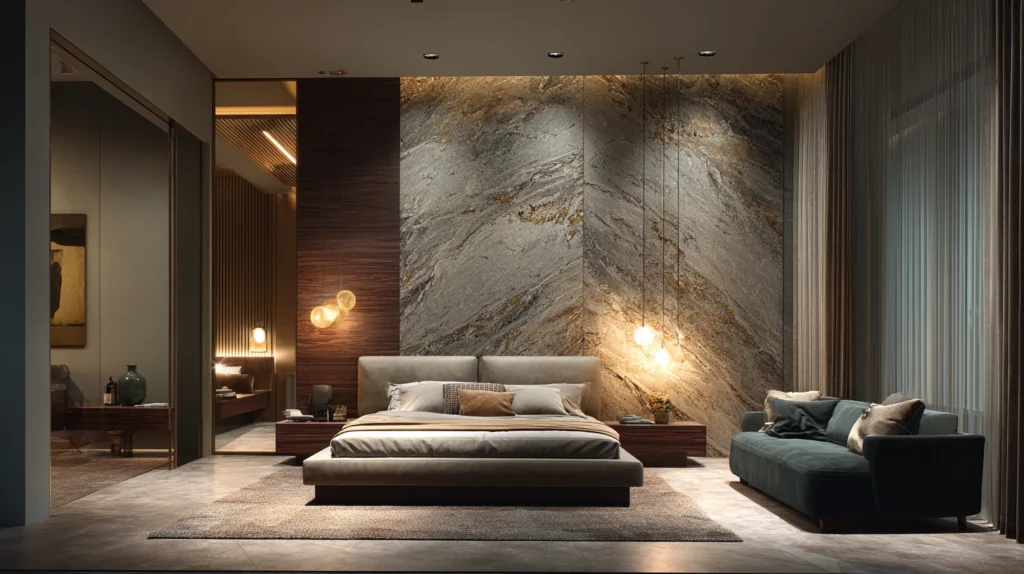
12. The Unexpected Material Headboard
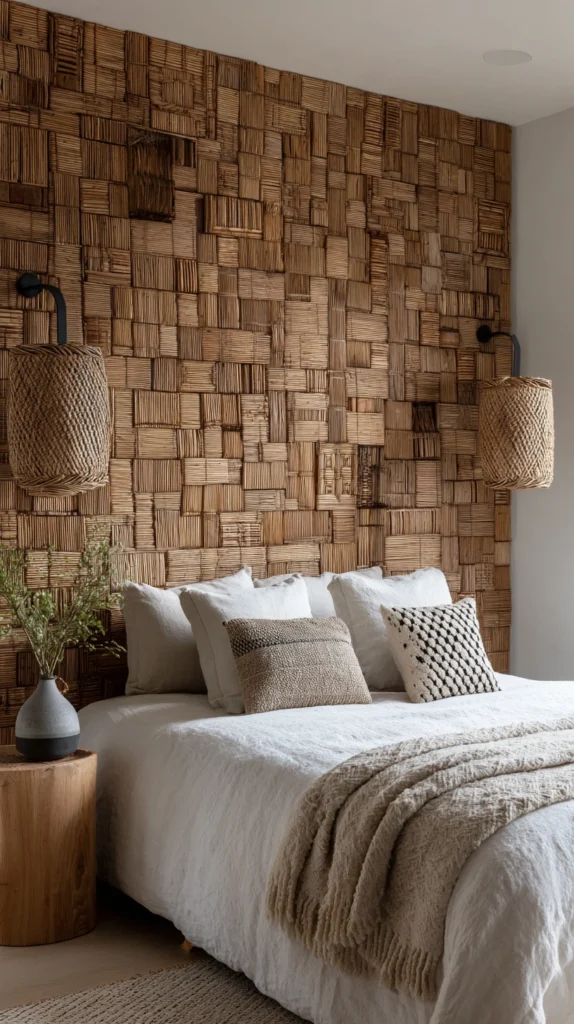
Budget: $100 – $800
A headboard made from an unexpected material — a panel of handmade zellige tile, a section of aged timber with visible grain, a leather-wrapped board with brass nail detail, a woven rattan panel at a generous scale, or a section of mirror — creates a statement from the room’s primary furniture piece that a conventional upholstered headboard cannot match. The unexpected material communicates a design decision that went beyond the obvious option and chose the specific over the standard.
A woven rattan headboard panel costs $100–$300. A leather-wrapped headboard with brass nail head trim runs $200–$600. A section of zellige tile on a backing board costs $150–$500. A DIY aged timber headboard from reclaimed planks costs $40–$120 in materials. The unexpected material headboard requires the rest of the bedroom to exercise some restraint — a headboard that communicates strongly through its material needs clear space around it to be read rather than visual competition from other statement elements.
Style tip: Position lighting that highlights the headboard material — a wall sconce on each side that illuminates the texture and the surface of the headboard — rather than relying on ambient room lighting to reveal the material quality. A zellige tile headboard illuminated by a warm side light communicates its specific material quality completely; the same headboard under general overhead lighting reads as a tiled surface rather than as a specific, considered material choice.
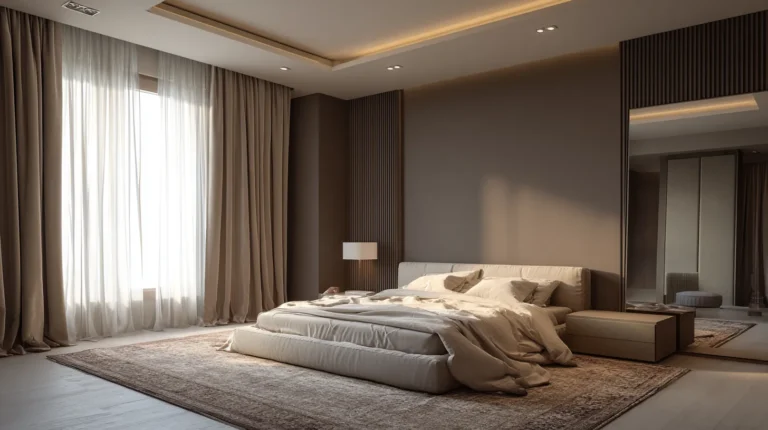
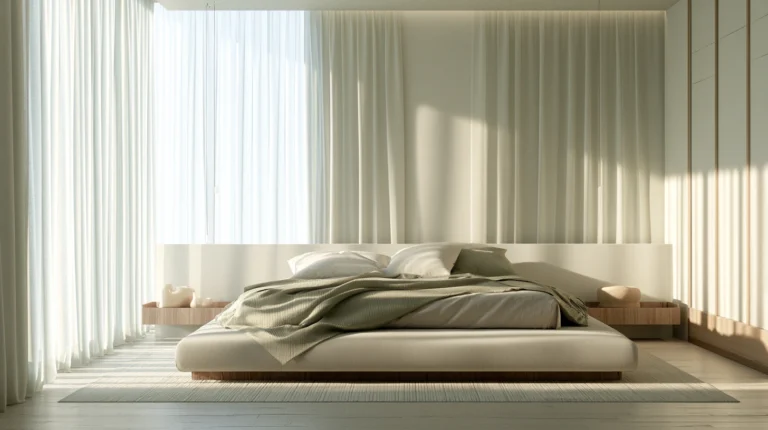
13. The Floor Mattress and Low Living Approach
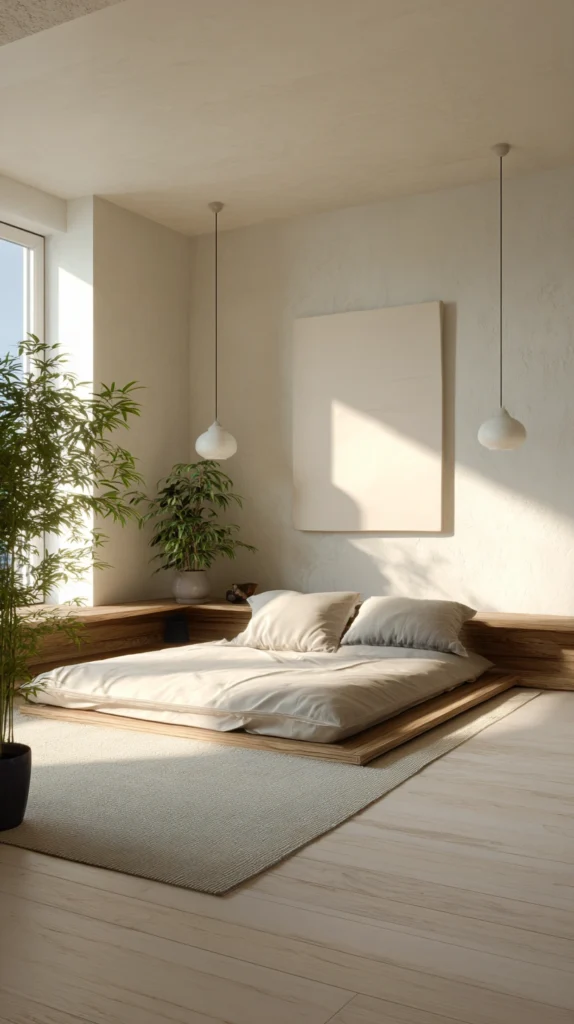
Budget: $100 – $600
A bedroom built around a floor mattress or an extremely low-profile platform bed — the sleeping surface positioned at floor level or within 20 centimetres of it — creates a statement of anti-conventional living that produces a room with a completely different spatial quality from the standard raised-bed bedroom. The floor-level bed expands the perceived ceiling height, makes the room feel larger by removing the visual bulk of the bed frame from the middle of the space, and communicates a specific, culturally specific approach to the bedroom that reads as extremely considered.
A quality floor mattress with a low-profile foam base costs $200–$600. A Japanese-style platform bed frame of 15–20 centimetres in height runs $200–$500. A tatami-style woven mat as the base beneath the mattress costs $40–$120. The floor-level bed requires bedding with excellent drape — linen or cotton percale that falls to the floor rather than sitting stiffly — and a bedroom that is genuinely clean and well-maintained at floor level, since the floor is now the primary visual plane.
Style tip: Pair the floor-level bed with an extremely low bedside arrangement — a low tray on the floor with a candle and a plant rather than a conventional bedside table, or a single low shelf fixed to the wall at 20–30 centimetres height. The consistency of the low-level approach throughout the room is the design decision that makes the floor mattress read as an intentional statement; a low mattress beside a standard-height bedside table reads as a bed without a frame.
14. The Curtain Partition Statement
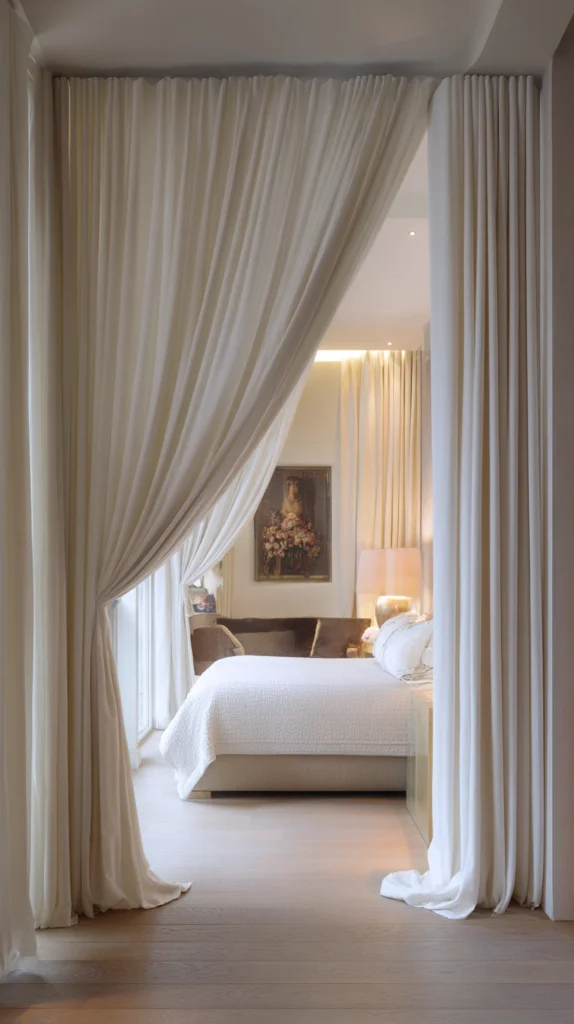
Budget: $60 – $300
Floor-to-ceiling curtains used as a room divider — separating the sleeping zone from a dressing area, creating an alcove behind the bed, or screening a wardrobe or a study corner — creates a bedroom statement that introduces the architectural quality of defined zones without structural work. A curtain partition communicates a bedroom that was designed for multiple functions and that organised those functions with considered boundaries, which is the design intelligence of a larger, better-designed bedroom made available to any space regardless of its size.
Floor-to-ceiling curtain panels in a quality fabric cost $30–$80 each — two to four panels for a standard room-width partition. A ceiling-mounted curtain track for the partition costs $20–$60. The curtain fabric for a partition wall should be opaque rather than sheer — the partition is a spatial boundary rather than a visual softener, and the opacity communicates the separation of the zones it creates. Velvet, linen, or a heavyweight cotton in a coordinating tone suits the partition function.
Style tip: Mount the partition curtain track so the curtain falls exactly from the ceiling to the floor with a slight pool — the same ceiling-height rule that applies to window curtains. A partition curtain that begins below the ceiling creates the impression of a hanging fabric panel rather than a room boundary; one that begins at the ceiling reads as an architectural element of the room’s spatial organisation, which is the quality the statement is reaching for.
The statement bedroom is the bedroom where the person who lives in it made a decision — about colour, about material, about scale, about the specific atmosphere they wanted the room to produce — and carried that decision through without compromise. The decision itself is rarely the most expensive option available. It is almost always simply the most committed one.
Make the decision. Choose the colour that is genuinely the right colour rather than the safe colour. Specify the headboard at the scale the room deserves rather than the scale that seemed manageable. Paint the ceiling as well as the walls. Hang the curtains from the ceiling rather than the window frame. Every one of these decisions costs almost nothing additional and produces a room that is entirely different from the room that results from caution. The statement bedroom begins with the decision to make one.