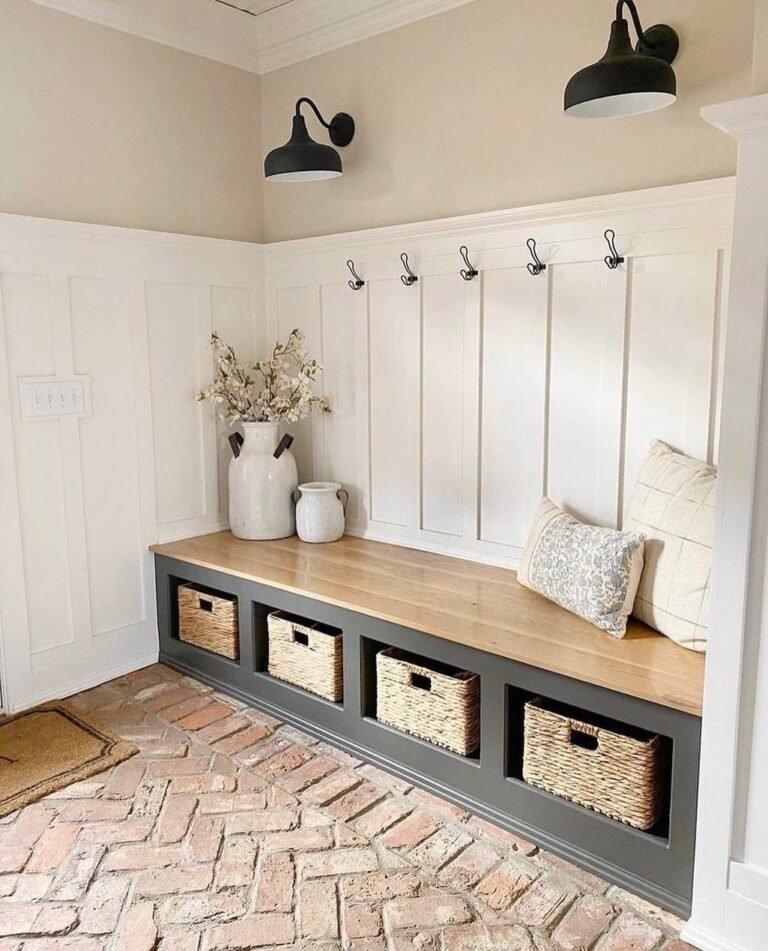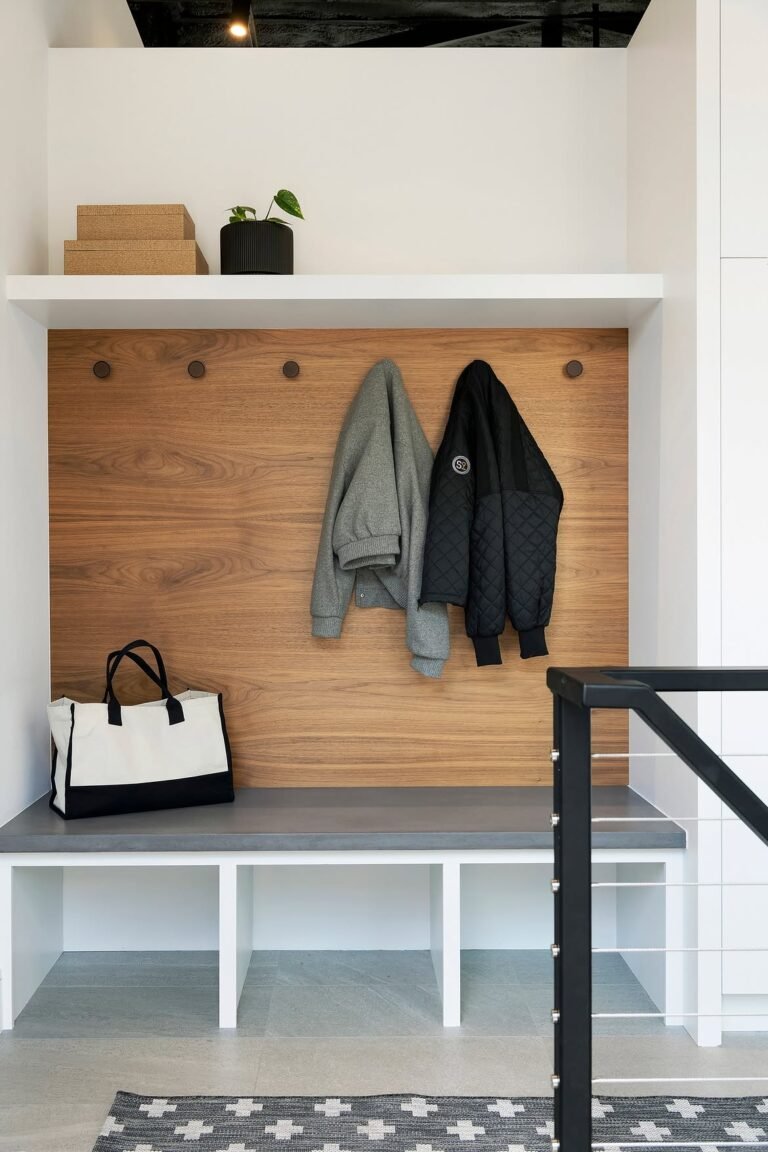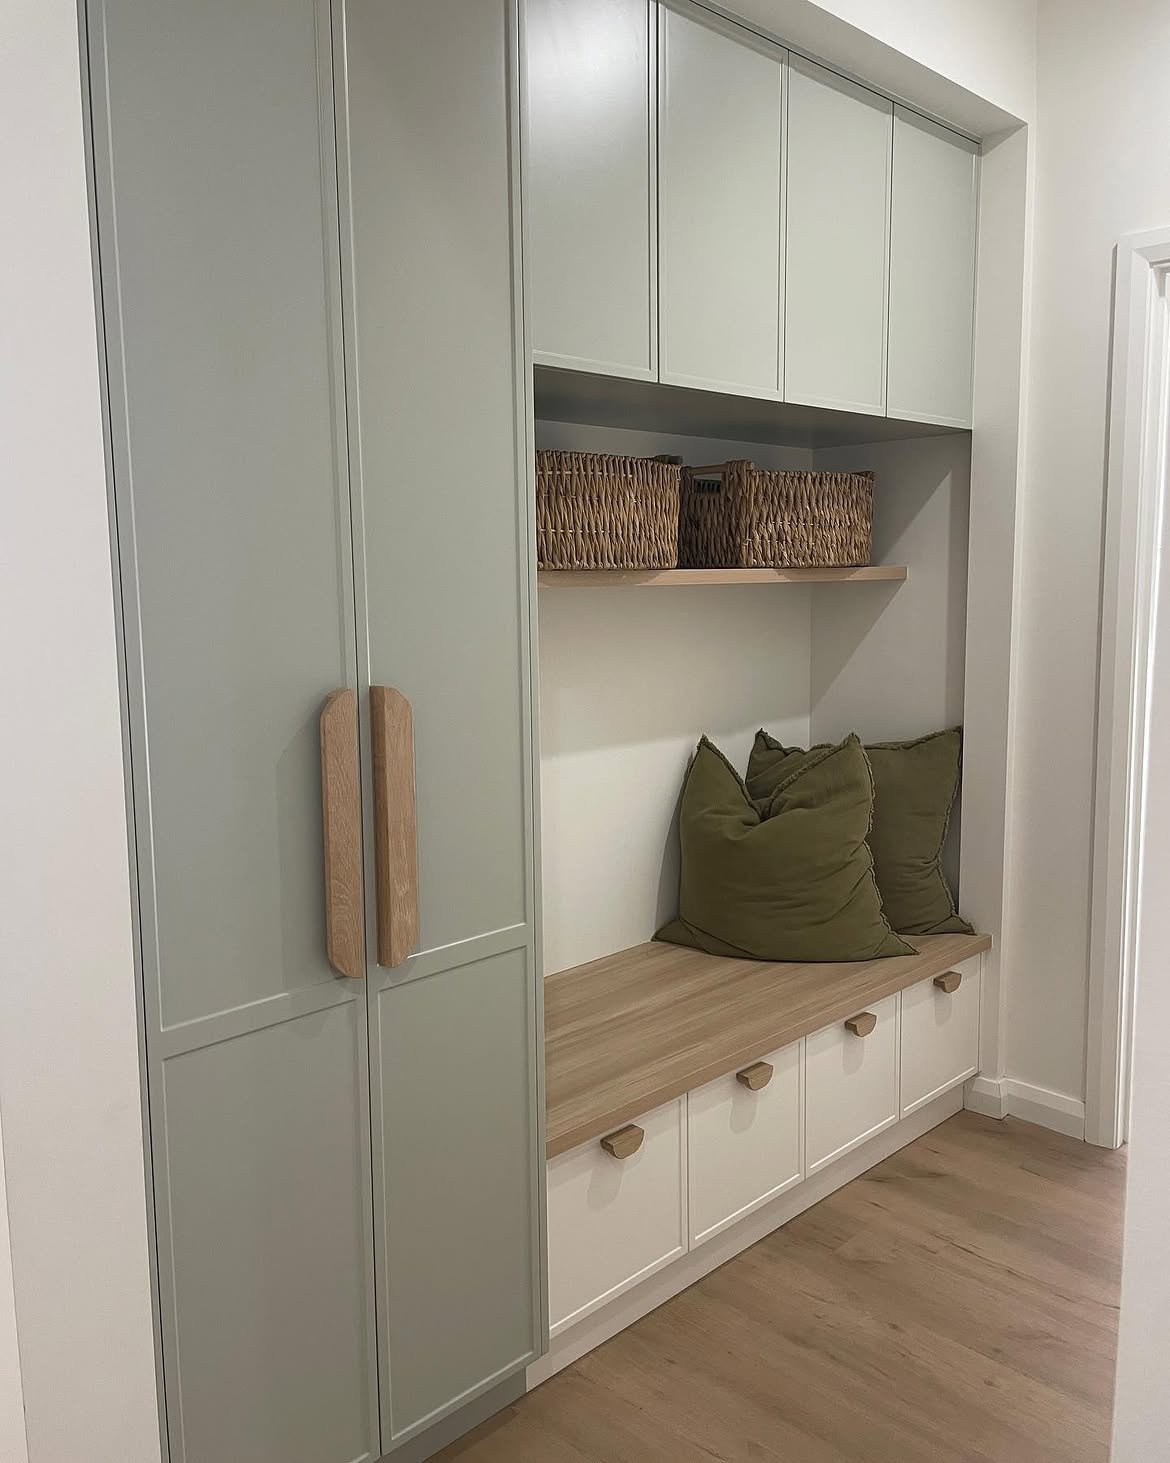
How to Plan the Perfect Mudroom Layout
How to Plan the Perfect Mudroom Layout
The mudroom stopped being a pile-up zone the day I actually planned it instead of just furnishing it. Not a bigger entryway. Not more hooks crammed onto whatever wall had space. Not another bin bought in a moment of frustration with the existing chaos.
A real plan, built around how the household actually enters and exits the house.
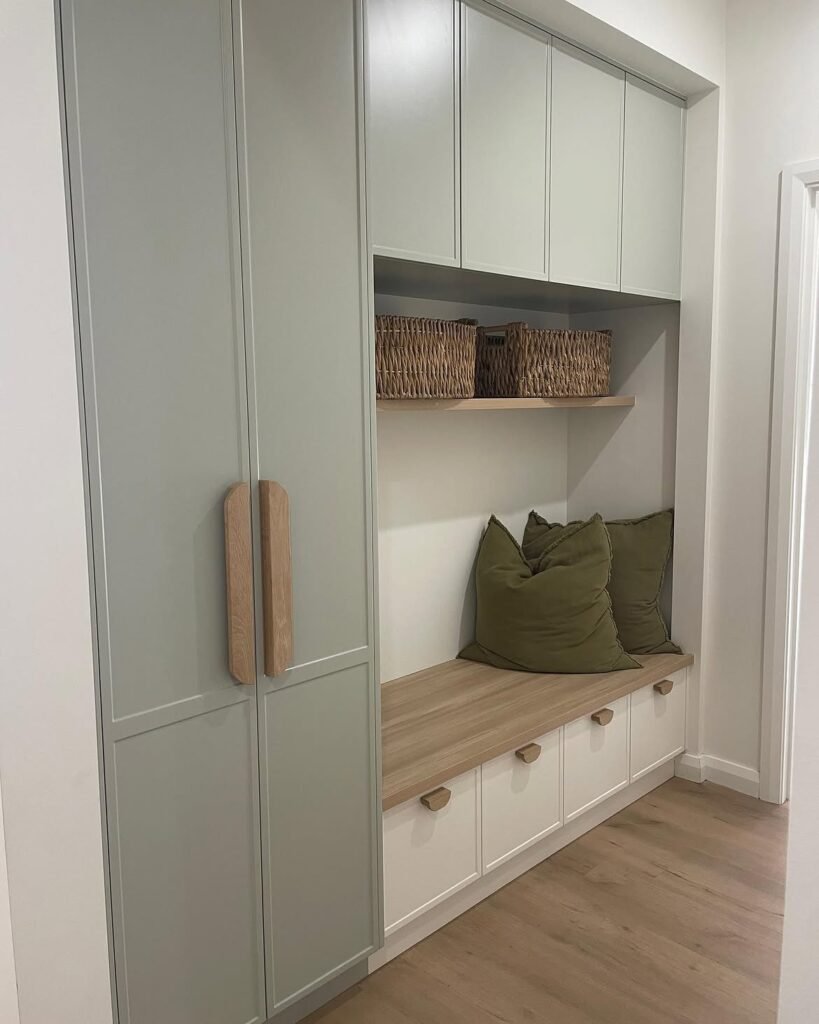
Because designing the space around genuine daily behavior, rather than around whatever furniture happened to be available, did something no amount of additional storage ever managed on its own. Before it: a small entry space with shoes scattered across the floor, coats slung over chairs because the hooks were already full, backpacks dropped exactly where they landed.
After it: a mudroom where everything had a specific place, sized for the specific number of people and their specific gear, and the household actually used it that way because the plan matched their real habits.
A mudroom is not simply a bench and some hooks installed near the back door. It is a system, and the mudrooms that actually work are planned around the household’s specific size, the specific gear they need to store, and the specific sequence of actions that happen every single time someone enters or leaves the house. The entryway: no longer a chaotic transition zone, but a genuinely functional system built around real daily behavior.
Here is how to plan the perfect mudroom layout — from the first household assessment to the final finishing details — built on that understanding.
Why Most Mudrooms Fail and How Planning Prevents It
The generic-layout problem
Most mudroom failures trace back to a generic layout — a bench, some hooks, a shelf — installed without any specific consideration of the actual household’s size, gear, and habits, rather than a layout planned around real, specific daily use.
The capacity mismatch
Without a planned layout:
Storage sized for an assumed “average” household, regardless of whether four people or six actually use the space, and regardless of what specific gear — sports equipment, work uniforms, dog leashes — they need to store.
The mudroom: overwhelmed within weeks, the mismatch between actual need and planned capacity becoming immediately apparent.
With a planned layout:
Storage genuinely sized to the specific household using it, accounting for exactly how many people, how much seasonal gear, and what specific daily items need a home.
The mudroom: functioning as intended, because the plan matched the household’s actual real capacity needs from the outset.
The sequence-of-entry principle
A mudroom is used in a specific behavioral sequence — shoes off, coat off, bag down — and a layout planned around that actual sequence functions far more smoothly than one where storage elements are placed without regard to the order in which they are actually used.
The zone-based organization case
Dividing the mudroom into distinct functional zones — a seating and shoe zone, a hanging zone, an overflow storage zone — rather than treating the whole space as one undifferentiated area, is the single most effective organizing principle available.
Step 1: Count the Actual Household and Their Specific Gear
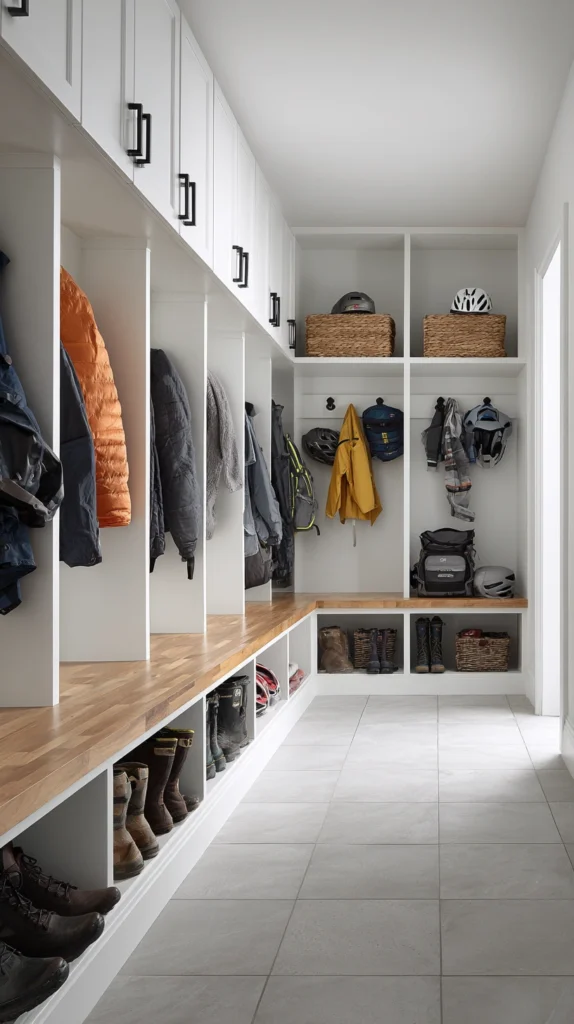
Determining exactly how many people use the mudroom daily, and cataloging the specific categories of gear each person needs stored there, before any furniture or layout decision.
Why this specific inventory prevents the most common mudroom planning mistake
A mudroom planned for a generic household of four, when the actual household is six with three children in different sports, will be undersized from day one regardless of how well-designed the layout otherwise is.
The headcount
The specific number of people who will use this exact entry point regularly, including any frequent guests or a household member who works from a location requiring specific daily gear.
The gear categories
A genuine list of what actually needs storage — everyday shoes, seasonal boots, coats by season, sports equipment, dog walking gear, mail and keys — rather than an assumed generic list.
The seasonal variation
Storage needs that shift significantly between seasons — bulky winter coats and boots versus lighter spring gear — planned for with enough flexible capacity to handle the year’s most demanding season, not just an average.
The growth consideration
Whether the household’s needs are likely to change soon — a child moving from smaller to larger sports equipment, a new pet, additional household members — worth accounting for with some built-in flexibility.
The overall value
A layout genuinely sized to the household’s real, specific capacity needs, preventing the undersized-within-weeks problem most generic mudroom installations eventually face.
Cost breakdown: No cost — an assessment step Total: $0
Step 2: Map the Actual Entry Sequence
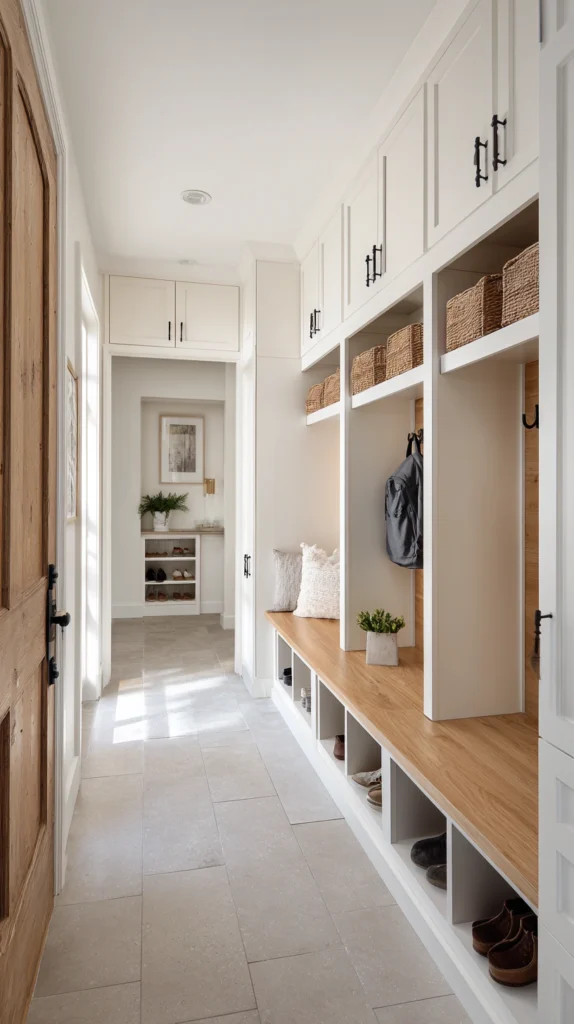
Observing and mapping the specific sequence of actions that happen every time someone enters or exits through this door, before deciding where any specific storage element goes.
Why the behavioral sequence should determine the physical layout, not the other way around
A mudroom laid out without regard to the actual sequence of removing shoes, then a coat, then setting down a bag, forces people to move out of sequence or in an awkward order every single time they use the space, undermining the whole system regardless of how much storage it includes.
The sequence observation
Watching, or simply recalling, the actual physical sequence a person goes through entering the house — bag down first, then shoes off, then coat off, or some other specific order this particular household follows.
The reverse sequence
The same sequence in reverse for leaving the house, since the outbound sequence (coat on, shoes on, bag grabbed) may follow a slightly different physical order than the inbound one.
The physical flow mapping
A simple sketch of where each action in the sequence should physically happen, moving from the door inward, ensuring the layout supports rather than interrupts the natural movement pattern.
The bottleneck identification
Any point where multiple household members are likely to need the same space simultaneously — several people removing shoes at once during a busy morning departure — flagged specifically for extra width or capacity at that point.
The overall value
A layout that physically supports how people actually move through the space, rather than one requiring an awkward workaround every single time it is used.
Cost breakdown: No cost — an observation and mapping step Total: $0
Step 3: Establish the Seating and Shoe Zone First
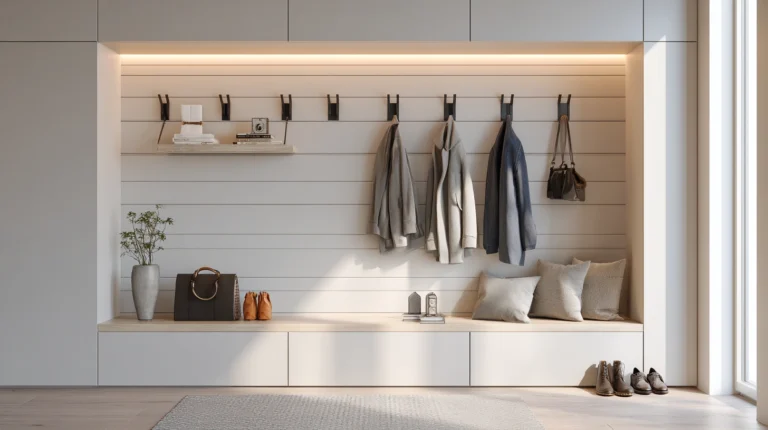
Designating the specific area for sitting down and removing or putting on shoes, sized for the number of people likely to use it simultaneously.
Why seating and shoe storage should be planned before any other zone
Removing and putting on shoes is one of the most consistent, universal mudroom activities across virtually every household, making it the logical starting point for the whole layout, with every other zone planned in relation to it.
The bench sizing
A bench long enough for the number of people likely to sit simultaneously, generally allowing at least 18 to 24 inches of seating width per person, rather than a bench sized for only one or two people in a larger household.
The shoe storage
Cubbies, a shoe rack, or a bench with built-in shoe storage beneath, sized to the household’s actual shoe quantity across all seasons, rather than the smaller quantity that fits during any single season alone.
The placement
Positioned closest to the actual door, since shoe removal and replacement is typically the first and last action in the entry sequence identified in Step 2.
The material durability
A bench and shoe storage surface genuinely durable against wet, muddy, or snowy footwear, rather than a delicate finish that would show wear quickly given this zone’s heavy daily use.
The overall value
The mudroom’s foundational zone, planned first and sized to the household’s actual simultaneous-use needs, with every subsequent zone building outward from this starting point.
Cost breakdown: Bench with shoe storage: $200–600 Total: $200–600
Step 4: Plan Individual Hook and Storage Zones Per Person
Assigning each household member their own specific hook, cubby, or storage section, rather than a shared, undifferentiated hook row.
Why individual assignment prevents the most common daily mudroom friction
A shared, undifferentiated set of hooks leads to daily confusion and clutter, as coats and bags pile onto whichever hook happens to be available, rather than each person having a clear, specific spot.
The individual zones
One hook, one cubby, or one small section specifically assigned to each household member by name, rather than a generic shared row.
The height consideration
Hooks and storage at genuinely appropriate heights for each specific person, including lower hooks for children, rather than a single uniform height assumed to work for everyone.
The labeling
A name label, a specific color, or another clear marker at each person’s designated section, particularly useful for children still learning to consistently use their assigned spot.
The capacity per person
Each individual zone sized for that person’s actual gear — a child with a backpack and a coat needing different capacity than an adult with a work bag and a heavier coat.
The overall value
A system directly addressing the ambiguity that causes most daily mudroom clutter, giving each household member unambiguous ownership of a specific storage spot.
Cost breakdown: Individual hooks and cubby dividers: $100–300 Total: $100–300
Step 5: Add a Dedicated Zone for Frequently Grabbed Items
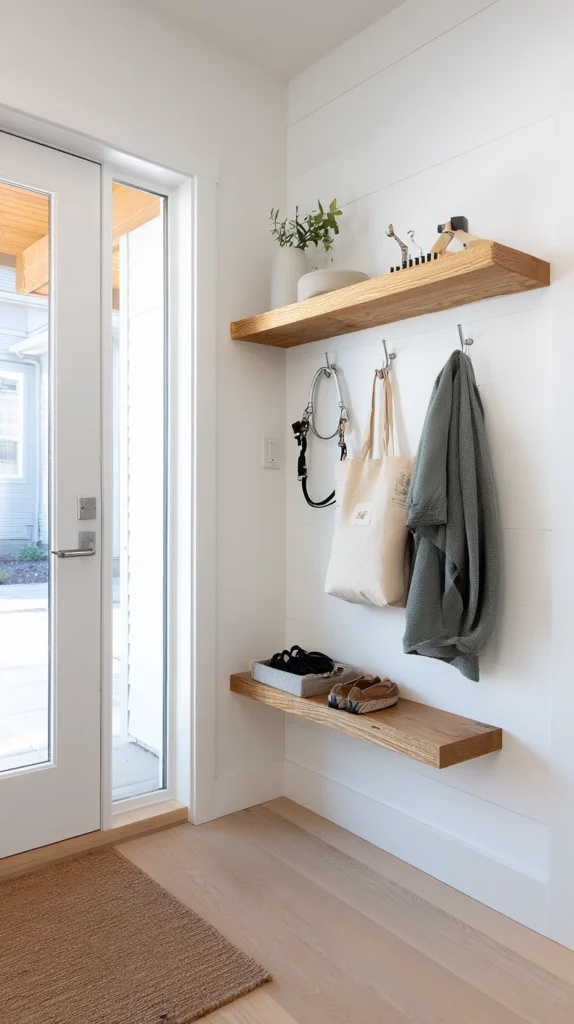
Designating a specific, easily accessible spot for the items grabbed or dropped off every single time someone leaves or enters — keys, sunglasses, dog leashes, masks, or reusable bags.
Why small daily-use items need their own specific zone rather than being left to accumulate randomly
Keys, sunglasses, and similar small daily items are exactly the kind of thing that ends up scattered across whatever surface is nearest the door if they lack a specific, dedicated spot, undermining an otherwise well-organized mudroom.
The catch-all tray or hooks
A small tray, a row of small hooks, or a shallow drawer, positioned at the exact point in the entry sequence where these items are naturally grabbed or set down.
The specific item categories
Keys, sunglasses, a dog leash, reusable shopping bags — whatever the household’s actual most frequently used small items are — each with a specific designated spot rather than a single undifferentiated catch-all bin.
The placement height
Positioned at a height and location that genuinely gets used in practice, typically right beside the door itself, rather than tucked somewhere requiring an extra step to reach.
The visibility principle
Open, visible storage for these items rather than a closed drawer, since items used multiple times daily benefit from being immediately visible rather than requiring a deliberate search each time.
The overall value
A specific answer to one of the most persistent sources of small daily clutter, giving frequently used items a genuine home rather than leaving them to accumulate wherever convenient.
Cost breakdown: Small tray, hooks, or shallow drawer unit: $30–80 Total: $30–80
Step 6: Build in Seasonal and Overflow Storage
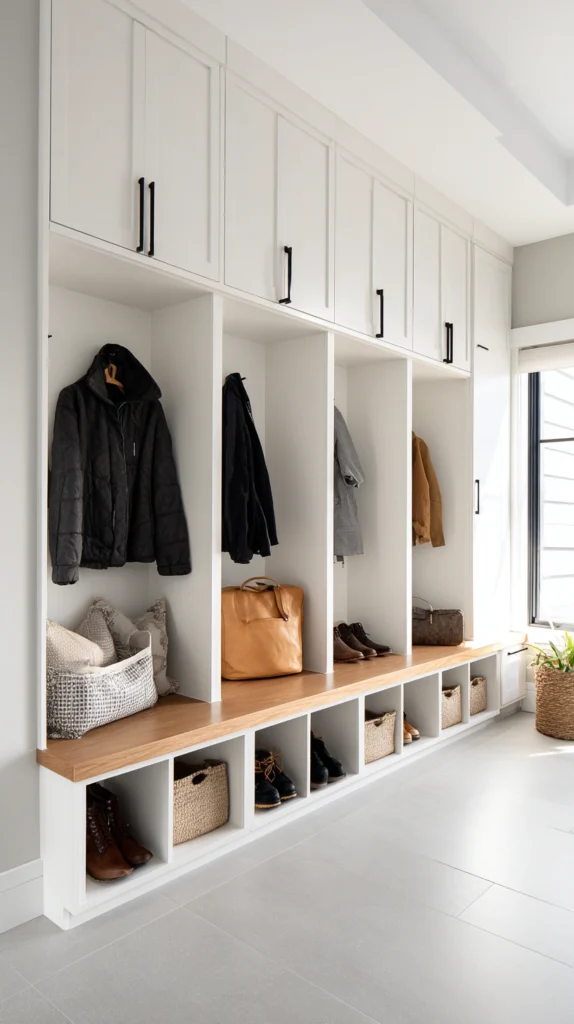
Planning a specific, separate storage zone for bulky seasonal items and overflow gear, rather than assuming the everyday hooks and cubbies must accommodate everything year-round.
Why seasonal items need their own zone rather than competing with daily-use storage
Winter coats and boots take up considerably more space than the lighter gear used the rest of the year, and a mudroom trying to store both categories in the same limited daily-use zone will feel overcrowded for much of the year.
The overflow storage
A closet, a bench with deeper storage, or overhead cabinets, specifically designated for out-of-season gear rather than competing for space with the everyday hooks and cubbies.
The rotation practice
A seasonal swap practiced twice yearly, moving the previous season’s gear into overflow storage as the new season’s items move into the primary daily-use zone.
The bulky item accommodation
Sports equipment, umbrellas, and other larger or irregularly shaped items given their own specific storage solution — a tall narrow cabinet, a corner umbrella stand — rather than awkwardly wedged into space designed for coats and shoes.
The accessibility balance
Overflow storage positioned to be reasonably accessible without requiring daily use, since this zone is specifically for items not needed on a constant basis, unlike the primary zones established in earlier steps.
The overall value
A mudroom that remains genuinely uncluttered year-round, because seasonal bulk is planned for and given its own space rather than competing with the daily-use zones for the same limited capacity.
Cost breakdown: Overflow storage cabinet or closet organization: $150–500 Total: $150–500
Step 7: Choose Flooring That Handles the Real Daily Mess
Selecting a genuinely durable, easily cleaned flooring material specifically suited to wet shoes, muddy paws, and the heaviest daily traffic in the house.
Why mudroom flooring deserves more specific consideration than flooring elsewhere in the home
A mudroom experiences more concentrated daily moisture, dirt, and wear than almost any other room in the house, and flooring chosen without this specific consideration in mind will show damage and wear far faster than the same material would elsewhere.
The material selection
Tile, sealed concrete, or a high-quality luxury vinyl, all genuinely water- and stain-resistant, rather than carpet or an unsealed wood that would show water damage and staining quickly.
The slip resistance
A textured or slip-resistant finish, particularly important given the wet shoes and tracked-in moisture this specific room regularly deals with.
The drainage consideration
A slight slope toward a floor drain, in households with particularly heavy use — farm or ranch households, for instance — though this level of infrastructure is not necessary for most typical residential mudrooms.
The transition detail
A clear transition strip or threshold where the mudroom’s durable flooring meets the home’s interior flooring, both protecting the adjacent material and providing a clear physical and visual boundary matching the room’s functional purpose.
The overall value
Flooring genuinely suited to the room’s actual daily demands, preventing the premature wear and damage a less carefully chosen material would experience in this specific high-moisture, high-traffic space.
Cost breakdown: Durable flooring (tile or luxury vinyl, small room): $300–800 Total: $300–800
Step 8: Plan Lighting for Genuine Task Visibility
Ensuring the mudroom has adequate, well-placed lighting for the specific tasks performed there, rather than relying on a single dim overhead fixture or borrowed light from an adjacent room.
Why mudroom lighting deserves specific planning rather than an afterthought fixture
A mudroom used briefly but repeatedly throughout the day — tying shoes, checking for keys, inspecting a coat for spots — benefits from genuinely adequate task lighting, more so than many rooms used for longer, more passive purposes.
The overhead fixture
A bright, functional overhead light, sized appropriately to the room and positioned to eliminate shadows across the bench and storage areas where people actually need to see clearly.
The task-specific lighting
Additional lighting at the shoe and seating zone specifically, if the overhead fixture alone leaves that lower area in shadow, since this is the zone requiring the most genuine visual attention during actual use.
The switch placement
A light switch positioned conveniently at the entry point itself, rather than requiring a reach across the room, ensuring the light gets used consistently rather than skipped due to inconvenient placement.
The natural light consideration
A window, if the mudroom’s location allows one, reducing the reliance on artificial lighting during daytime hours and improving the room’s overall daily usability.
The overall value
A mudroom genuinely functional for its specific tasks at any hour, rather than a dim, borrowed-light space that makes even simple tasks like finding a lost sock or checking shoe laces unnecessarily difficult.
Cost breakdown: Overhead fixture and task lighting: $80–200 Total: $80–200
Step 9: Add a Small Message and Communication Center
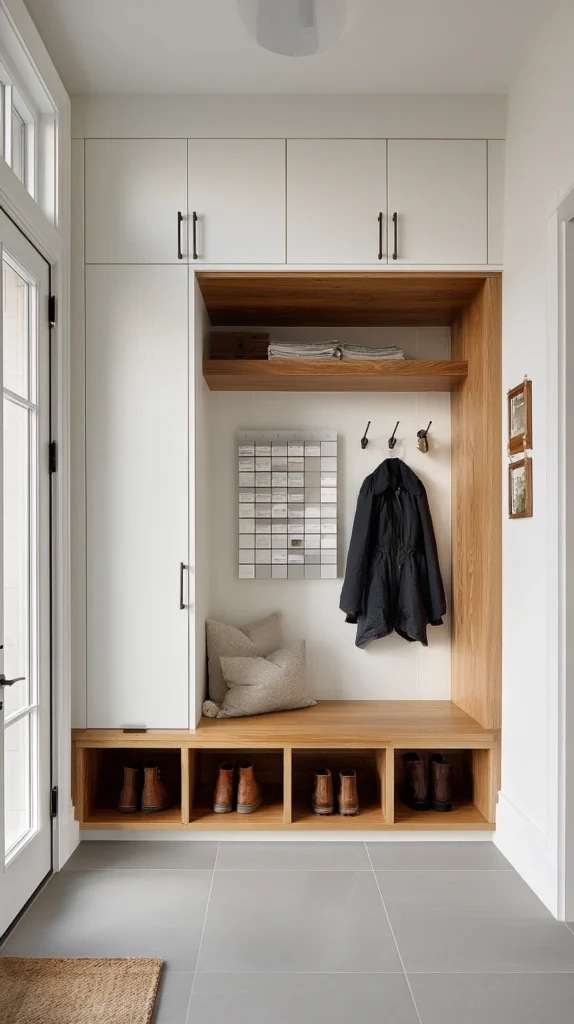
Including a small bulletin board, whiteboard, or mail sorting station within the mudroom, giving the household a genuine spot for shared communication right at the point of daily entry and exit.
Why a communication center belongs specifically at this transition point
The mudroom is the point every household member passes through daily, making it a genuinely effective spot for shared reminders, mail sorting, and family communication, rather than relying on messages left elsewhere in the house that might not be seen consistently.
The bulletin or whiteboard
A small board mounted near the entry point, used for shared reminders, a family calendar snapshot, or important notes household members need to see on their way in or out.
The mail sorting station
A small wall-mounted mail sorter or a designated basket, giving incoming mail a specific spot rather than allowing it to accumulate on the shoe bench or nearest available surface.
The placement
Positioned at eye level near the door, ensuring it is genuinely seen during the entry and exit sequence rather than tucked into an overlooked corner.
The simplicity principle
Kept genuinely simple and low-maintenance, since an overly elaborate command center often becomes another source of clutter rather than the organizing tool it is meant to be.
The overall value
A small addition directly leveraging the mudroom’s role as the household’s most consistently used daily transition point, turning that consistent traffic into a genuine communication and mail-sorting advantage.
Cost breakdown: Small bulletin board or mail sorter: $20–50 Total: $20–50
Step 10: Test the Layout Before Finalizing Any Built-In Elements
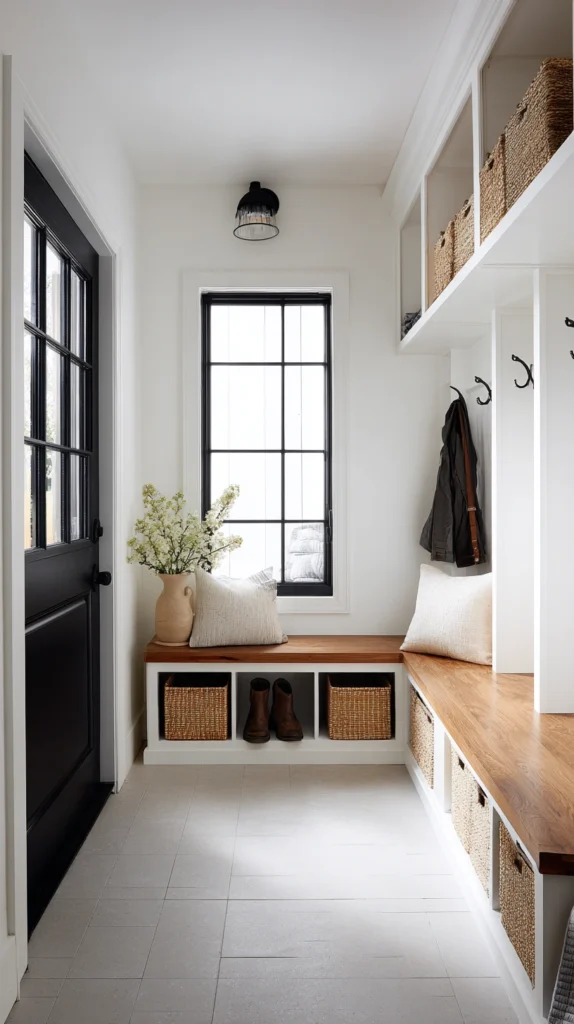
Living with a temporary, easily adjustable version of the planned layout for several weeks before committing to any permanent built-in cabinetry or fixed installation.
Why testing before permanent construction prevents the most costly mudroom planning mistakes
A layout that seems logical on paper can reveal genuine friction points only once actually used daily, and adjusting a temporary setup costs nothing compared with the expense of modifying built-in cabinetry after the fact.
The temporary version
Freestanding hooks, a simple bench, and movable bins, arranged according to the planned layout but without any permanent installation, used by the actual household for several genuine weeks.
The friction observation
Specific attention paid to where the household naturally deviates from the planned layout — dropping bags in an unplanned spot, avoiding a hook that turns out to be awkwardly placed — treating these deviations as genuine data rather than a failure to follow the plan.
The adjustment period
The temporary layout adjusted based on these real observations, potentially multiple times, before finalizing the permanent version based on what has actually proven to work in practice.
The permanent installation
Built-in cabinetry, a permanent bench, and any other fixed elements installed only once the temporary version has been genuinely tested and refined, rather than committing to a permanent layout based purely on the initial paper plan.
The overall value
A final, permanent mudroom layout validated by genuine daily use rather than assumption, preventing the costly mistake of finalizing built-in elements before confirming they actually suit the household’s real behavior.
Cost breakdown: Temporary hooks, bench, and bins for testing: $60–150 Total: $60–150
The Complete Mudroom Planning Process (Bringing Every Step Together)
A complete mudroom combining every step above — a genuine household assessment, a mapped entry sequence, individually assigned zones, seasonal storage, durable flooring, adequate lighting, and a tested layout before any permanent installation — treating the space as a planned system rather than a collection of furniture purchased in response to ongoing frustration.
What separates the complete process from simply buying a bench and some hooks
A bench and a row of hooks installed without any specific household assessment: a common, generic starting point that often falls short within weeks. A complete mudroom planning process: every decision, from the initial headcount through the final tested and finalized layout, working together toward a system genuinely suited to this specific household’s real daily behavior.
The elements of the complete mudroom plan
The foundation
A genuine household and gear assessment, and a mapped understanding of the actual daily entry and exit sequence.
The core zones
A properly sized seating and shoe zone, individually assigned hooks and storage per household member, and a dedicated spot for frequently grabbed small items.
The capacity planning
Seasonal and overflow storage, ensuring the space remains uncluttered across every season rather than only during its lightest-use months.
The finishing infrastructure
Durable, appropriate flooring and genuinely adequate task lighting, supporting the room’s actual daily function.
The validation
A tested, temporary version of the layout, refined through real use before any permanent installation is finalized.
The complete process in action
A household’s mudroom, properly planned:
The assessment stage: Four family members counted, their specific gear cataloged, the actual morning departure sequence observed and mapped.
The zone planning: Each child assigned their own labeled hook at their own height, a shared bench sized for simultaneous shoe removal, a small tray for keys and sunglasses positioned right at the door.
The testing phase: A temporary setup lived with for a month, one hook repositioned after noticing it was consistently avoided, the shoe storage expanded after realizing the initial capacity underestimated the household’s actual footwear collection.
The final installation: Built-in cabinetry installed based on the refined, tested layout, flooring and lighting completing a space that finally functions the way the household actually behaves.
The complete mudroom planning process: not a bench and some hooks installed in response to ongoing frustration, but a genuinely planned system, built around this specific household’s real size, gear, and daily habits.
Cost breakdown for the complete mudroom plan: Assuming a starting point of an unplanned, disorganized entry space: Seating and shoe zone: $200–600 Individual hooks and storage: $100–300 Small item zone: $30–80 Seasonal overflow storage: $150–500 Flooring: $300–800 Lighting: $80–200 Communication center: $20–50 Total: $880–2,530
Phased over a planning and installation timeline:
Phase one: The assessment, sequence mapping, and a temporary tested layout, costing little beyond simple freestanding furniture
Phase two: Flooring and lighting upgrades, addressing the room’s core infrastructure
Phase three: Permanent built-in cabinetry and finishing details, installed only once the layout has been genuinely validated through real use
The complete mudroom planning process: not a single weekend furniture purchase, but a genuinely considered system, built specifically around how this particular household actually enters and exits their home every single day.
The Question Before Any Mudroom Layout Decision
Before buying a single hook or bench:
What specific daily behavior is currently causing the most mudroom frustration?
If the answer is: shoes and bags scattered everywhere with no clear spot — start with the individually assigned hook and cubby zones, addressing the ambiguity directly.
If the answer is: the space feels overwhelmed specifically during winter — the seasonal and overflow storage zone, ensuring bulky gear has its own dedicated capacity.
If the answer is: keys, mail, and small items constantly going missing — the dedicated frequently-grabbed-items zone and the small communication center.
If the answer is: uncertainty about what layout will actually work for this household — the testing step, living with a temporary setup before any permanent installation.
The design follows the household’s actual current point of frustration, more than any single generic mudroom template. Every step in this process addresses a different piece of what makes an entry space either chaotic or genuinely functional. The question is which specific frustration matters most to resolve first for this particular household.
The single household assessment and one week of observing the actual entry sequence: still meaningfully improves how any subsequent mudroom purchase gets planned. The complete process, followed from assessment through tested, finalized installation: a mudroom that functions exactly as this specific household actually behaves, rather than as a generic household might.
That genuine fit to real behavior: the whole point of planning a mudroom rather than simply furnishing one.
Getting Started This Weekend
The immediate mudroom planning solution:
Count the household and list every category of gear that currently ends up cluttering the entry space.
The foundational information every subsequent layout decision depends on.
Watch, or simply recall, the actual sequence of removing shoes, coats, and bags every time someone enters.
This observation shapes the physical layout more directly than any furniture style choice.
Assign each household member their own specific hook or spot, even with existing furniture, before buying anything new.
A free, immediate test of whether individual assignment reduces the current clutter.
Set up a temporary version of any bigger planned change before committing to permanent installation.
The rest of the design: the elaboration of this moment.
The assessment: the beginning. The mudroom: what gets planned, tested, and finally built, deliberately, around it.