15 Fall Camper Organization Ideas for Small Spaces
15 Fall Camper Organization Ideas for Small Spaces
Most campers get organized once, in spring, and then left alone for the rest of the season. A few bins under the bed, a junk drawer for cords, gear stacked wherever it last fit. It works well enough through summer, when there isn’t much gear to begin with and the doors stay open most of the day anyway.
That system falls apart the moment fall arrives. The same fixed cubic footage that easily held swimsuits and sandals now has to hold fleece layers, rain shells, extra blankets, and boots — without adding a single inch of actual space to work with.

A camper’s storage problem in fall is not the same problem it was in summer, just with more stuff. It’s a different kind of organizing entirely — one built around density, accessibility in low light, and keeping dampness from taking over a sealed-up space. Solve for those three things, and even the smallest camper can hold an entire season’s worth of gear without anyone tripping over it.
Here are 15 ideas for organizing a small camper for fall, without losing a single square inch to chaos.
Why Fall Camper Organization Plays by Different Rules Than Summer
The rules are not the same for every season of camping:
Summer Camper Advantages:
- Minimal gear — swimsuits, sandals, a few t-shirts, little else
- Doors and windows open for most of the day, so airflow does a lot of the organizing work on its own
- Long daylight hours mean less reliance on fast, find-it-in-the-dark storage systems
The summer camper comparison: less gear, less to organize
Fall Camper Advantages and Realities:
- More gear per person — layers, rain shells, blankets — competing for the same fixed cubic footage
- Doors and windows closed more often, which turns condensation and dampness into real storage concerns
- Shorter daylight means everything has to be findable fast, often in low light
The key insight:
- Summer camper organization rewards simplicity
- Fall camper organization rewards density and accessibility — fitting more into the same space without losing track of any of it
- These are different organizing problems, not the same camper simply packed a little fuller
The Space Reality
The most important number in fall camper organization:
The square footage that doesn’t change:
- A camper’s footprint stays fixed regardless of season — fall gear has to fit into the same space that held half as much in summer
- Know this — it governs every storage decision before anything else gets planned
The “vertical before horizontal” calculation:
- Floor space in a camper is almost always the most contested resource
- Wall space, ceiling space, and the backs of doors are usually underused
- Look up and around before adding a single new floor-based storage bin
Most camper organization happens in passes, not all at once:
- The purge pass — removing summer-only gear before adding fall gear on top of it
- The zone pass — assigning specific gear to specific places rather than letting it land wherever there’s room
- The access pass — making sure the most-used items are reachable without unpacking everything else first
1. The Vertical Wall Organizer (The Space Most Campers Waste)
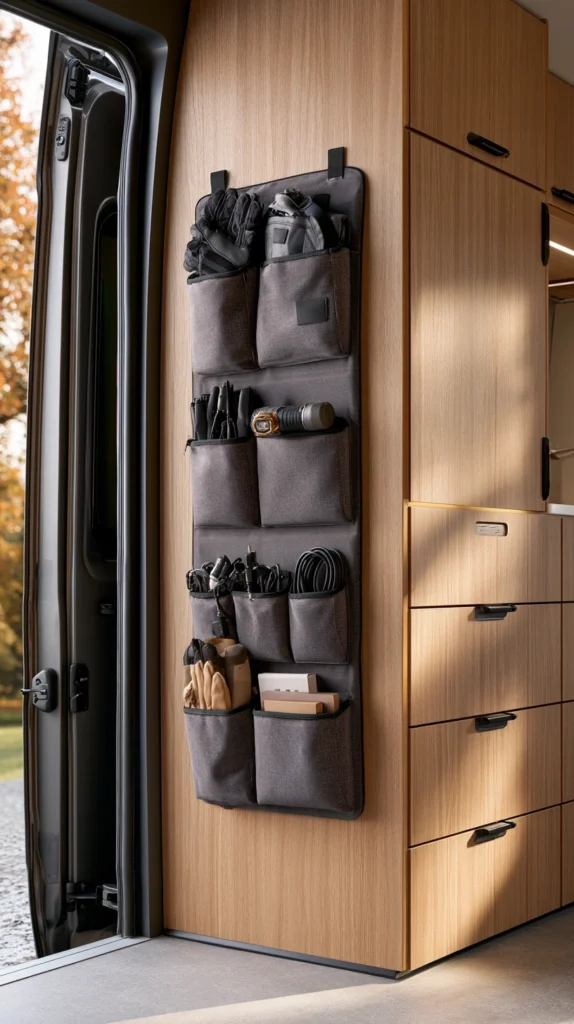
A hanging pocket organizer or wall-mounted system installed on an interior wall or the back of a door — the single change most likely to free up real storage in a camper without removing a single piece of existing furniture.
Why claiming wall space matters more than any new bin
- The unused-space logic: most campers have several square feet of bare wall or door space holding nothing at all
- The fall-specific case: the extra layers, gloves, and rain gear fall brings need somewhere to go, and vertical space is the only square footage that hasn’t already been claimed by summer’s setup
- The visibility benefit: items in a wall pocket are visible at a glance, unlike items buried in a drawer or bin
The options
- Over-the-door pocket organizer — the simplest install, no tools required on most camper doors
- Wall-mounted canvas or felt pocket panel — a slightly more structured, semi-permanent option
- A pegboard panel — the most flexible, since hooks and small shelves can be rearranged as gear changes through the season
- Command-style hook strips combined with small baskets — a lower-commitment version of the same idea
The practical execution
- Measure the door or wall space before buying — many “standard” organizers are sized for a full-size home door, not a camper’s narrower one
- Assign each pocket or hook to a specific category — gloves, headlamps, chargers — rather than letting it become a catch-all
- Mount on the inside of a closet or pantry door rather than a frequently-used main door, to avoid the organizer swinging and snagging
Cost breakdown
- Over-the-door pocket organizer: $15–30
- Wall-mounted pegboard panel and hooks: $25–50
- Total: $15–50
2. The Under-Bed Storage System (The Camper’s Biggest Hidden Zone)
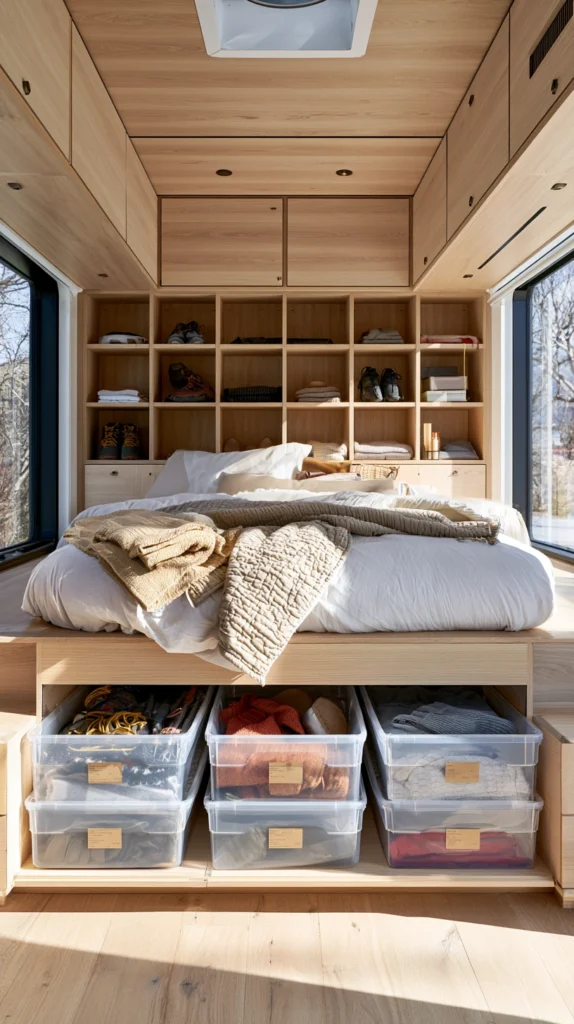
Bins, drawers, or a slide-out system built into the space beneath the bed — the largest single storage zone in most small campers, and the one most often left as one disorganized pile.
Why this zone deserves more planning than it usually gets
- The square-footage math: under-bed space is frequently the largest contiguous storage area in the entire camper, larger than any single cabinet
- The fall capacity problem: bulkier seasonal gear — sleeping bags, extra blankets, winter boots — needs exactly this kind of large, flat storage
- The access trade-off: under-bed storage is harder to reach than a cabinet, which means organization matters more here than almost anywhere else in the camper
The options
- Stackable clear bins — visibility through the bin reduces the need to pull everything out to find one item
- A slide-out drawer system — built or retrofitted, the easiest to access without lifting the mattress
- Vacuum-sealed bags for soft goods — compress bulky blankets and clothing into a fraction of their original size
- Rolling bins with wheels, for beds with enough clearance, making retrieval easier than lifting and sliding
The practical execution
- Measure the actual clearance under the bed before buying bins — many campers have less vertical clearance than a standard home bed
- Store the least-used seasonal items farthest back, and the items needed most often nearest the access point
- Label every bin on the end facing outward, since most under-bed storage can’t be read from above
Cost breakdown
- Clear stackable bins, a set of 4–6: $30–60
- Vacuum-sealed storage bags, a set: $15–30
- Slide-out drawer retrofit kit: $50–150
- Total: $30–200, depending on whether retrofitting is involved
3. The Compression Cube Wardrobe (Fitting Bulkier Layers Into the Same Drawer)
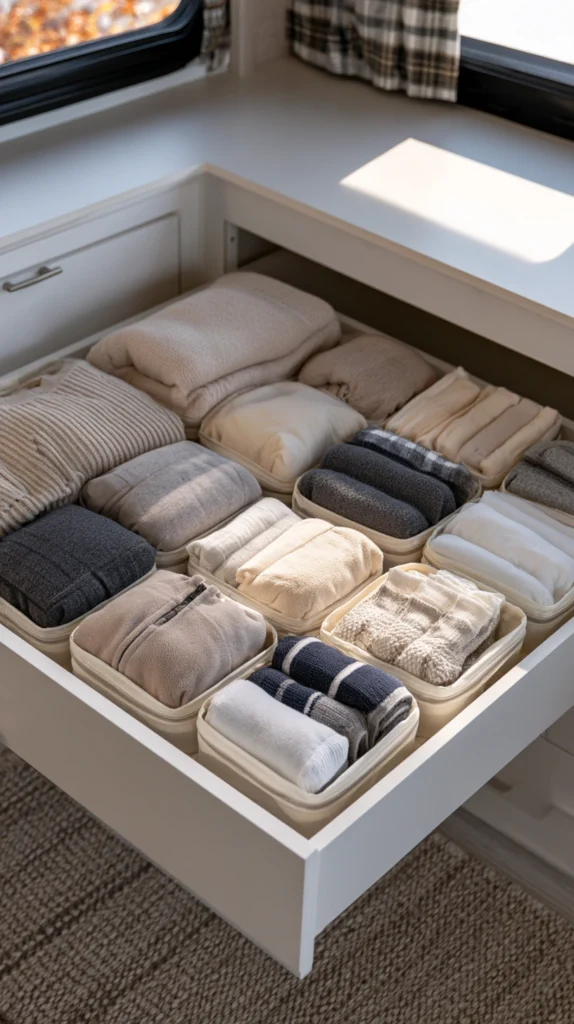
Packing cubes or compression bags used to organize clothing inside existing drawers and cabinets — the system that lets a camper’s fixed drawer space hold fall’s bulkier wardrobe without anything spilling over.
Why compression solves a problem expansion can’t
- The volume problem fall creates: a fleece, a rain shell, and a pair of wool socks take up far more room than the t-shirts and swimsuits they’re replacing
- The drawer space that doesn’t grow: camper drawers stay a fixed size regardless of the season, which makes compression the only realistic way to fit more into the same footprint
- The find-it-fast benefit: cubes organized by category mean a specific layer can be found without unpacking the whole drawer
The options
- Soft packing cubes — zippered fabric cubes, sized to fit standard camper drawer depths
- Compression bags with a roll-valve or vacuum seal — for items that need maximum space savings, like sleeping bags or extra blankets
- Mesh cubes — see-through panels for quickly identifying contents without opening every cube
- A cube-per-person system — one set of cubes assigned to each traveler, simplifying both packing and unpacking
The practical execution
- Roll rather than fold clothing going into cubes — rolled items compress more efficiently and wrinkle less
- Assign cube sizes by category: a small cube for socks and underwear, a larger one for sweaters or fleece layers
- Keep one cube near the top or front of the drawer for daily-use items, rather than burying them under bulkier seasonal pieces
Cost breakdown
- Packing cube set (4–6 cubes): $20–40
- Compression bags, a set: $15–25
- Total: $20–65
4. The Boot and Wet Gear Mudroom Zone (Keeping Mud and Rain Out of the Living Space)
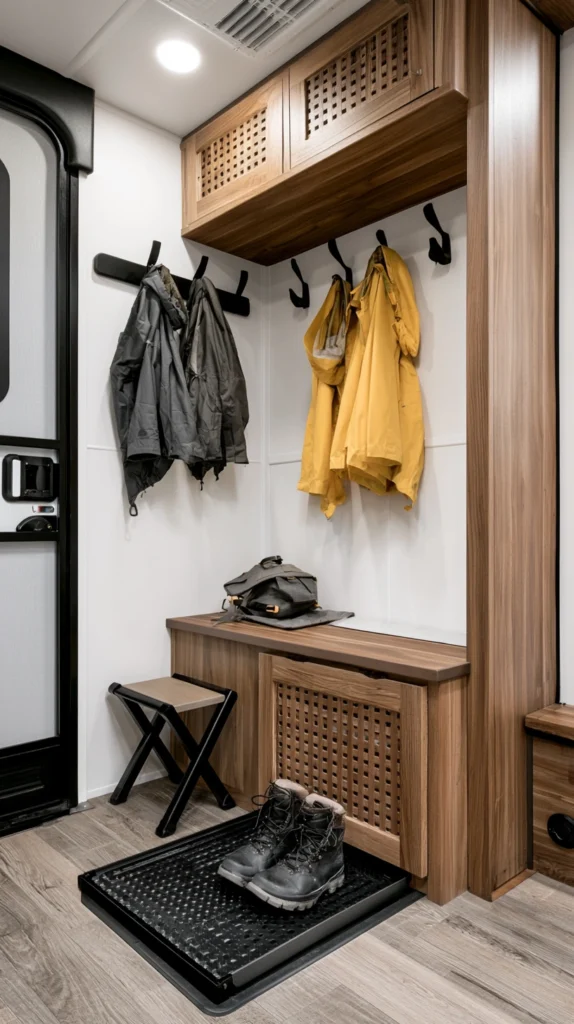
A small dedicated zone just inside the entry door for boots, wet jackets, and muddy gear — the setup that keeps fall’s rain and mud from spreading through a camper that doesn’t have room to absorb it.
Why a single-door space needs its own mudroom logic
- The single-entry problem: unlike a house with a mudroom or garage, a camper usually has one door, which means every muddy boot and wet jacket passes directly through the main living space
- The moisture-control case: fall and the dampness that comes with it make this more urgent than it would be in a dry summer
- The small-footprint solution: this zone doesn’t need to be large to work — it needs to be positioned correctly, right at the point of entry, before anyone takes a step further in
The options
- A boot tray — a low-profile catch for wet or muddy footwear just inside the door
- A small hook rail — for wet jackets, hung where they can drip without touching anything else
- A folding stool or step — makes removing boots easier in a tight entry space
- A waterproof mat layered over the boot tray — adds a buffer between wet boots and the camper’s actual flooring
The practical execution
- Position the entire zone within arm’s reach of the door — anything that requires walking further in defeats the purpose
- Use materials that wipe clean or can be hosed off outside, rather than fabric that holds moisture
- Empty the boot tray regularly rather than letting standing water accumulate in a small space
Cost breakdown
- Boot tray: $15–30
- Hook rail: $10–20
- Folding step stool: $15–25
- Total: $40–75
5. The Tension Rod Cabinet Dividers (Turning One Shelf Into Three)
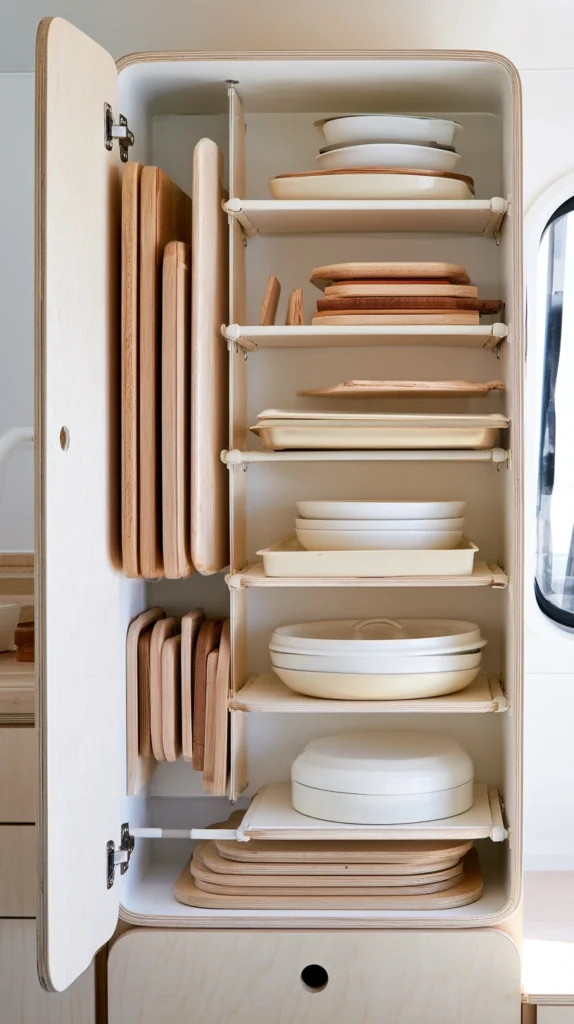
Spring-tension rods installed inside cabinets to create vertical dividers — the nearly free trick that stops pots, lids, and cutting boards from collapsing into a single sliding pile.
Why a few dollars of hardware solves a recurring problem
- The sliding-pile problem: a single open cabinet shelf in a moving vehicle turns into chaos within a few miles of driving
- The no-installation advantage: tension rods require no drilling, no permanent modification, and no tools, making them one of the lowest-commitment organizing solutions available
- The flexible reconfiguration: dividers can be repositioned in minutes as the contents of a cabinet change through the season
The options
- Standard spring tension rods, sized to the cabinet’s depth, creating vertical slots for flat items like pans and cutting boards
- Tension rods used horizontally, creating a barrier that keeps stacked items from sliding forward when the camper is in motion
- Adjustable cabinet shelf risers, a related tool for adding a horizontal tier rather than a vertical divider
- Non-slip liner combined with tension rods, doubling the anti-shift effect
The practical execution
- Install rods snugly enough that they don’t shift in transit, but not so tight that the cabinet walls bow under pressure
- Test the setup with the camper in motion before relying on it for a full trip — what holds still parked doesn’t always hold on the road
- Group items by shape rather than by category, since the rods are organizing by physical fit as much as by use
Cost breakdown
- Tension rod, each: $5–12
- A set of 3–4 for a full cabinet: $20–40
- Total: $20–40
6. The Magnetic Strip Storage (Small Metal Items Off the Counter for Good)
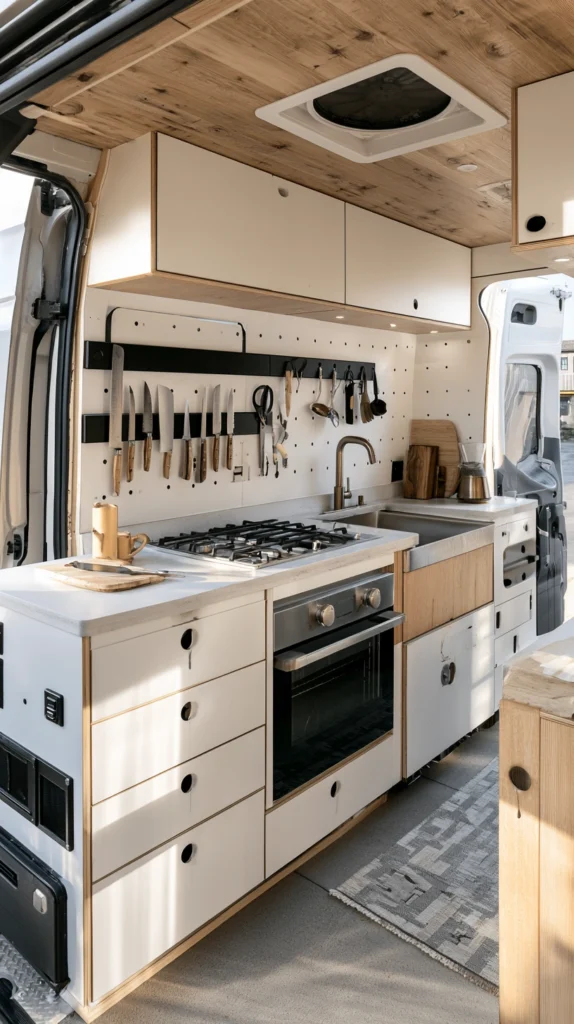
A magnetic strip mounted inside a cabinet or on a wall, holding knives, scissors, and other small metal tools — the storage solution that uses a wall surface most campers never think to claim.
Why a magnetic strip earns its place over a drawer
- The drawer-clutter problem it solves: small metal tools are some of the worst offenders for sliding around loose in a drawer, especially in motion
- The vertical-space logic: like the wall organizer in Idea #1, this claims space that would otherwise sit empty
- The visibility and safety benefit: knives stored visibly on a strip are easier to grab safely than ones buried point-first in a drawer
The options
- A magnetic knife strip, mounted inside a cabinet door or on an interior wall
- A magnetic spice tin system, repurposing the same strip for small spice containers rather than tools
- A magnetic bar with small hanging hooks, for lightweight metal utensils
- Adhesive-backed magnetic strips, for a no-drill installation on metal-backed cabinet surfaces
The practical execution
- Mount inside a cabinet door rather than an open wall if children or pets are part of the trip, keeping blades out of casual reach
- Confirm the mounting surface can actually hold a magnet securely — not every camper interior panel is magnetic
- Space items with enough clearance that the cabinet door still closes fully
Cost breakdown
- Magnetic knife strip: $10–25
- Magnetic spice tins, a set: $15–30
- Total: $10–55
7. The Hanging Pocket Pantry (Pantry Storage Without a Single New Shelf)
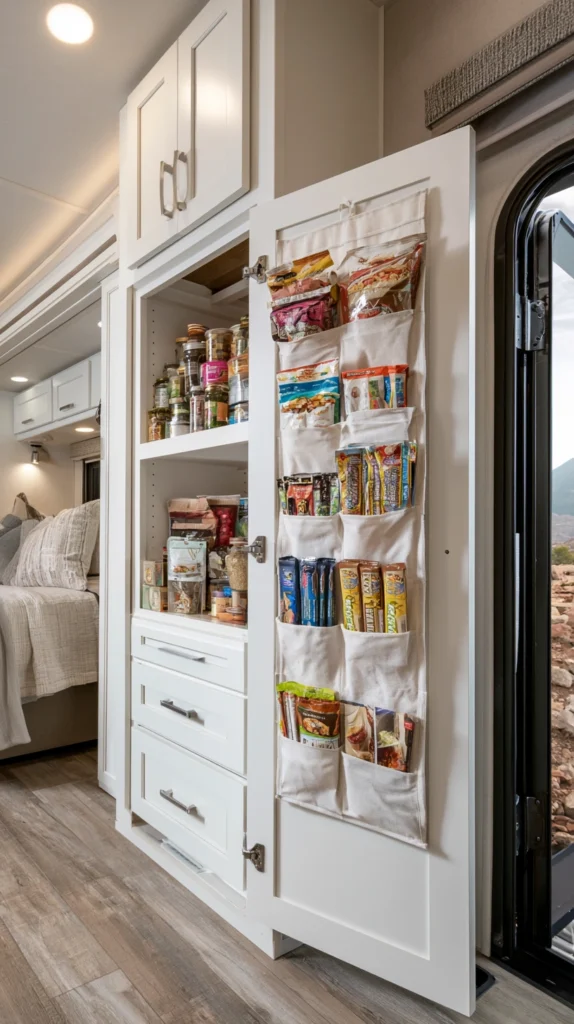
A fabric pocket organizer hung inside a pantry cabinet or closet door, holding snacks, spice packets, and small dry goods — the pantry solution for campers too small to fit a single additional shelf.
Why pocket storage outperforms a shelf in this case
- The shelf-space scarcity: most camper pantries run out of usable shelf depth long before they run out of items to store
- The repurposed-product logic: this is frequently the same over-the-door organizer from Idea #1, simply assigned to food storage instead of clothing or gear
- The portion-control benefit: individual pockets naturally separate snacks and small packets, which keeps an already tight pantry from becoming one tangled bag pile
The options
- A clear-pocket over-the-door organizer, repurposed specifically for the pantry door
- A hanging fabric shoe organizer, an inexpensive and widely available option for the same purpose
- Small fabric bins that hang from a tension rod, for bulkier pantry items that don’t fit a flat pocket
- A mix of clear and labeled opaque pockets, separating snacks that need to stay visible from staples that don’t
The practical execution
- Reserve the lowest, most accessible pockets for the items reached for most often, like snacks for the road
- Avoid overloading pockets meant for lightweight items with anything heavy enough to tear the fabric or pull the organizer off its hooks
- Check pocket contents periodically for anything expired or melted in heat, since pantry doors get warmer than open shelving in direct sun
Cost breakdown
- Over-the-door pocket organizer: $10–20
- Hanging fabric bins: $10–25
- Total: $10–45
8. The Collapsible Bin System (Storage That Disappears When It’s Empty)
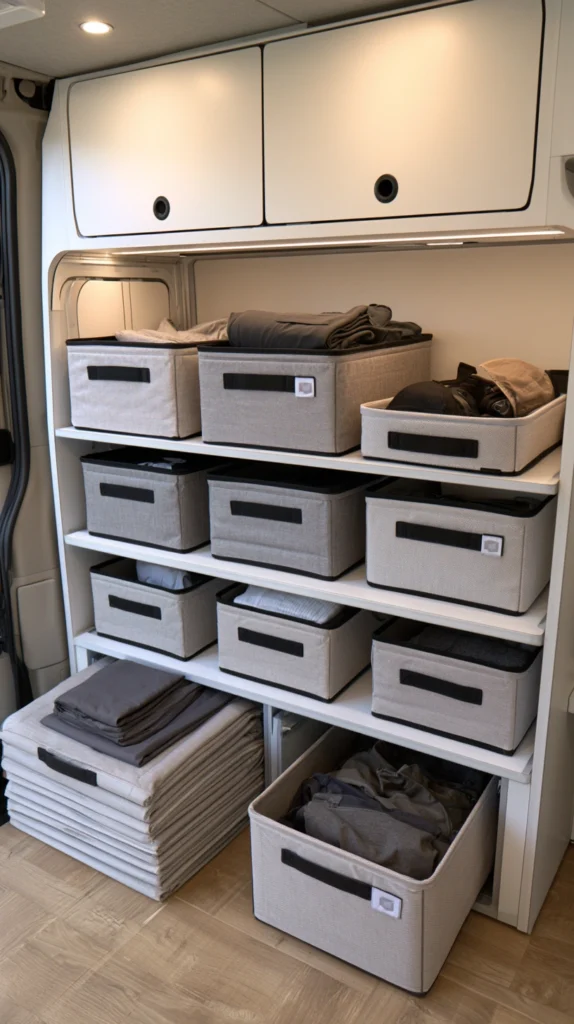
Collapsible fabric or silicone bins used for overflow storage — the system that provides extra capacity exactly when it’s needed and folds down to almost nothing the rest of the time.
Why a bin that disappears solves a problem a rigid one can’t
- The fixed-space paradox: a camper’s storage needs change by the week — more laundry building up, more firewood, more groceries after a stop — but the available space never grows to match
- The empty-bin problem rigid containers create: a hard plastic bin takes up the same room whether it’s full or empty, wasting space exactly when storage is tightest
- The multi-use flexibility: the same collapsible bin can hold laundry one day and firewood the next, unlike a bin built for one specific purpose
The options
- Collapsible fabric bins with reinforced sides, sturdy enough to hold their shape when filled
- Silicone collapsible containers, often used for food storage but equally useful for small gear
- Foldable laundry hampers, specifically sized and shaped for the awkward task of laundry storage in a tight space
- Stackable collapsible crates, rigid enough to stack when in use, flat enough to store when not
The practical execution
- Store collapsed bins in a single flat stack in a drawer or under a seat, rather than scattered loose around the camper
- Choose a consistent size or a matched nesting set, so collapsed bins stack cleanly rather than at odd angles
- Reserve one or two bins permanently for a single recurring task — laundry, firewood — rather than reassigning every bin’s purpose daily
Cost breakdown
- Collapsible fabric bin, each: $10–20
- A nesting set of 3: $25–45
- Total: $25–45
9. The Ceiling Net Storage (The Overhead Space Nobody Uses)
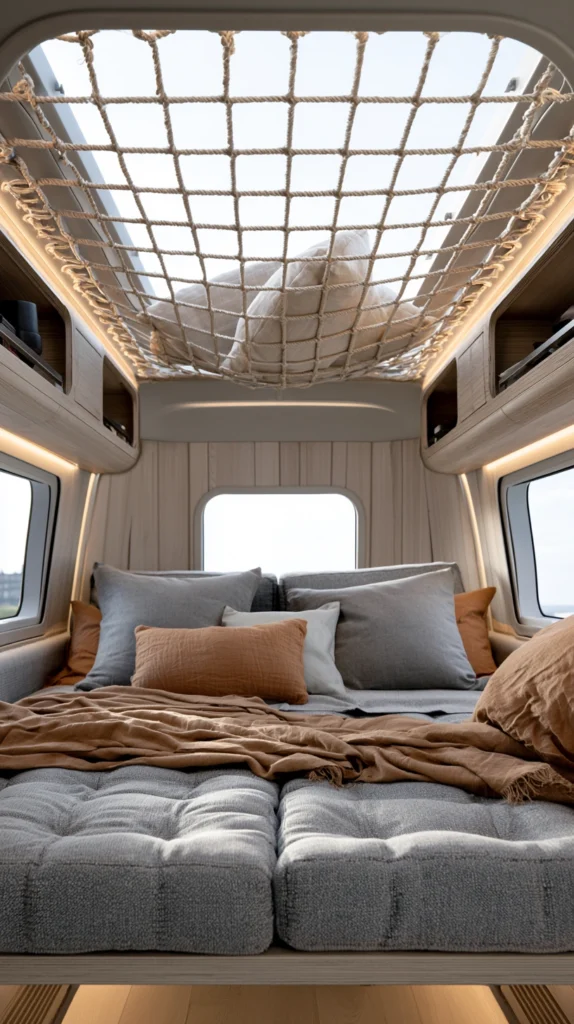
A cargo net or hammock-style storage system installed across the ceiling, holding lightweight bulky items like pillows, hats, or stuffed gear — the storage zone directly overhead that almost no camper uses by default.
Why looking up solves what looking around can’t
- The truly unused space: ceiling space in a camper is almost never claimed for storage, despite often being just as available as a wall or cabinet
- The lightweight-bulky match: pillows, hats, and inflatable items are exactly the kind of low-weight, high-volume gear that benefits most from overhead storage rather than competing for drawer or bin space
- The visual lightness: unlike a floor bin, overhead net storage doesn’t reduce the felt sense of space in the room below it
The options
- A cargo net, stretched across a section of ceiling using hooks or an existing structural rail
- A hammock-style sling, hanging lower than a flat net, for items that need slightly deeper storage
- A small net specifically over a bed nook, holding pillows or blankets out of the way during the day
- A net positioned over a dinette or seating area, for items used only when that area converts to a bed at night
The practical execution
- Confirm the mounting points can bear the actual weight intended, not just the apparent lightness of pillows and soft goods
- Keep heavier items out of overhead storage entirely — this zone is for genuinely lightweight gear only
- Position the net where it won’t interfere with anyone standing up or moving through the space below it
Cost breakdown
- Cargo net or ceiling hammock: $15–35
- Mounting hooks or hardware: $5–15
- Total: $20–50
10. The Labeled Food Bin System (A Pantry That Works in the Dark)
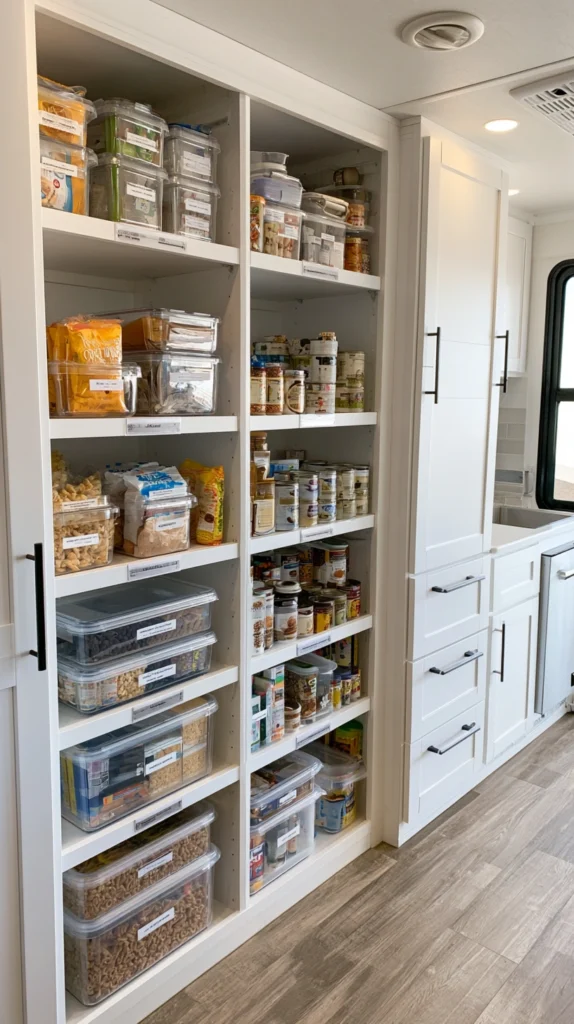
Clear, labeled bins assigned to specific food categories inside the pantry or under a seat — the system that means finding dinner ingredients doesn’t require pulling out every box on the shelf, even with the early fall sunset cutting daylight short.
Why labeling matters more once daylight runs out early
- The shorter-daylight case: fall’s earlier sunset means more meals get prepped in dim interior light, where a labeled, clear bin is far faster to search than a shadowed shelf of loose boxes
- The category logic: grouping by type — baking, snacks, canned goods — rather than letting everything mix means restocking after a grocery stop takes minutes instead of a full reorganization
- The shared-use benefit: a labeled system means anyone in the group can find what they need without asking, which matters more the more people are sharing the same small kitchen
The options
- Clear plastic bins with snap lids, one per food category
- Bins with chalkboard or write-on labels, allowing categories to be adjusted as the season’s stocked items change
- Stackable bins specifically sized to pantry shelf height, maximizing the vertical space available
- A mix of bin sizes, larger ones for bulkier staples, smaller ones for spices or snack packets
The practical execution
- Label both the lid and the front-facing side, since bins get viewed from different angles depending on where they’re stored
- Keep the most-used categories — snacks, breakfast items — at eye level or in the most accessible bin
- Re-sort contents after every grocery restock rather than letting new purchases pile up unsorted on top
Cost breakdown
- Clear bins with lids, a set of 6–8: $25–50
- Labels or a label maker: $10–25
- Total: $25–75
11. The Storage Bench or Ottoman (Seating That Doubles as a Closet)
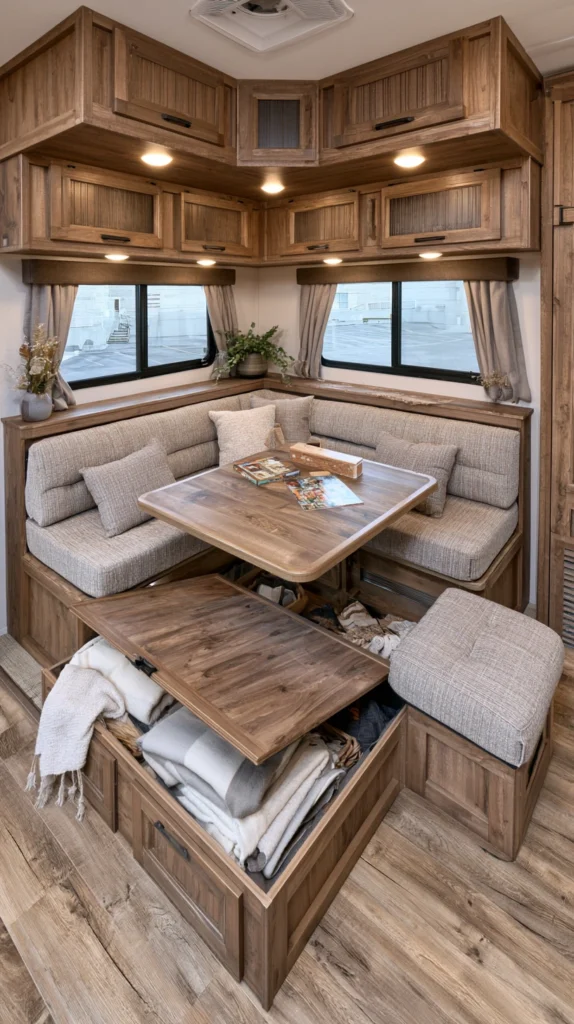
A bench seat or ottoman with a lift-top or removable cushion, holding gear underneath while still functioning as a place to sit — the furniture upgrade that gives a small camper genuine extra storage without adding floor footprint.
Why furniture earning two jobs matters this much
- The dual-purpose math: in a space this size, furniture that only does one job is a luxury most campers can’t afford; a bench that’s also a closet earns its footprint twice over
- The bulky-gear solution: this is often the only spot large enough for sleeping bags, extra pillows, or board games that don’t fit neatly into a drawer or bin
- The visual cleanup it provides: gear stored inside a bench disappears from view entirely, unlike a bin or basket sitting visibly in a corner
The options
- A built-in bench with a lift-top seat, common in dinette areas and easily retrofitted with hinges if it doesn’t already have them
- A standalone storage ottoman, brought in as freestanding furniture rather than built into the camper
- A bench with a removable cushion and open bin underneath, simpler than a hinged lid but slightly less tidy
- A bench with drawers built into the base, for smaller items that don’t need the full depth of a lift-top
The practical execution
- Reserve this storage for items used only occasionally, since lift-top access is slower than a drawer or open shelf
- Add a liner or smaller bins inside the bench cavity to keep contents from becoming one large jumble
- Check that the hinge or lid mechanism is secure enough to handle being opened and closed regularly without weakening over a season of use
Cost breakdown
- Hinge kit for converting a fixed bench to a lift-top: $15–35
- Standalone storage ottoman: $40–100
- Total: $15–100
12. The Compact Drying Rack (Wet Gear Without a Damp Camper)
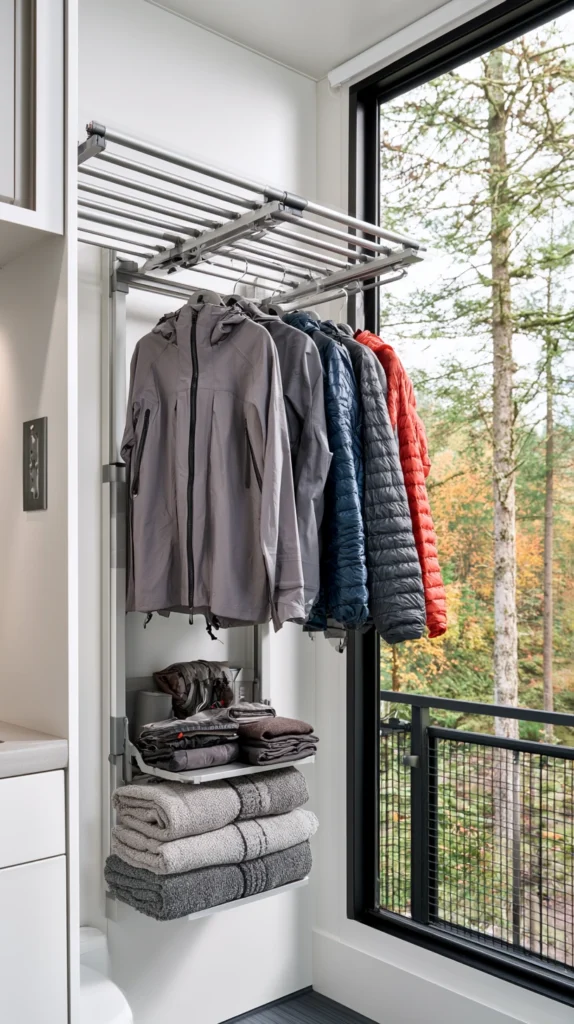
A small, foldable drying rack used for wet jackets, towels, and gear after a day in fall rain — the tool that keeps dampness from settling into fabric, cushions, and the air of a small enclosed space.
Why a drying rack matters more in fall than any other season
- The condensation problem fall creates: a camper closed up against cold, wet weather traps moisture far more than one with the windows open in summer, and a pile of wet gear makes it worse
- The mildew-prevention case: damp fabric stored without airflow in a small space is a near-guarantee for mildew within days, not weeks
- The space-efficient design most drying racks offer: unlike a clothesline, a compact folding rack is built specifically for the airflow-without-footprint problem a camper presents
The options
- A small tabletop folding rack, sized for a counter or the inside of a shower stall
- A collapsible hanging rack, suspended from a hook rather than taking up floor space at all
- A suction-mounted rack for the shower or bathroom, using a space that often goes unused during the day
- An outdoor awning-mounted rack, for drying gear outside whenever weather actually permits it
The practical execution
- Position the rack somewhere with airflow — near a vent or a cracked window — rather than a closed-off corner, where moisture has nowhere to go
- Use the rack daily during wet stretches rather than letting gear accumulate, since one bad week is enough to start a mildew problem
- Wipe down the rack itself periodically, since it’s handling the most consistently damp gear in the camper
Cost breakdown
- Tabletop or collapsible drying rack: $10–25
- Suction-mounted shower rack: $10–20
- Total: $10–25
13. The Command Hook and Rail Wall (Hanging Storage Without a Single Drilled Hole)
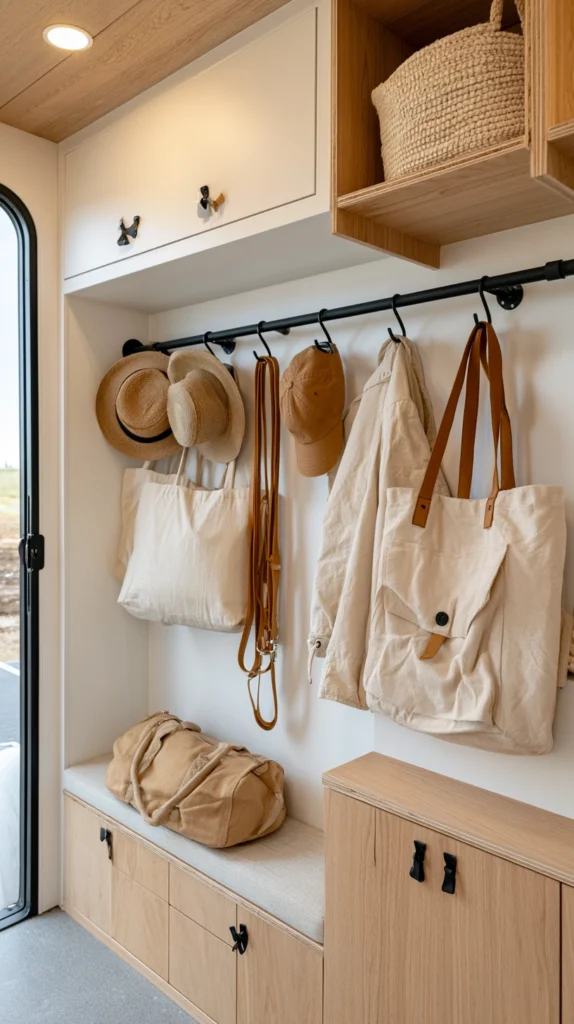
A cluster of adhesive hooks or a mounted rail used for hanging hats, towels, leashes, and bags — the storage system built specifically for renters and owners alike who don’t want to put new holes in a camper’s interior walls.
Why a no-damage system solves a problem unique to campers
- The no-damage requirement: many camper interiors use thin paneling that doesn’t hold screws well, or owners simply don’t want to drill into a surface that’s hard to repair
- The catch-all category problem it solves: hats, leashes, reusable bags, and small accessories rarely fit neatly into a drawer or bin, and tend to end up in a single disorganized pile without a dedicated hanging spot
- The flexible relocation: adhesive hooks can be moved or added to as the season’s gear changes, unlike a permanently mounted rail
The options
- Heavy-duty adhesive hooks, rated for several pounds each, removable without damaging most surfaces
- A mounted wood or metal rail with multiple hooks, for a more finished look if light drilling is acceptable
- Carabiner-style clips on a cord or rail, for quickly swapping items in and out
- A mix of hook sizes, small ones for keys or leashes, larger ones for jackets or bags
The practical execution
- Clean and dry the wall surface thoroughly before applying adhesive hooks, since dust or moisture significantly weakens the bond
- Test weight capacity with a lighter load before committing a hook to something heavy or frequently used
- Position the rail or hook cluster near the entry door for anything used on the way in or out, rather than burying it deeper in the camper
Cost breakdown
- Adhesive hooks, a set of 6–8: $10–20
- Mounted hook rail: $15–35
- Total: $10–35
14. The Exterior Seasonal Rotation Bin (Storing What This Week Doesn’t Need)
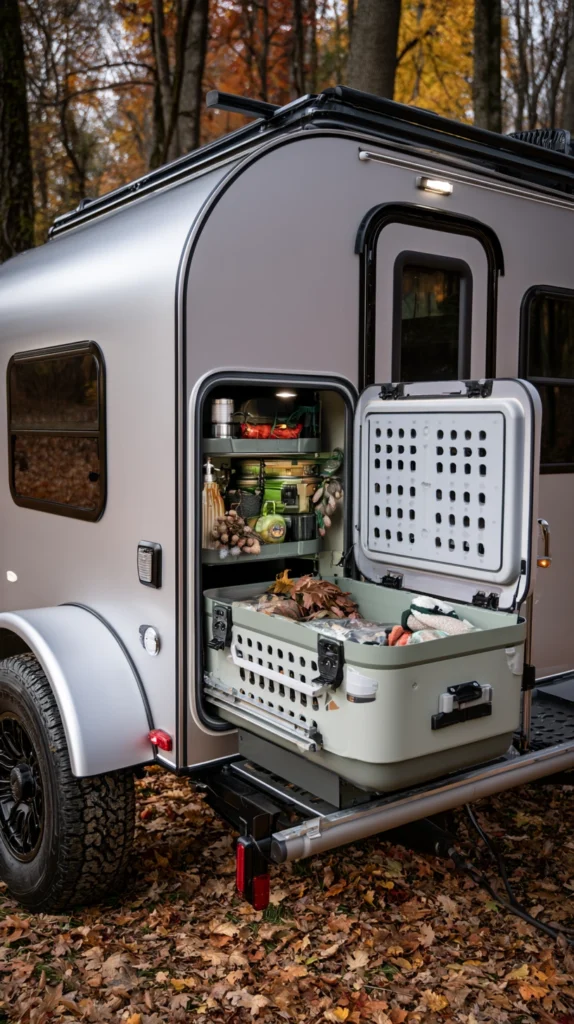
A weatherproof bin or storage box mounted outside the camper — in a bed, on a rack, or in a designated exterior compartment — holding seasonal gear not currently in active use, freeing up interior space for what actually is.
Why some gear belongs outside the living space entirely
- The rotation principle: not every piece of fall gear is needed every single day, and the items waiting for next week’s colder stretch don’t need to compete for space with what’s needed right now
- The interior-space multiplier: moving inactive gear outside effectively expands the camper’s usable interior storage without adding a single inch to the structure itself
- The seasonal transition case: this is also the easiest place to stage gear being swapped out as the season changes, rather than letting summer and fall gear pile up together inside
The options
- A weatherproof exterior storage box, mounted to a hitch, roof rack, or bed rail
- A built-in exterior compartment, if the camper already has one not currently in use
- A waterproof duffel or dry bag, strapped down rather than boxed, for a lower-cost option
- A small lockable trunk, for gear that needs both weather protection and basic security
The practical execution
- Reserve this space for gear that tolerates temperature swings and occasional dampness — not anything that needs to stay fully dry or climate-controlled
- Rotate contents at the start and end of each stretch of the trip, rather than letting the same bin sit untouched for the entire season
- Label or photograph the contents before closing it up, so a quick check doesn’t require fully unpacking the bin
Cost breakdown
- Weatherproof exterior storage box: $40–100
- Waterproof duffel or dry bag: $25–60
- Total: $25–100
15. The Cord and Charging Station (Electronics Organized for Shorter, Indoor-Heavy Days)
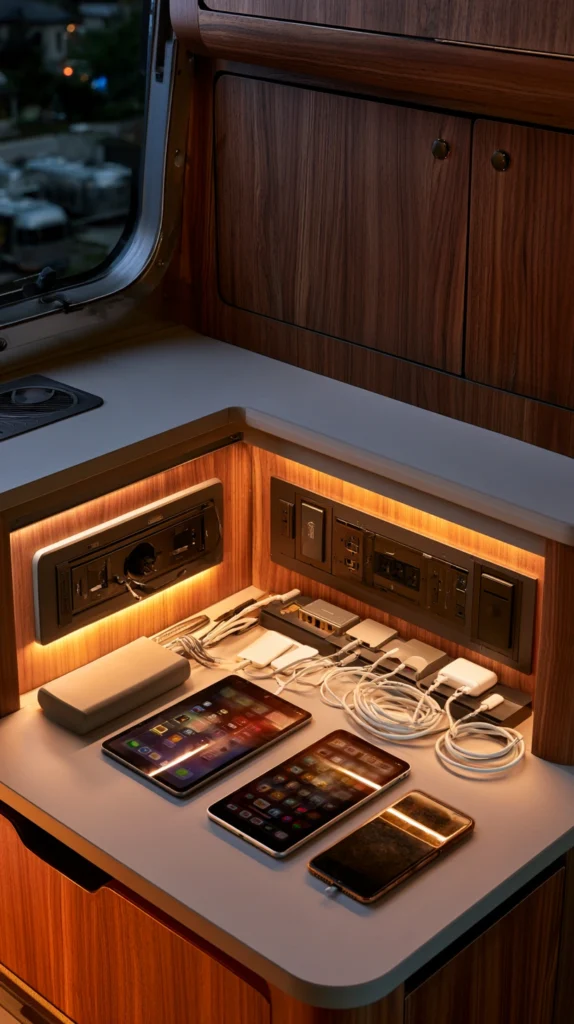
A dedicated small organizer for cords, chargers, and power banks, kept near the camper’s main outlet or USB port — the system built for the longer indoor evenings fall’s early sunset creates.
Why this becomes the most-used system on the whole list
- The indoor-time increase: shorter daylight means more hours spent inside the camper after dark, often with devices charging, in use, or both at once
- The tangle problem a small space makes worse: a single drawer of loose cords becomes unworkable fast in a space too small to spread everything out and sort through it
- The single-point-of-use logic: unlike a house with outlets in every room, a camper usually has one or two main charging points, which makes organizing right at that spot more valuable than spreading storage elsewhere
The options
- A small zippered cord organizer, with individual pockets or loops for each cable
- A multi-port charging station with a built-in tray, combining the charger itself with a small storage spot for the devices charging on it
- Velcro cable ties, a near-free option for keeping individual cords coiled and labeled
- A hanging pocket organizer, repurposed from Idea #1, assigned specifically to electronics near the main outlet
The practical execution
- Label each cord at the connector end, since most charging cables look identical once coiled
- Position the entire station within reach of the main seating area, since that’s where most evening device use actually happens
- Unplug and coil cords after each use rather than leaving them strung loosely across a counter or table
Cost breakdown
- Zippered cord organizer: $10–20
- Multi-port charging station: $20–40
- Velcro cable ties, a pack: $5–10
- Total: $15–60
The charging station by the door: the one organizing system that gets used every single evening, whether or not anything else on this list ever gets touched again.
The Fall Camper Organization Roadmap
The work, sequenced:
Phase One (the big structural storage):
- The vertical wall organizer (#1)
- The under-bed storage system (#2)
- The storage bench or ottoman (#11)
- The exterior seasonal rotation bin (#14)
Phase Two (the cabinet and drawer systems):
- The tension rod cabinet dividers (#5)
- The compression cube wardrobe (#3)
- The collapsible bin system (#8)
- The ceiling net storage (#9)
Phase Three (the zones):
- The boot and wet gear mudroom zone (#4)
- The compact drying rack (#12)
- The labeled food bin system (#10)
- The hanging pocket pantry (#7)
Phase Four (the finishing touches):
- The magnetic strip storage (#6)
- The command hook and rail wall (#13)
- The cord and charging station (#15)
Getting Started This Weekend
The immediate-impact organization refresh:
One afternoon, three changes:
- Install tension rods in the most chaotic cabinet (Idea #5)
- Hang an over-the-door pocket organizer for gear or pantry overflow (Ideas #1 and #7)
- Set up the cord and charging station near the main outlet (Idea #15)
Total cost: $35–75. Time: about an hour. The most-used parts of the camper will already feel less crowded by dinner.
The structural investment (the next big project):
The under-bed storage system (Idea #2) is the single biggest opportunity on this list. Once it’s organized with labeled, accessible bins, it can absorb most of fall’s bulkier gear — sleeping bags, extra blankets, off-season boots — freeing every other system on this list to handle only what’s actually needed day to day.
What organized fall camper storage provides that a summer setup can’t:
The capacity that grows without the camper growing:
- Wall and ceiling space doing work that floor space alone never could
- Compression and collapsible systems that expand and shrink with what’s actually needed
- An exterior bin absorbing gear the interior never has to make room for
The speed of finding things once daylight runs out by five:
- Labeled bins that don’t require pulling out three other boxes first
- A pocket organizer that puts gloves and headlamps exactly where a hand reaches for them in the dark
- A pantry system built to work by feel and label, not just by daylight
The dryness that keeps a small space from working against itself:
- A mudroom zone that stops mud and rain at the door instead of letting it spread
- A drying rack that gives wet gear somewhere to go besides a damp pile on the floor
- Airflow-conscious storage that keeps a sealed-up camper from turning into a mildew problem by November
A camper’s storage space never gets any bigger, no matter the season. What changes is how much that fixed space is asked to hold, and how fast someone needs to find what’s inside it once the sun goes down at five o’clock. The bins that are labeled in October are still labeled in December. The hook by the door that holds a wet jacket tonight is the same hook that’ll hold it again tomorrow, without anyone having to think about where it goes.