14 Backyard Privacy Ideas That Are Stylish and Practical
14 Backyard Privacy Ideas That Are Stylish and Practical
There is a specific quality that a private garden possesses that an overlooked one cannot achieve regardless of how well it is planted, furnished, or lit. It is the quality of genuine relaxation — the relaxation that is only available when the person in the garden is not being observed or does not feel that they might be.
An overlooked garden is a garden where the occupant is perpetually aware of being potentially visible, and that awareness produces a quality of self-consciousness that prevents the full ease that the garden is designed to provide.
Privacy in a backyard is not about secrecy or about hostility to the neighbours — it is about the specific domestic freedom of being genuinely at ease in your own outdoor space. To eat breakfast in a dressing gown without consideration. To have a conversation that does not carry to the adjacent garden.
To use the outdoor space at every hour and in every condition without the modifying awareness of being seen. These are the freedoms that privacy provides, and they are worth designing for with the same seriousness that every other quality of the garden receives.
Each idea below is a specific approach to one type of backyard privacy solution. Each includes what you will need, what it will cost, and a practical tip to make it work both practically and stylishly.
1. The Pleached Tree Screen
Budget: $400 – $2,000
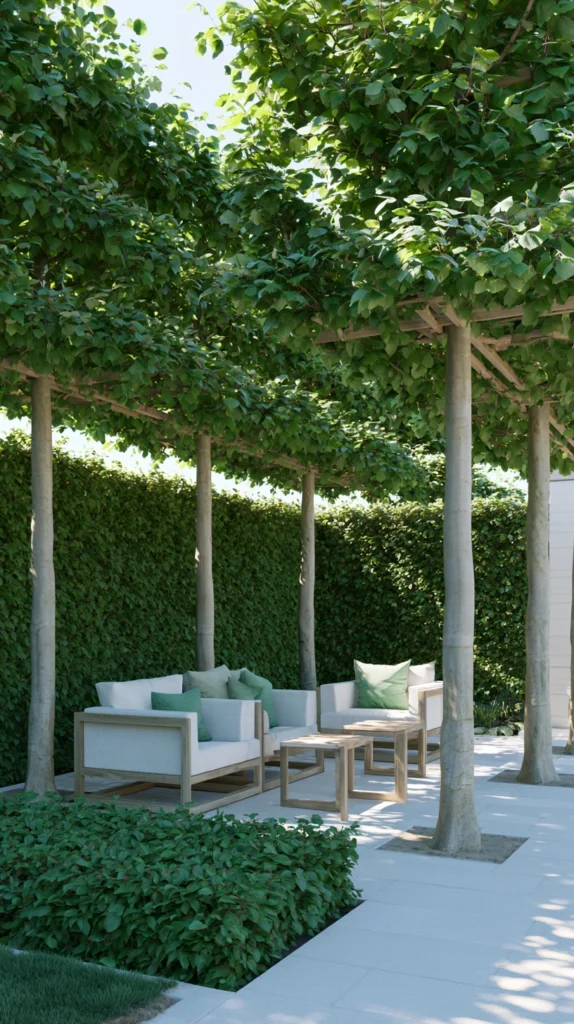
Pleached trees — trees whose branches have been trained horizontally on a framework to create a raised screen of foliage on clear trunks — create the most architecturally sophisticated and most specifically designed of all the backyard privacy solutions.
A row of pleached hornbeams or pleached limes provides the privacy of a hedge at height while leaving the ground level open, creating the specific quality of a garden that is screened from above — from neighbouring windows and elevated viewpoints — while remaining visually open at the level of the garden itself.
Pleached hornbeam trees on a 180-centimetre clear stem cost $80–$200 each. A row of five to create a privacy screen runs $400–$1,000 in plant material plus $100–$300 in supporting stakes and ties. Pleached trees require annual tying-in of new growth to the horizontal framework in late summer — twenty minutes per tree — and a single annual clipping to maintain the flat, formal canopy that gives the pleached screen its architectural character.
Style tip: Plant pleached trees at a spacing of 1.5–2 metres rather than the wider spacing that some suppliers recommend for faster establishment at lower density. Closer spacing achieves the continuous screen within the first season; wider spacing leaves visible gaps between the canopies for two to three seasons before the trees grow together. The closer planting costs more initially and produces the privacy solution years earlier.
2. The Bamboo Living Screen
Budget: $100 – $500
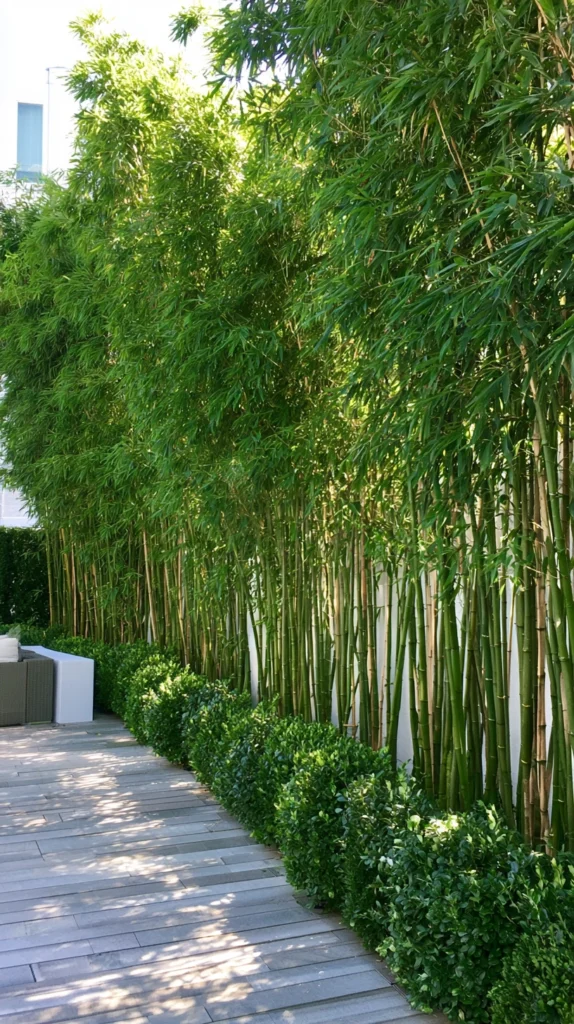
Clump-forming bamboo — planted in a long trough container or directly in a border along the boundary — creates a dense, year-round green screen of considerable height within a single growing season. Bamboo grows faster than any other screening plant in a warm summer, provides privacy from the first year, and produces the specific sound quality of moving bamboo — the rustling of the canes in the lightest breeze — that gives the garden an acoustic dimension as well as a visual one.
Fargesia bamboo in a 5-litre pot costs $20–$40 each. A row of five provides immediate density — $100–$200 in plants plus $40–$100 in a trough container if a contained system is used. Specify Fargesia species only for a contained or border planting — Phyllostachys and other running species spread aggressively beyond their original position and create the problem that the next twenty years must manage. The contained system using a root barrier is the most reliable installation for running varieties if they are specifically desired.
Style tip: Plant the bamboo trough against the fence rather than in front of it — the fence provides the wind shelter that young bamboo requires to establish quickly, and the combination of the fence and the growing bamboo creates the full privacy solution faster than bamboo planted in an exposed position in open ground.
3. The Elevated Deck with Privacy Rail
Budget: $500 – $3,000
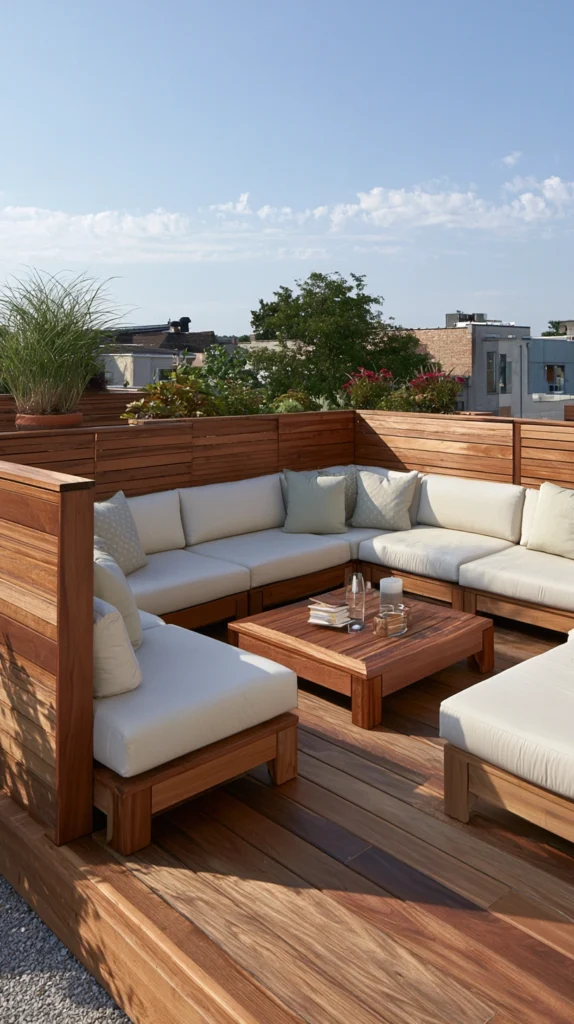
An elevated deck — raised 30–60 centimetres above the garden level — with a privacy rail of 150–180 centimetres in total height creates a seating platform with built-in screening at the most important privacy level: the seated eye level from which overlooking is most directly experienced. The deck rail at this height screens the seated occupant from the adjacent garden without requiring the full-height fence or wall that a ground-level solution needs and without blocking the sky or the view of the garden beyond.
A raised timber deck of 3 by 4 metres costs $600–$1,500 in materials and basic installation. A privacy rail of 150 centimetres in total height — deck surface plus rail — costs $200–$600 added to the deck perimeter. The rail can be in timber slats, in planted trough panels, or in trellis with climbing plants — the material determines the aesthetic of the privacy rail as much as the screen of the deck surround.
Style tip: Design the privacy rail to be higher on the side of the deck most exposed to overlooking and lower on the side facing the house or garden — a variable-height rail that addresses the specific sources of overlooking rather than treating all sides equally communicates a considered privacy response rather than a uniform fence at height.
4. The Pergola and Climbing Plant Combination
Budget: $300 – $2,000
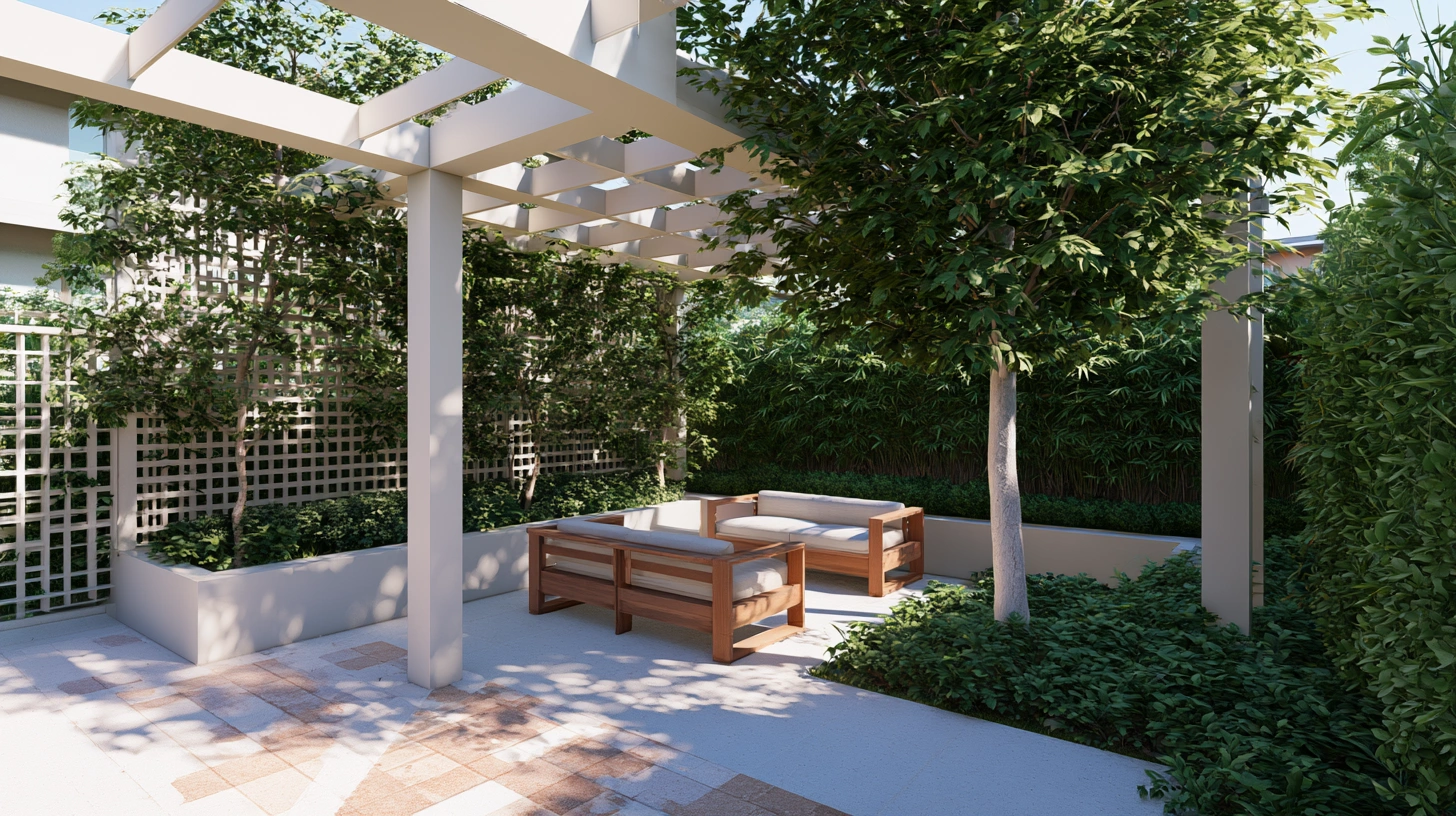
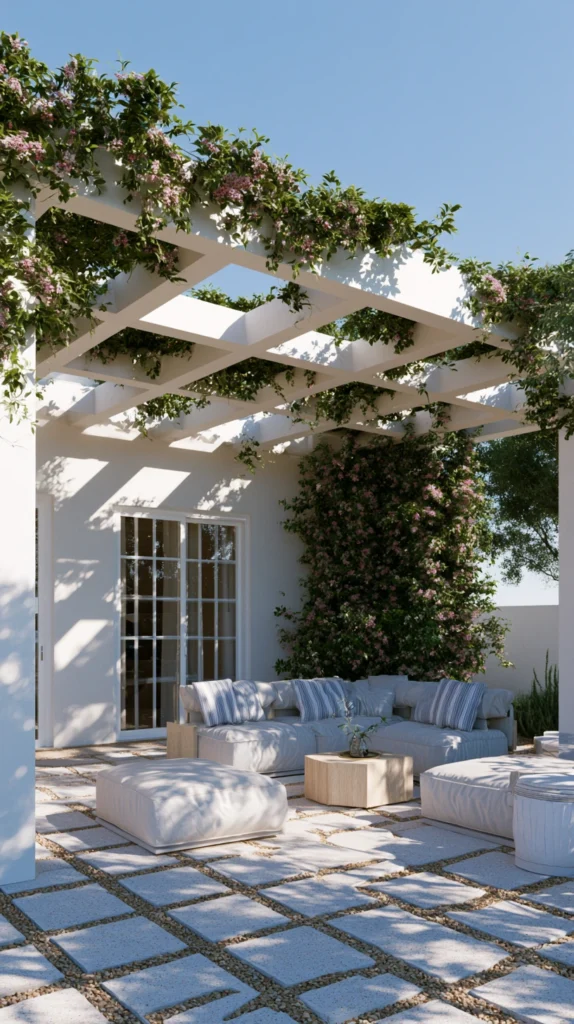
A pergola over the primary seating area — planted with a dense, fast-growing climber that creates overhead coverage within two to three seasons — provides the privacy from upper-floor windows and elevated viewpoints that a side fence or boundary hedge cannot address. Privacy from above is the overlooking problem that most urban gardens face and that most privacy solutions fail to address because they are installed at the boundary rather than over the seating position.
A timber pergola of 3 by 3 metres costs $200–$600. A wisteria — the most dense and most beautiful of the overhead coverage climbers — costs $20–$50 and reaches the top of the pergola in the second season. A golden hop or a climbing hydrangea provides faster initial coverage — $15–$40 each — in exchange for a less floriferous result. Plant a climber at each post in the first season to achieve the fullest coverage in the shortest time.
Style tip: Supplement the overhead climber coverage with fabric shade panels — stretched canvas, shade cloth, or a quality sail shade — between the pergola beams while the climber is establishing. The fabric provides immediate overhead privacy and is removed once the climber is sufficiently established to take over the coverage role. The fabric cost of $30–$80 provides years of earlier privacy use of the pergola while the permanent plant solution matures.
5. The Trellis and Climber Extension
Budget: $60 – $300
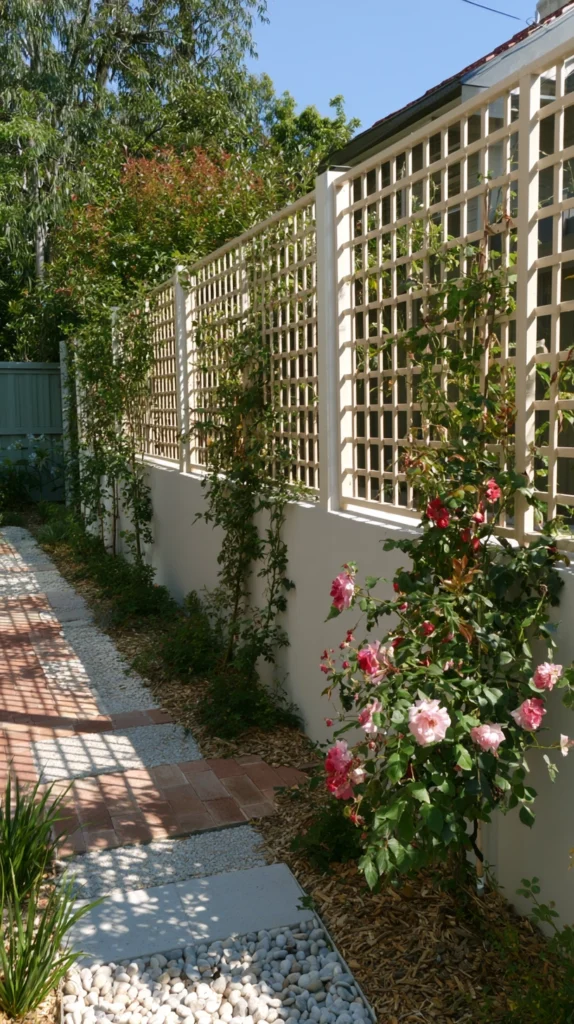
A trellis panel fixed to the top of an existing fence — extending the boundary screening height from the standard 180 centimetres to 240–270 centimetres — with a fast-growing climbing plant trained across it, creates one of the most cost-effective and most immediately beautiful of all the backyard privacy upgrades. The trellis extension adds the additional height required to screen seated and standing occupants from adjacent overlooking without the cost or the planning implications of a solid fence at the same total height.
Trellis panels of 30 by 180 centimetres cost $8–$20 each. A 6-metre fence run requires four panels on top — $32–$80 in trellis. A fast-growing annual climber — sweet peas, morning glory, black-eyed Susan vine — provides coverage in the first season at $3–$8 per packet of seed. A perennial climber — clematis, climbing rose — provides permanent coverage from the second season at $10–$35 per plant.
Style tip: Fix the trellis extension to the back face of the fence posts rather than to the top of the fence boards. Trellis fixed to the post faces extends the structural timber of the fence rather than relying on the fence board top edge for support — the post-fixed trellis can handle the wind loading and the weight of a mature climber without flexing at the junction between the fence and the trellis.
6. The Planted Privacy Hedge
Budget: $80 – $400
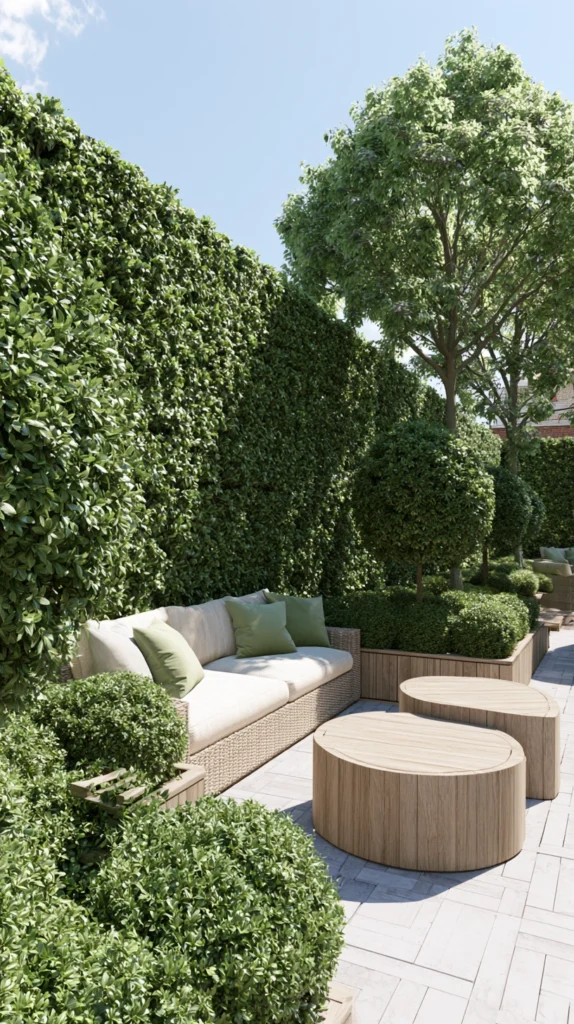
A garden hedge — hornbeam, yew, beech, or Thuja in a formal garden; hawthorn, blackthorn, or field maple in a more naturalistic one — provides the most permanent, most wildlife-friendly, and most cost-effectively scalable of all the backyard privacy boundary solutions. A hedge at 180–240 centimetres height is a genuinely effective privacy screen, a significant acoustic barrier, a habitat for garden birds and beneficial insects, and a beautiful garden feature in its own right.
Bare root hedge plants of hornbeam or beech cost $1.50–$4 each when planted in the dormant season between November and March. A run of 6 metres at the standard planting density of three plants per metre requires eighteen plants — $27–$72 in plant material. Potted plants available year-round cost $3–$8 each for the same species. The hedge reaches useful privacy height in two to three seasons — slower than a trellis but considerably more beautiful at maturity.
Style tip: Plant the hedge at least 60 centimetres inside the boundary rather than directly on the boundary line. A hedge planted on the boundary line is shared maintenance with the neighbour and a potential source of ongoing dispute; one planted 60 centimetres inside the line is entirely within the garden’s management, can be allowed to grow to any height without encroachment, and creates a narrow border in front of it that can be planted with bulbs or ground cover.
7. The Privacy Planting Island
Budget: $80 – $400
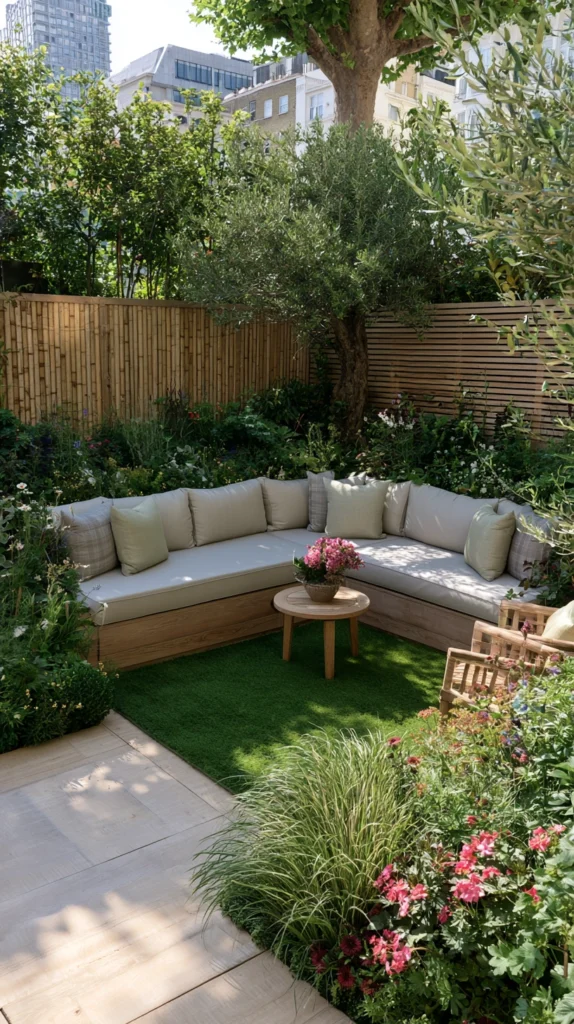
A freestanding planted island — a large container or a raised planting bed positioned within the garden rather than at its boundary — creates a privacy screen at the specific position within the garden where the screen is most needed rather than at the perimeter. A planted island beside the primary seating area screens that position from the specific overlooking angle that a boundary planting installed along the full fence line may not address.
A large trough planter of 120 by 40 centimetres costs $40–$100. Tall screening plants for the trough — phormium, Miscanthus, tall grasses — cost $15–$30 each. Three plants per trough create immediate density — $45–$90 in plants plus the trough. A pair of troughs flanking the seating area costs $170–$380 total and provides the specific privacy that a boundary planting cannot target with the same precision.
Style tip: Choose plants for the privacy island that are interesting at every height as they grow rather than only at full maturity. A phormium provides architectural privacy from the first season; Miscanthus provides transparent privacy in summer through its dense stem mass and bare structural privacy in winter. The combination of an evergreen architectural plant and a deciduous screening grass in the same trough provides year-round screening of different qualities in different seasons.
8. The Outdoor Curtain Screen
Budget: $60 – $300
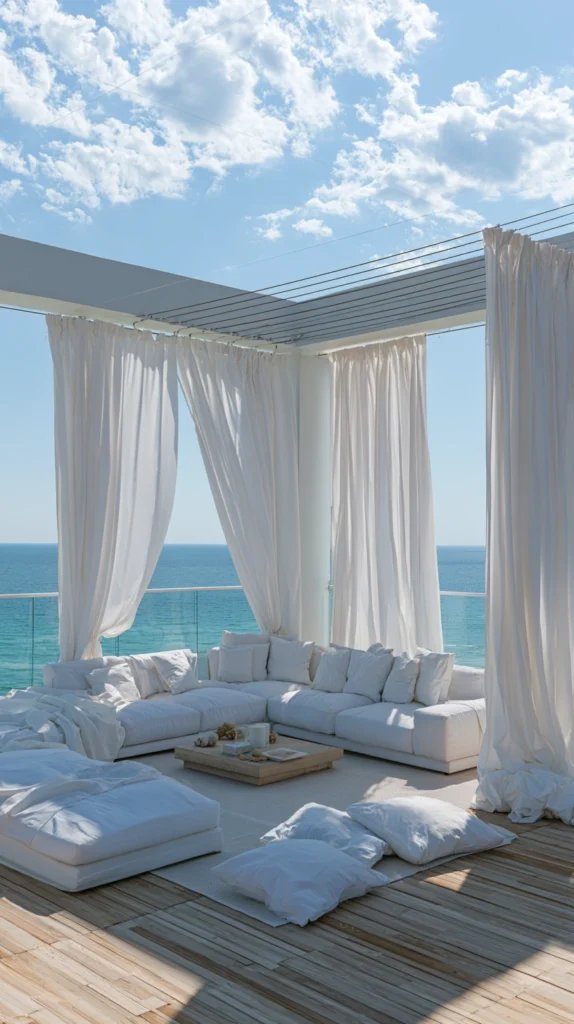
Weather-resistant outdoor curtains hung on a tension wire or a simple rod — between pergola posts, between fence posts, or from an overhead structure — provide on-demand privacy that can be opened when privacy is not required and closed when it is. The outdoor curtain is the privacy solution for the garden space that is sometimes used privately and sometimes used openly, and the flexible quality of the curtain — the ability to manage the degree of screening rather than committing to full enclosure — is the specific advantage that no planted or structural solution provides.
Outdoor curtain panels in a solution-dyed acrylic fabric cost $30–$80 each. A tension wire between two fence posts costs $10–$25 in wire and fixings. Curtain clips for attaching the panels to the wire run $5–$10 for a pack. Choose a fabric colour that relates to the fence or the garden palette rather than a neutral or contrasting tone — a curtain that reads as part of the garden provides privacy without the enclosure-quality of a colour that reads as introduced from outside the garden’s palette.
Style tip: Hem the outdoor curtain panels so they are 10–15 centimetres longer than the distance from the wire to the ground and allow the fabric to pool at the floor. The pooled curtain reads as a generous, deliberate textile element of the outdoor space; the exactly hemmed curtain reads as a fabric panel installed at the functional minimum. The extra fabric communicates the quality of an outdoor room rather than an outdoor screen.
9. The Gabion Wall Feature
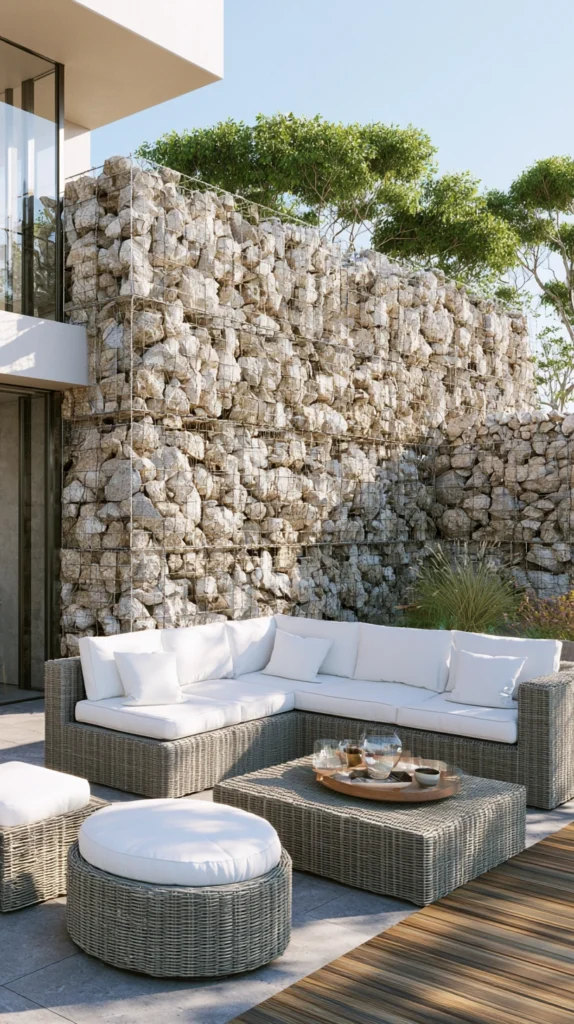
Budget: $200 – $1,500
A gabion wall — a steel mesh cage filled with stone, brick, or recycled glass — creates a privacy screen of extraordinary material honesty and architectural solidity at a cost significantly below a built masonry wall of equivalent height. The gabion communicates a design sensibility that appreciates industrial material used beautifully, and in the right garden context it produces a privacy feature of genuine design quality rather than a screening solution with no aesthetic dimension.
A gabion cage of 100 by 50 by 50 centimetres costs $30–$60. A privacy screen of 180 centimetres in height and 3 metres in length requires six cages stacked two high — $180–$360 in cages plus $100–$250 in stone fill. Choose a fill stone that relates to the garden’s existing material palette — a garden with natural sandstone paving suits a gabion filled with sandstone; one with slate accents suits a slate-filled gabion. The material relationship between the gabion fill and the garden’s existing stone communicates a designed material palette rather than an installed product.
Style tip: Stack the gabion cages with a slight taper — slightly narrower at the top than at the base — rather than in a perfectly vertical stack. The tapered stack is more structurally stable, reads as more intentional than a plumb vertical face, and relates to the natural form of dry stone walling that the gabion is referencing. A slight taper of 5 centimetres across the full height is sufficient to produce both the structural and the visual benefit.
10. The Living Wall Privacy Screen
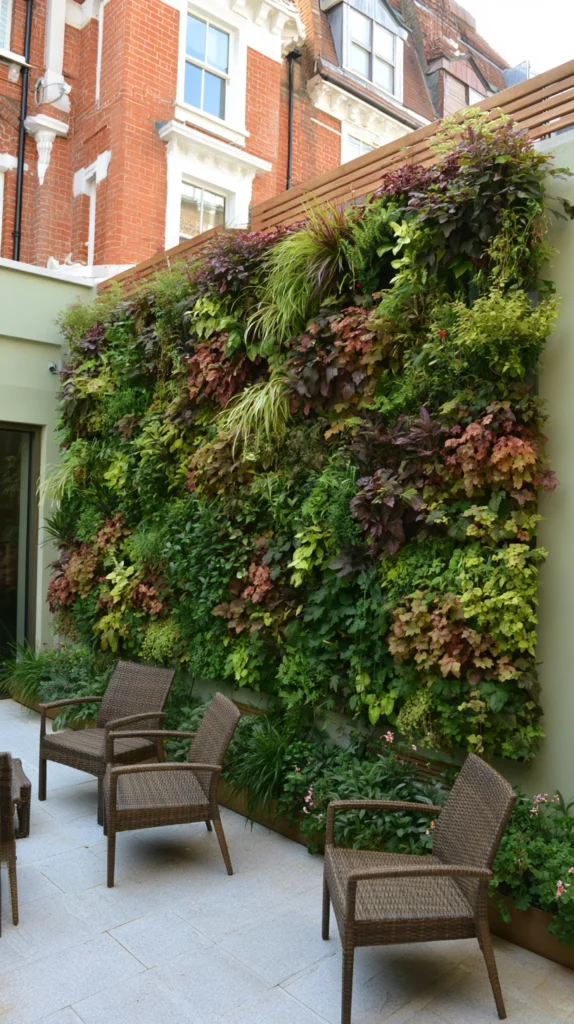
Budget: $150 – $800
A vertical living wall — a planted panel fixed to the fence or a freestanding frame, with pocket planting of ferns, sedums, grasses, and trailing plants — creates a privacy screen of lush, textural planting at a scale that horizontal borders cannot achieve in the same footprint. The living wall provides the visual privacy of a solid fence while communicating the ecological and aesthetic quality of a planted surface, and in the urban backyard where the fence is the most consistently present surface, a living wall transforms the boundary from a barrier into a garden feature.
A pocket felt living wall panel of 24 pockets costs $35–$70. A modular living wall system costs $100–$300 for a standard 1.5-square-metre panel. Plants for the living wall — shade-tolerant ferns, sedums, ajuga, small grasses — cost $3–$8 each. A drip irrigation line to the living wall costs $20–$60 and is the infrastructure investment that makes the living wall practically sustainable rather than perpetually requiring manual watering.
Style tip: Plant the living wall with a mix of species rather than a single variety — the textural variation between different plant forms (the architectural fern frond, the rosette sedum, the trailing strand) is what gives the living wall its quality of genuine planting rather than a planted surface. A single-species living wall reads as a maintenance challenge; a mixed-species one reads as a garden feature.
11. The Willow Screen
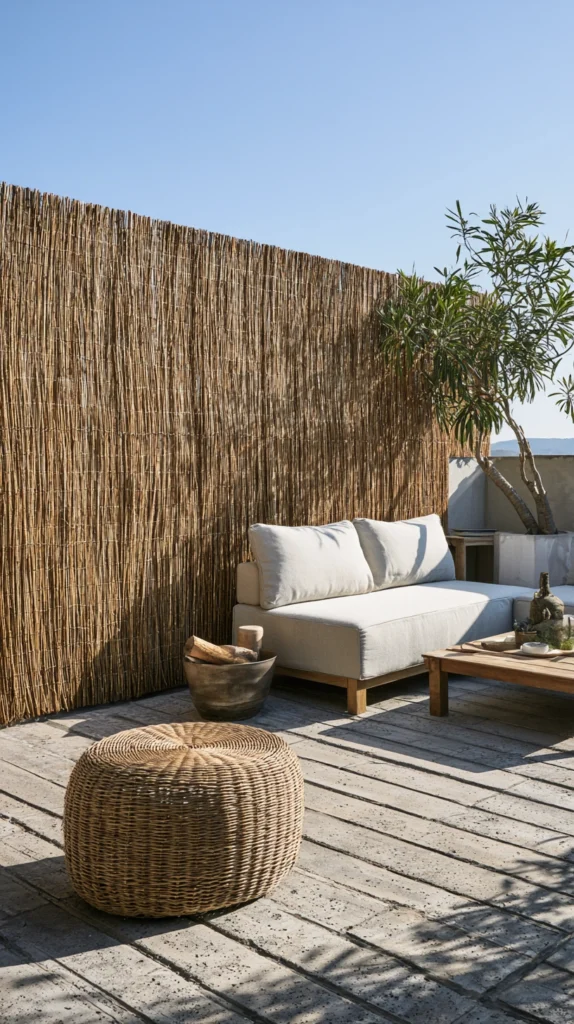
Budget: $30 – $150
A woven willow screen — either purchased as a ready-made panel or constructed from fresh-cut willow rods woven between timber stakes — provides the most specifically natural and most warmly organic of all the instant privacy screening options. Willow weave has a quality of handmade, living material that bamboo panel and timber trellis lack, and a well-installed willow screen has a beauty in its texture and its warm colour that persists even as the living willow dries to its characteristic silver-brown.
Ready-made willow hurdles of 180 by 180 centimetres cost $20–$50 each. A privacy screen of 6 metres requires three to four hurdles — $60–$200 total. Fresh willow rods for weaving a DIY screen cost $20–$40 per bundle. Fix the hurdles to a timber post and rail framework rather than directly to the fence posts — hurdles fixed to a purpose-built frame are more stable, more adjustable, and more replaceable than ones screwed directly to the fence structure.
Style tip: Replace willow hurdles every three to five years rather than attempting to maintain them indefinitely. Willow weave deteriorates gracefully — going from warm golden-brown to silver-grey before eventually losing structural integrity — but once the individual strands begin to separate and bow outward from the panel, the maintenance effort exceeds the aesthetic benefit. The replacement cycle is part of the material relationship with willow as a privacy material.
12. The Stacked Log Privacy Wall
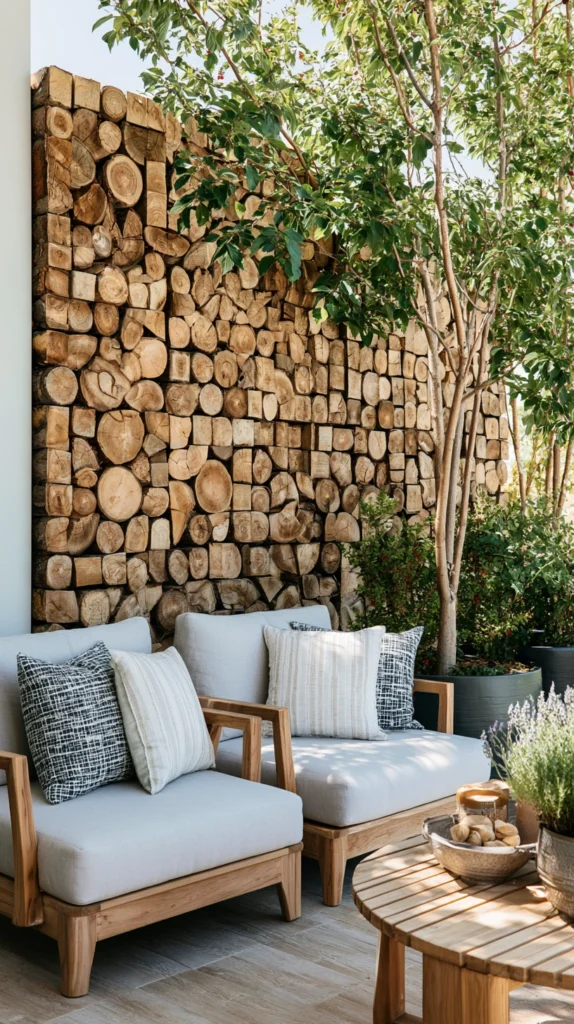
Budget: $60 – $300
A stack of logs — rounds cut to 30–40 centimetres in depth, stacked in a grid pattern to a height of 150–180 centimetres — creates a privacy wall of extraordinary material character that also functions as insect habitat, as wood storage, and as an architectural element of genuine horticultural significance. The stacked log wall is simultaneously a functional structure and an ecological asset, and its quality improves as the wood weathers and as the moss, lichen, and invertebrate life that colonises it develops over subsequent seasons.
Log rounds of 30–40 centimetres in diameter cost $5–$15 per wheelbarrow load from a timber yard or a tree surgeon. A privacy wall of 3 metres in length and 150 centimetres in height requires approximately 0.5 cubic metres of log rounds — $30–$80 in wood. A steel channel or a timber framework behind the stack provides stability for walls above 120 centimetres — $20–$50 in frame materials. The log wall should be positioned on a free-draining base — gravel or compacted hardcore rather than soil — to prevent the base logs from deteriorating through ground contact.
Style tip: Mix log sizes — large diameter rounds alongside smaller ones — in the stack rather than using only consistent sizes. The mixed diameter stack fills more completely, produces fewer gaps at the face of the wall, and reads as organically assembled rather than uniformly built. The gaps between logs in a mixed-size stack are smaller and more irregular than those in a uniform-size stack, and the irregular gaps suit the ecological character of the log wall better than the grid pattern that uniform sizing produces.
13. The Opaque Garden Room
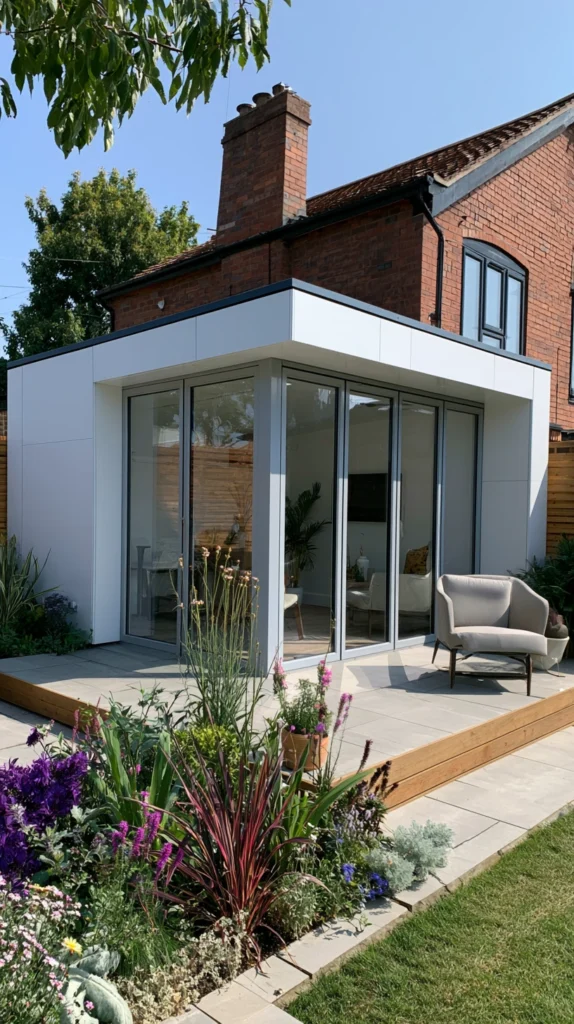
Budget: $500 – $4,000
A garden room or a garden cabin — positioned at the boundary most exposed to overlooking, with its blank rear wall forming the privacy screen and its interior used as a studio, a home office, or a garden retreat — provides privacy as a function of an element that has its own independent use and value. The garden room that screens the garden from above or from the side is earning its position in the garden twice: once as usable additional living space and once as the privacy infrastructure that the garden required independently of any other function.
A basic timber garden room of 3 by 2 metres costs $1,500–$4,000 including installation. A DIY shed conversion costs $300–$800 in materials. The garden room should be positioned so its blank wall faces the primary overlooking angle — the upper window or the elevated boundary from which the garden is most directly visible — with its door and window oriented toward the primary garden view. The blank wall at the overlooking boundary is both the practical privacy screen and the functional rear of the structure.
Style tip: Treat the blank rear wall of the garden room as a designed garden feature rather than as a utilitarian surface. A climbing plant on wires, a painted mural, or a living wall installation on the back face of the garden room transforms the privacy screen from the back of a building into a designed garden wall. The visual quality of this surface is experienced from the primary seating area and deserves the attention of a designed surface rather than the neglect of a functional one.
14. The Combination Privacy Strategy
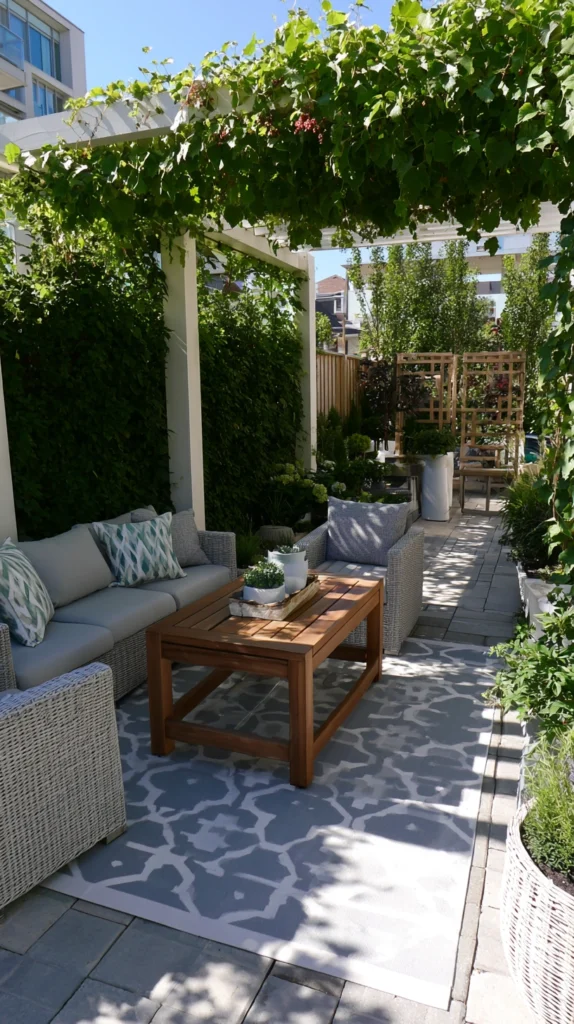
Budget: $200 – $1,000
The most effective backyard privacy strategy is almost always a combination of solutions rather than a single approach — a hedge at the boundary for the ground-level screen, a trellis extension above it for the upper-level screen, a pergola over the seating area for the overhead privacy, and a planted island to address the specific angle that the boundary solutions miss. The combination approach acknowledges that overlooking comes from multiple directions at multiple heights, and that a single solution positioned at the boundary addresses only one of these directions at one of these heights.
The combination strategy requires beginning with a privacy audit — standing at the primary outdoor seating positions and identifying every position from which the garden can be overlooked. The audit reveals the specific angles and heights of the overlooking and allows the combination of solutions to be designed as a response to the specific privacy requirements of the specific garden rather than as a generic application of fencing to the perimeter.
Style tip: Implement the combination strategy in order of immediate impact rather than in order of the audit’s physical positions — address the overlooking that most directly affects the primary seating area first, regardless of whether it comes from the boundary, from above, or from a specific angle within the garden. The privacy that improves the experience of the most-used outdoor position first is the privacy investment that produces the most immediate and most consistent return on the effort of its installation.
The backyard privacy that works is not the highest fence or the densest planting or the most complete enclosure. It is the privacy that addresses the specific sources of overlooking in the specific garden with solutions that are appropriate to the garden’s scale, its style, and the quality of the outdoor space that it is protecting. A privacy solution that suits the garden it is installed in is a privacy solution that the garden absorbs as a designed element; one that does not suit the garden is a screen that was installed against an oversight.
Design the privacy as part of the garden rather than as a response to the absence of it — and the garden that results will be both more private and more beautiful than the garden that was designed without it and screened afterward.